In this article, we talk a bit about how Kondado handles data transformation and why we believe our model creation functionality simplifies and streamlines your information flow.
From the moment you create your pipeline in Kondado and wish to transform the data in your destination, you can create a model. By doing so, you will generate a new table in your data destination that will be updated whenever its trigger (pipeline or another model) is executed. This ensures that your data remains consistently transformed and up-to-date.
To create a model in Kondado, follow the steps below:
1) Access the home page of your profile on the Kondado platform.
2) Click on "CREATE +" and then select "MODEL":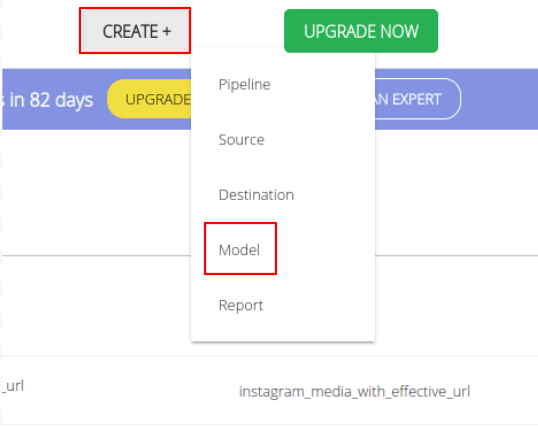
3) Name your model and then click “CREATE”: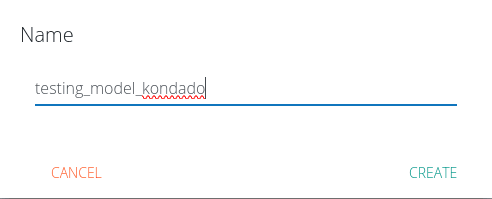
4) At this point, you will be directed to the model creation and editing page. On the left side of the screen, you will find all the model configurations: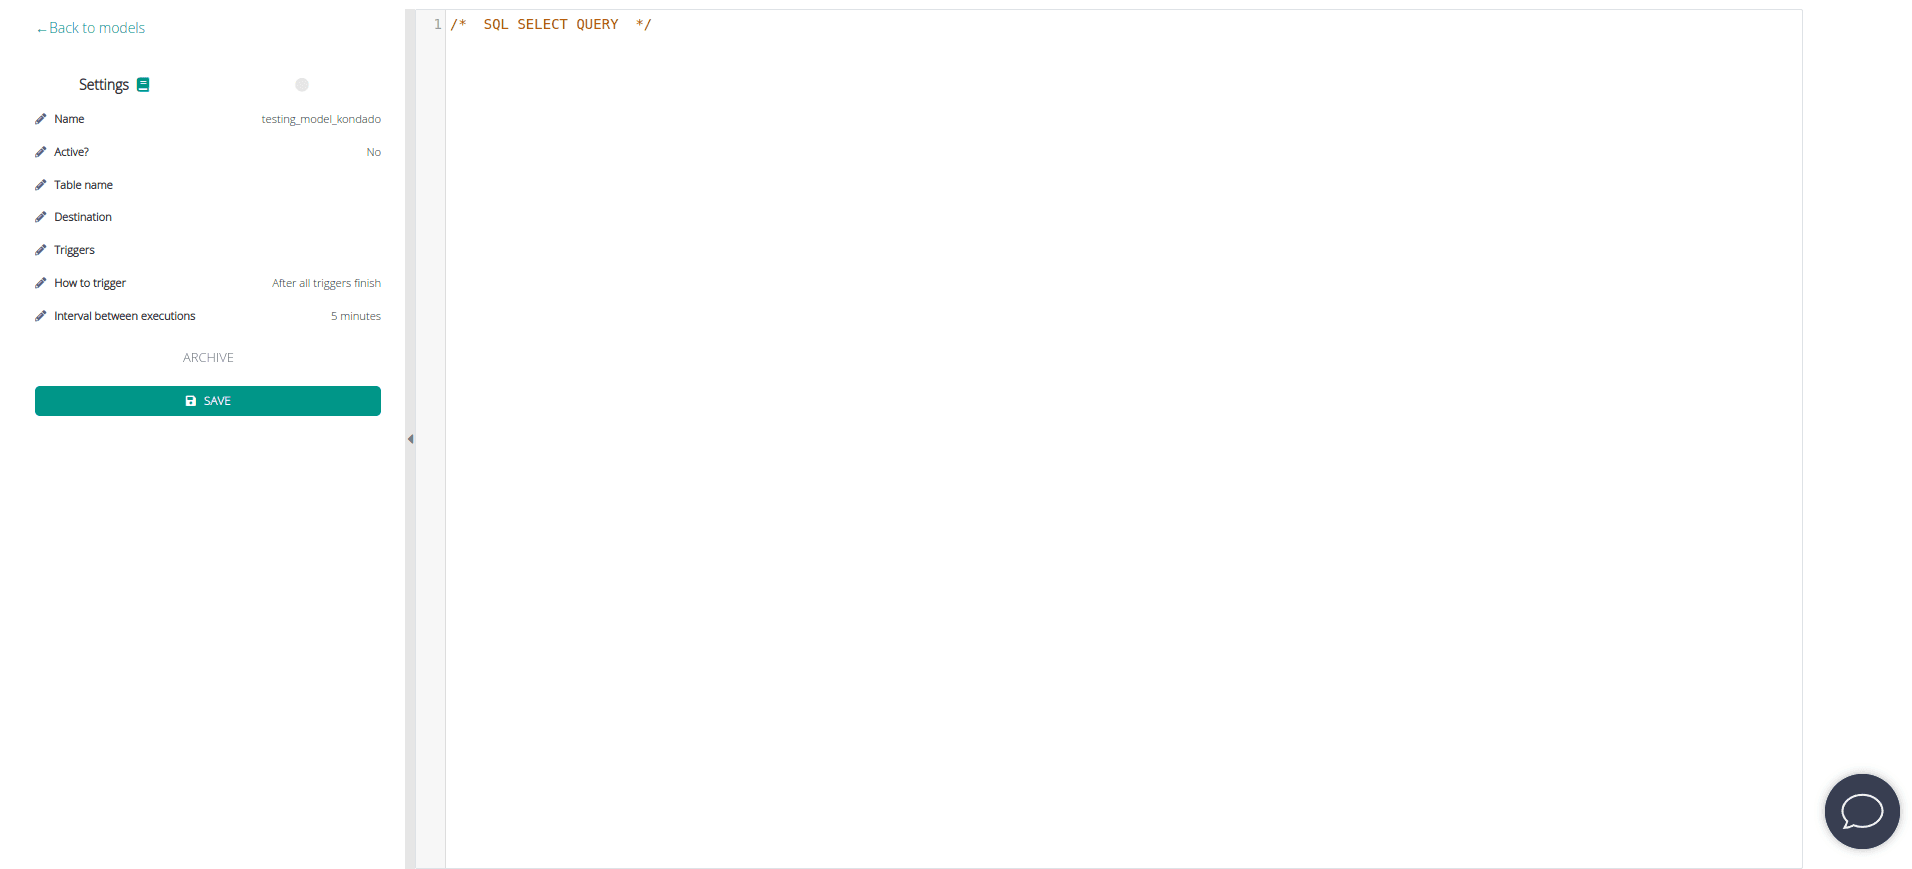
Name: The name of the model you defined in the previous step.
Active?: Indicates whether your model is active. After completing all the model configurations, it is important to ensure that this field is set to "yes" so that your model is applied whenever a trigger is executed. This field should be marked at the end of all edits.
Table Name: Here, you define the name that the table generated by the model will have in your data destination. It is important to follow the same table naming convention as your destination. Spaces and accents are not allowed.
Destination: By clicking on this setting, you will see a list of all your registered data destinations in Kondado. You must choose the destination where you want to create the new table (it is important that the tables queried in the model exist in the selected data destination).
Triggers: In this part of the configuration, you must choose which pipelines or models will trigger the execution of your new model. Once these triggers are executed, your model will automatically be updated. You can have up to 10 (ten) triggers for each model.
Trigger Mode: Here, you can decide whether the model will operate only after all the triggers defined in the previous step have been executed, or if the execution of just one trigger will be sufficient to start the model's execution.
Execution Interval: In this section, you define the minimum time interval between model executions. For example, if two triggers are configured to run every 5 minutes, but you want the model to be activated only every 30 minutes, simply set this interval. This way, the model will only be triggered after the defined period has passed.
5) After defining all the model configurations, insert your query into the editor. It is not necessary to create commands like "DROP TABLE" or "CREATE TABLE." Only the "SELECT" command should be used: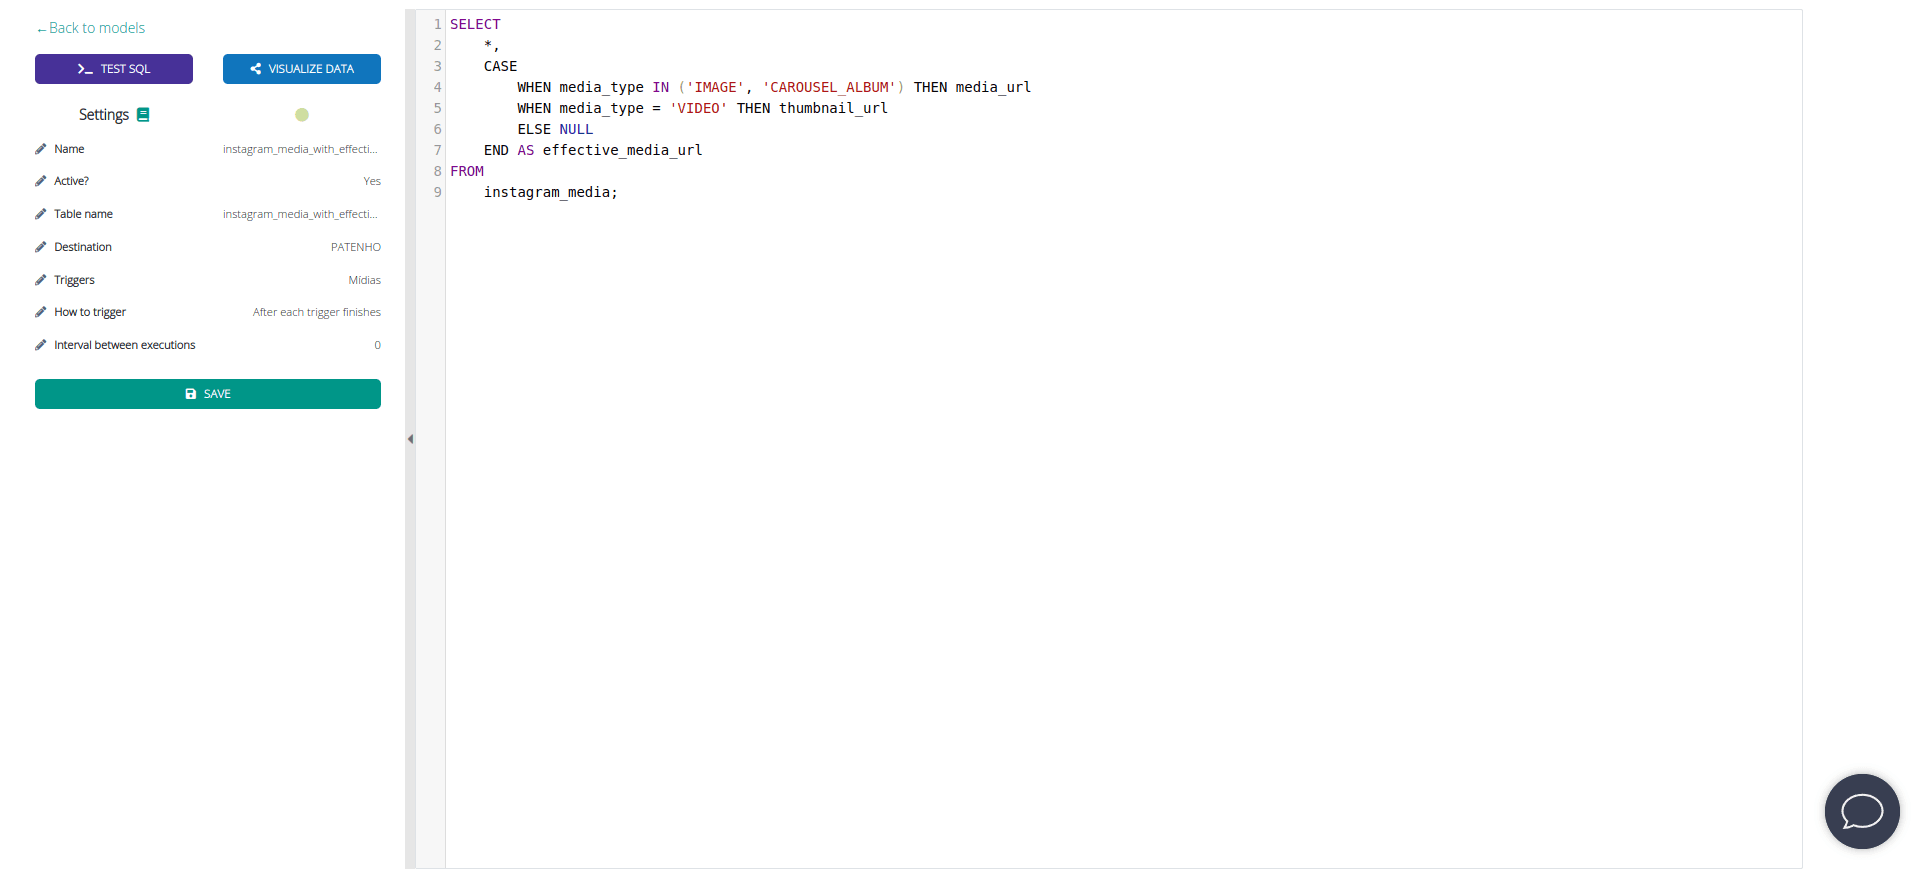
6) Click on "SAVE" at the bottom of the editor: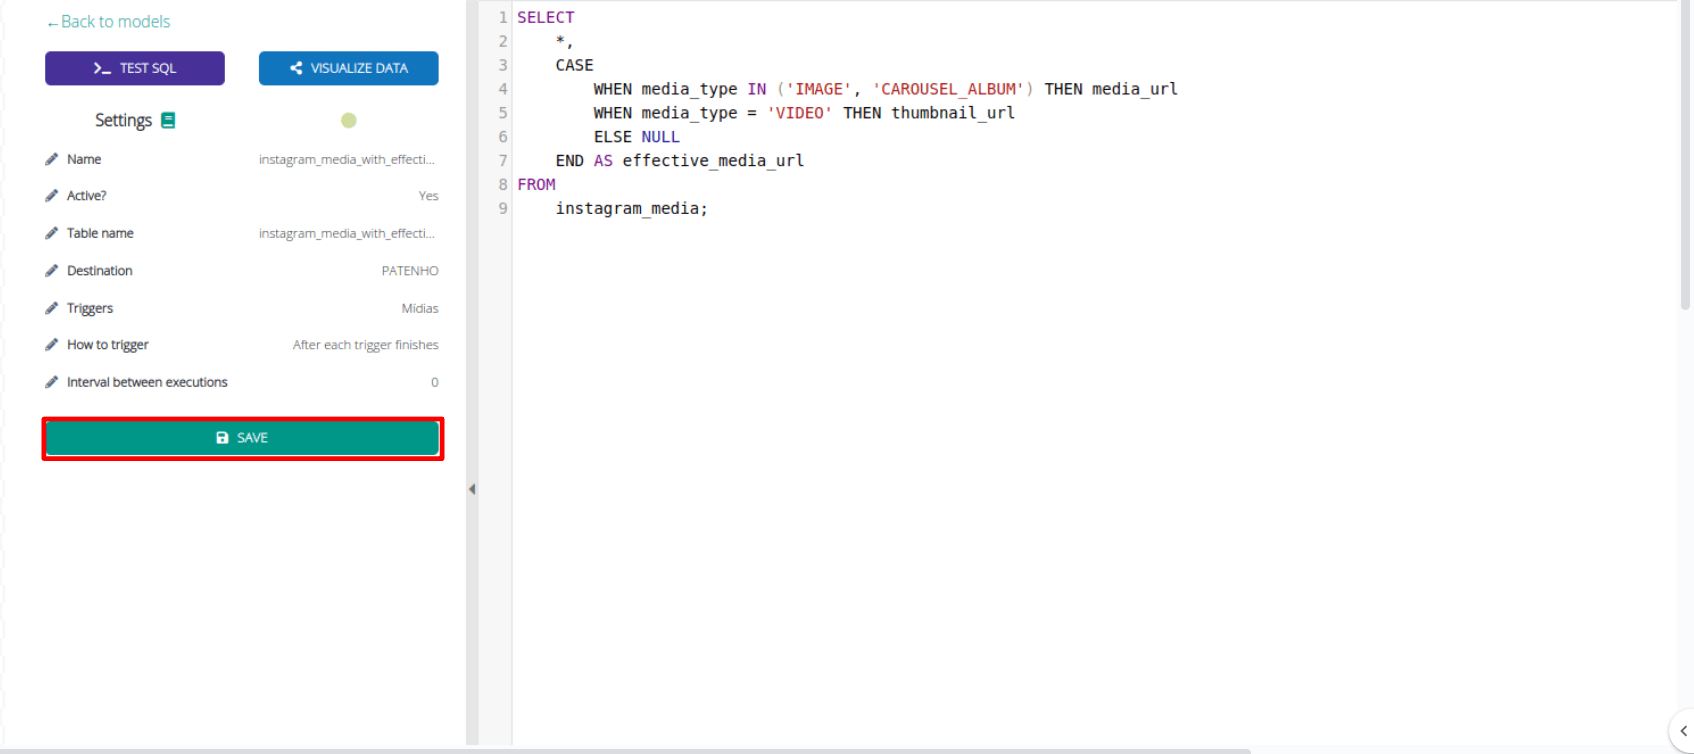
7) Finally, change the "Active?" setting to “Yes”: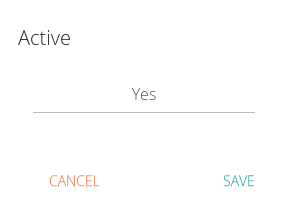
8) Once the model is correctly triggered, you can execute it. To do this, click on “EXECUTE MODEL”: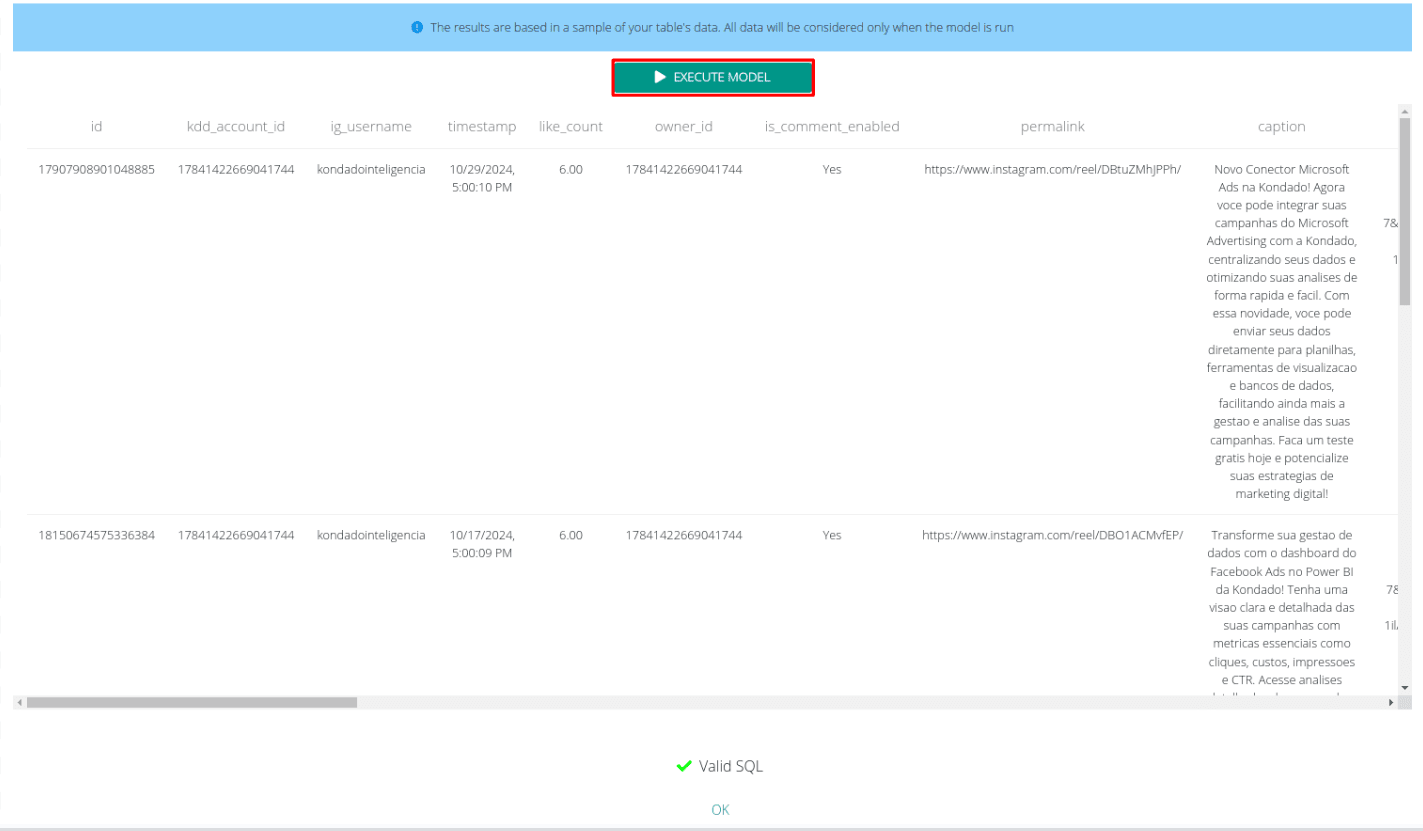
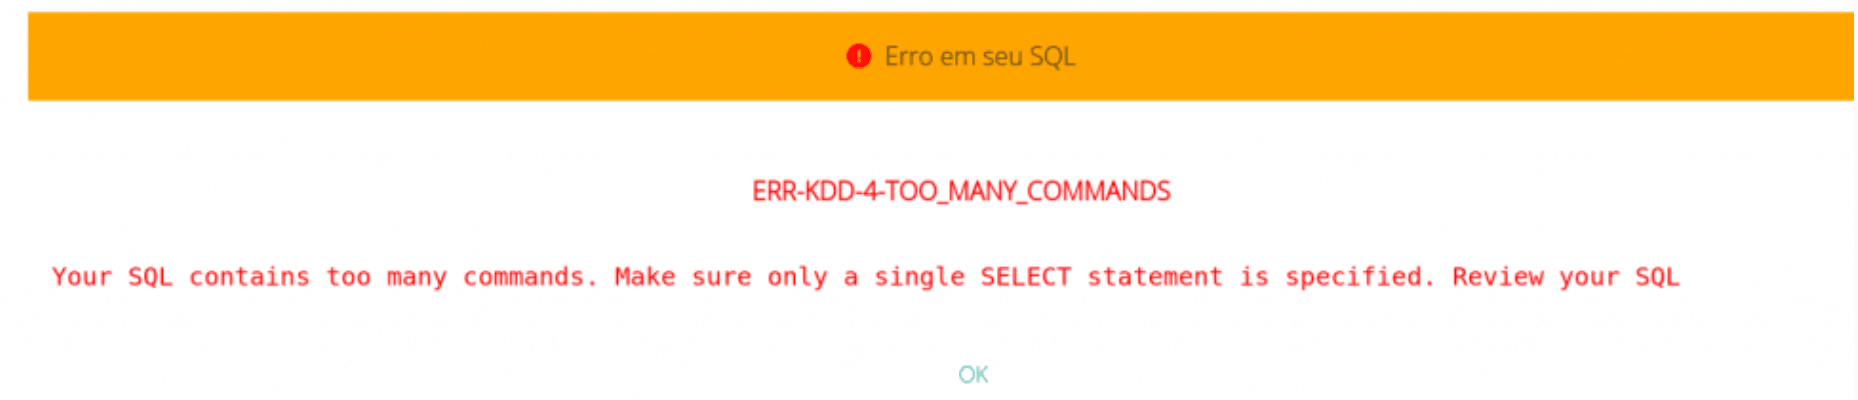
9) Any error messages, if displayed, will specify the issue found within the SQL body proposed by the model. It is important to note that models only accept the “SELECT” command. The tables and their information values will always reside within the data destination:
Now that your model is active, wait for the first execution of your triggers for the table to be created in your data destination. The model will be automatically updated every time the triggers are executed within the defined interval.
To deactivate your model, simply edit the "Active?" setting to "No." This way, the model will no longer be updated.
When you archive your model, it will no longer appear in most areas of the platform and will only be accessible via a direct URL. This action cannot be undone, and your model can no longer be modified once archived.
To archive your model, deactivate it and then click the "ARCHIVE" button located at the end of the configuration list: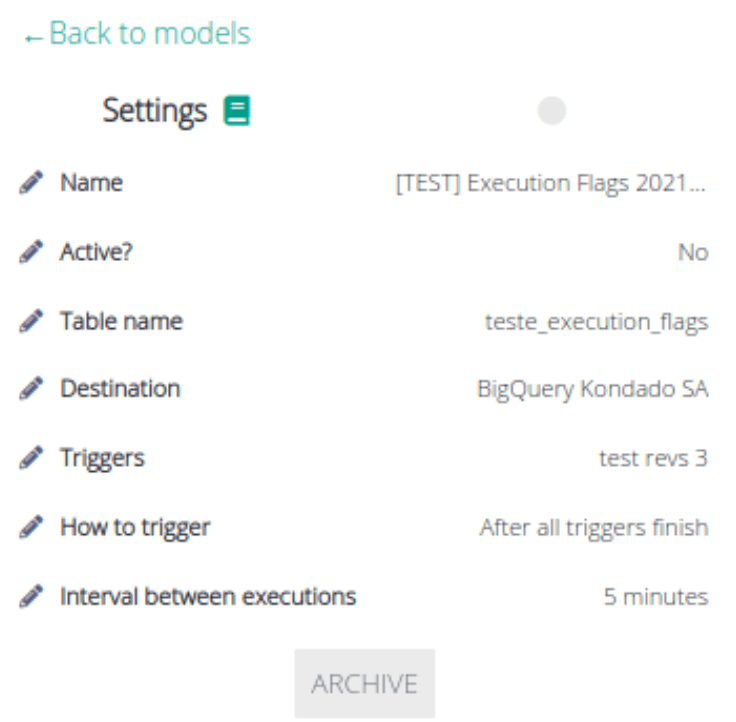
Create a Data Model in Kondado
Build a SQL-based model in Kondado to automatically transform and update tables in your data destination whenever triggers execute.
Access the model creation page
Log in to the Kondado platform, click "CREATE +", and select "MODEL". Name your model and click "CREATE" to enter the model editor.
Configure model settings
On the left panel, set your model's Table Name (no spaces or accents), choose the Destination where the table will be created, and define up to 10 Triggers (pipelines or other models) that will activate execution. Also select the Trigger Mode and Execution Interval.
Write your SELECT query
In the editor, write only a SELECT query — do not include DROP TABLE or CREATE TABLE commands. The queried tables must already exist in your selected data destination.
Save and activate the model
Click "SAVE" at the bottom of the editor, then change the "Active?" setting to "Yes". This ensures your model runs automatically when triggers execute within the defined interval.
Execute and monitor your model
Click "EXECUTE MODEL" to run it manually. Check for any SQL error messages in the editor if issues arise. Once active, your model will keep your transformed data updated automatically.
Deactivate or archive when needed
To stop updates, set "Active?" to "No". To permanently remove the model from most platform views, deactivate it first and then click "ARCHIVE" — note this action cannot be undone.