Welcome to Kondado! On this documentation page, you can learn more about the Kondado platform, find tutorials, and answer all your questions to better enjoy your new data integration platform.
Summary
- What is Kondado and what does Kondado do?
- What doesn't Kondado do?
- How do I start using Kondado?
- How does the free trial period work?
- What is a destination?
- What is a source?
- What is a pipeline?
- What is a model?
- How does the historical data load work?
- Types of pipelines according to the method of data replication
- Savepoint and update window
- History table (deltas)
- Editing pipelines
- How to add and manage users of your account
- How to subscribe to Kondado
Kondado is a cloud-based data platform that facilitates connections with dashboards, spreadsheets, data warehouses and data lakes, helping to organize and optimize data flow.
- Kondado does not integrate two systems (e.g., transferring data from Pipedrive to your telephony tool);
- Kondado is not a data visualization tool.
To start using Kondado, you first need to have an account. To create your free 14-day trial account, click here.
After that, create your source and follow the step-by-step instructions on our platform to start using our services!
Kondado's free trial offers 14 days of free access after creating an account on the platform. During this period, users can explore various features and perform pilelines at no cost. The main limitations of the free trial include:
Record Limit: You can include up to 10,000,000 records during the free trial. Once this limit is reached, the platform will prevent new records from being added until the user upgrades to a paid plan.
Pipeline Limit: The user can perform up to 30 pipelines. When this limit is reached, the platform will prompt an upgrade to allow new pipelines.
At the end of the 14 days, the user will be automatically directed to choose a suitable plan if they wish to continue using the platform's features.
The destination is a location that stores the desired information. Through it, you connect your data to visualization tools and spreadsheets. The destinations where Kondado sends your data include:
- Dashboards (https://kondado.com.br/wiki/a/via-kondado);
- Spreadsheets;
- Data warehouses, data lakes and databases.
Sources are the tools from which you want to extract information to send it to your chosen destination. They are responsible for enabling the flow of data.
The pipeline is responsible for guiding data from the data source to your destination. When creating a pipeline through Kondado, you must specify which object from the source you want to integrate into your destination. Therefore, each pipeline consists of a destination combined with its source and the object of that source (1 destination + 1 source + 1 source object). Once the pipeline is created, it will automatically execute at the frequency defined during creation. At any time, you can modify this frequency, as well as activate, deactivate, and perform two types of edits: simple and advanced. For the limits of your plan, only active pipelines are counted.
A model is a method for querying information where data from different tables is cross-referenced for various purposes. It is created with basic SQL knowledge, triggered by pipelines (or other models), and will always transform the new data that arrives at its respective destination.
The first 5 (five) days of every new pipeline created on the Kondado platform are free, allowing the historical data load from the source without counting against the limits of the chosen plan. The first load of any pipeline typically takes longer than subsequent executions and depends on the amount of historical records in the data source. Additionally, each source has its own data integration speed, as do the destinations. Therefore, it is not possible to estimate how long it will take for the rows to be loaded into the destination, as it may take minutes, hours, or even days.
Currently, there are 3 (three) different types of pipelines on the Kondado platform: full, incremental, and incremental with an update window. The type of pipeline is defined by Kondado based on the technical aspects of the source. However, in some rare cases, the user may choose the type of replication. Most of the pipelines available on the platform are incremental or incremental with an update window, with the exception of a few cases.
Incremental: Each time the incremental pipeline is executed, the destination table is updated only with the new records or those that have been updated in the data source since the last savepoint date.
Incremental with update window: Each time this pipeline is executed, all data from the data source is read and written, starting from the last savepoint date, minus the number of days defined by the update window. Example: If a pipeline has a savepoint date of 08/09/2021 and an update window of 7 (seven) days, all records from 01/09/2021 will be read.
Integral: Each time it is executed, all records from the data source are read and written.
Data that has been removed (or "deleted") from the source will continue to appear in the destination, unless the replication method is full or the source has a deletion logic that uses a field-based marking instead of actual removal (soft delete).
Savepoint is a date that defines from which point the data will be read from the data source for insertion into the destination. This date in the data source can correspond to the record creation date, modification date, among others. After each pipeline execution, the savepoint is updated to the most recent date. This way, subsequent executions can start from this new date (and continue updating it continuously). Think of the savepoint as a bookmark in a book, marking the page and completing the data load defined from that point onward.
The update window is a predetermined period of days that, when subtracted from the savepoint, helps determine from when the data will be read from the data source in incremental pipelines with an update window. In some pipelines, the update window may be referred to as the "assignment window," which has the same effect. For example, consider product offers on Facebook, where customers purchase the items as soon as they see them, or view the product with the intention of purchasing it days later.
When creating a new pipeline, you can choose to maintain a history table in addition to the main table that will be populated by the pipeline. The history table keeps a record of all integrated data without deleting or updating any rows. It can help, for example, to audit and analyze how a record has behaved over time. In this context, the Insert_ts field returns the date when the pipeline was executed and the data was inserted by Kondado. The use of the history table is optional and free for all Kondado plans. Moreover, the history table is not supported by S3, spreadsheets, and Via Kondado.
After creating a pipeline, it can be edited at any time. There are two types of edits available on the platform: basic and advanced.
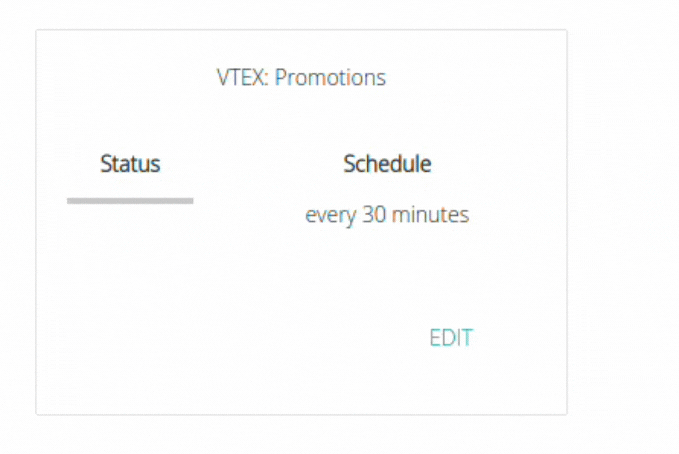
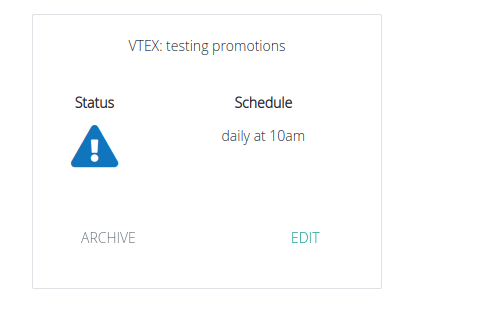
To edit basic information of a pipeline, simply go to its settings page and click "Edit":
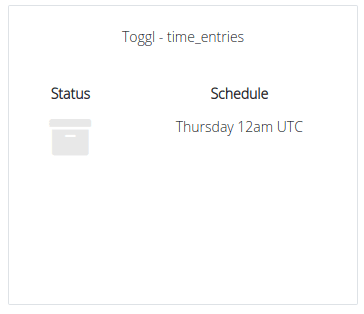
You can change your pipeline status by clicking on the toggle (Status). You can also change your schedule: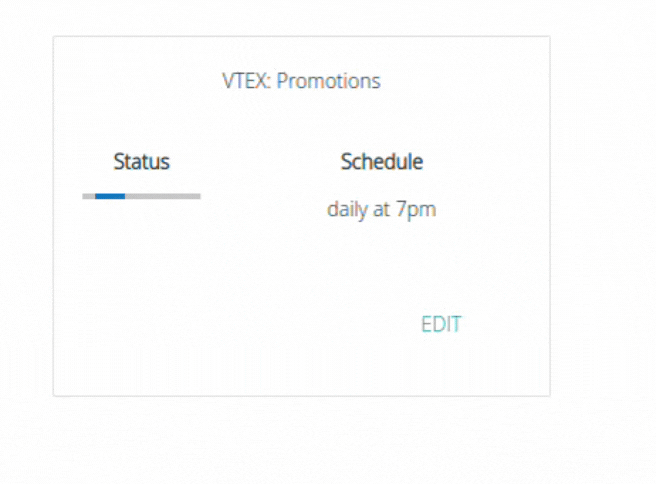
In basic editing, you can change settings such as the pipeline name, status (enabled or disabled), and frequency. Basic editing does not affect the destination table or reset the pipeline's savepoint.
To make an advanced edit, go to the pipeline page, click "Edit," and then select "Advanced":
In advanced editing, you will go through the same steps as when creating the pipeline, simply clicking "Next" until you reach the screen where you want to make changes. In this type of edit, you can change the destination, source, object to be integrated, include or exclude fields, modify the savepoint and update window, change the destination table name, and choose to start storing historical data. Essentially, all aspects of your pipeline can be altered here.
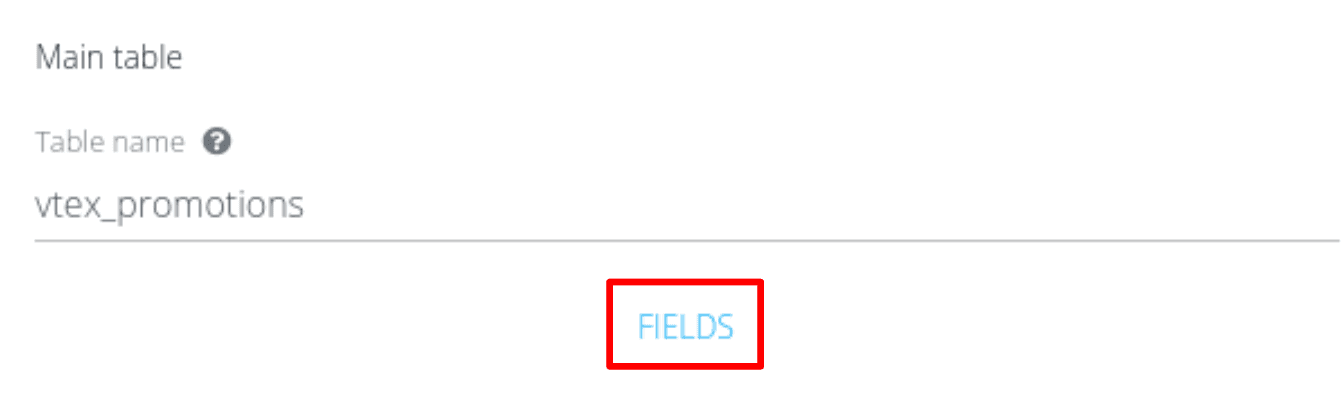
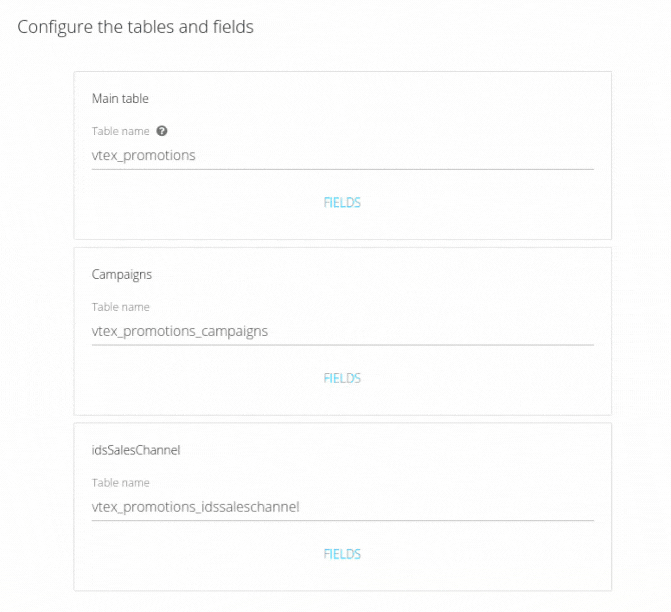
If metrics, dimensions, or fields are added, it is necessary to select the new fields in the "Fields" section of the table and fields settings screen. Otherwise, they will not be sent to the destination table. Just as users can create their own columns according to their needs, they can also recalculate them based on modifications made directly within the source.
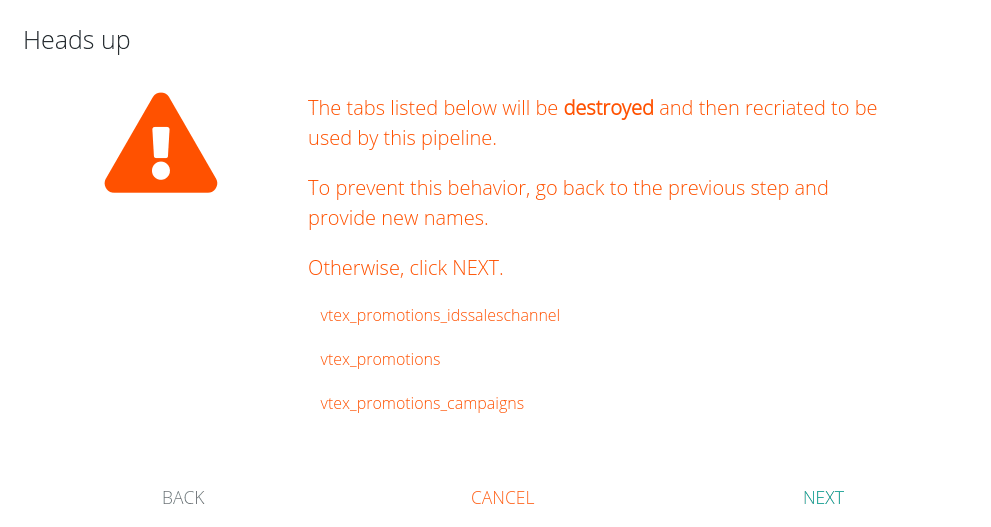
- No changes will take effect until the pipeline is saved in the final step of editing;
- By default, advanced editing resets the pipeline's savepoint and deletes the destination table, reloading the data from the newly defined savepoint date. You will receive a warning (as shown in the example below) in the second-to-last step of editing. The table will only be deleted if the same table name is retained for this or other pipelines.
Savepoint Editing
You can edit the savepoint of your pipeline without needing to perform advanced editing. To do so, click on "DETAILS" at the bottom of the screen, locate the “Properties” section on the right side, and click the pencil icon next to the savepoint. Only savepoints that are dates or date-time values (date+time) can be edited. When editing the savepoint, the current pipeline execution will be interrupted. However, if an execution is already in progress, there is a risk that it will finish before the savepoint is updated, overwriting the edited value. Therefore, we recommend disabling the pipeline before editing the savepoint.
Archiving pipelines
Pipelines that are deactivated can be archived. When a pipeline is archived, it will no longer appear in most areas of the platform and will only be accessible via a direct URL (https://app.kondado.com.br/pipelines/{pipeline_id}). This action cannot be undone.
Simply click the "ARCHIVE" button located to the left of the EDIT button for deactivated pipelines:
After confirming, the status of your pipeline will be updated, and it will no longer be possible to edit it
To add, remove, or edit user permissions on the account, visit the documentation page on user management.
To subscribe to Kondado, simply log in to the platform and follow the steps below:
Click on "Subscribe to Kondado now" or "Subscribe now" on the banner that will appear on your homepage.
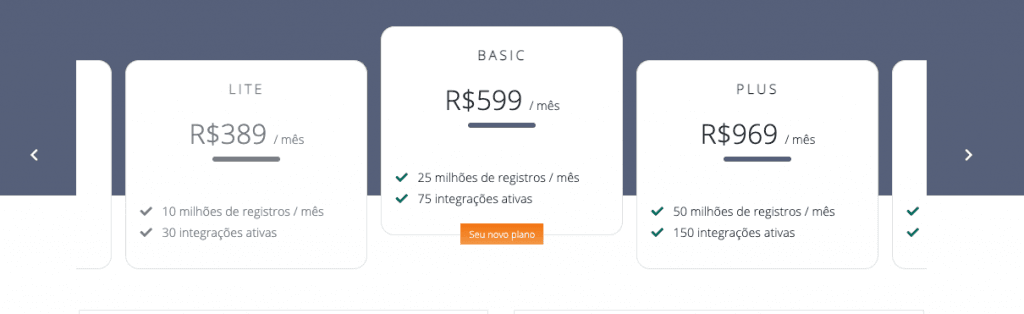
Choose the desired plan from the available options (to learn more about our plans and limits, visit our Plans and Limits page).
You will also need to select the country where the company operates:
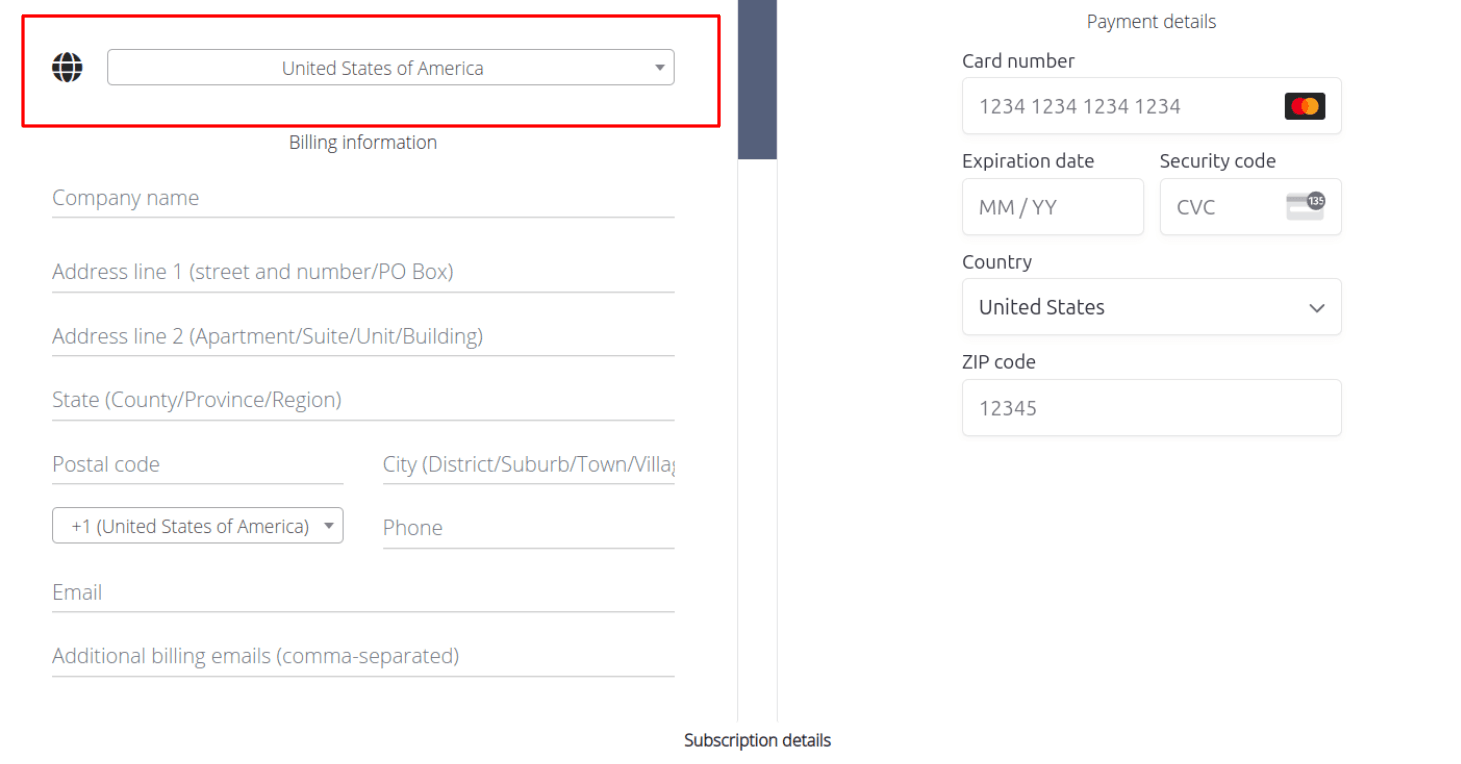
Fill in your company information.
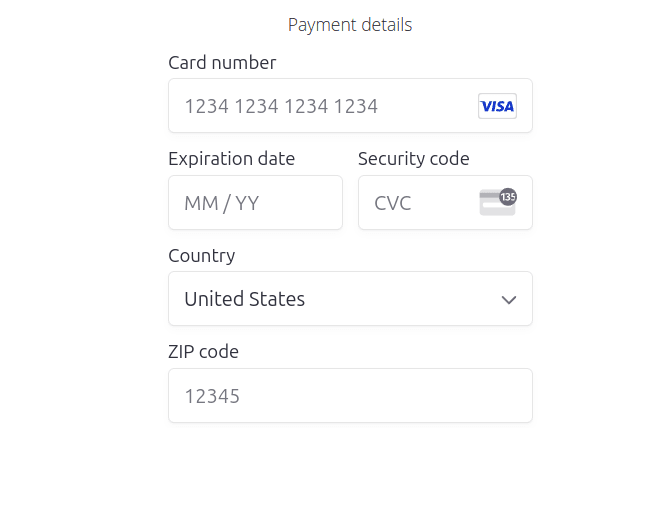
Simply fill in the credit card information that will be used for monthly payments:
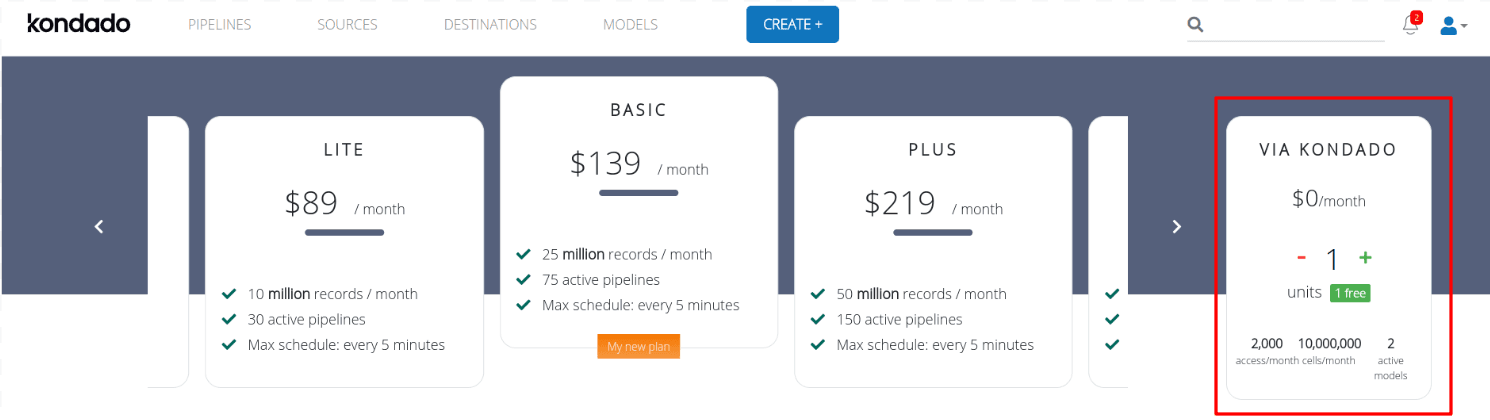
If you choose to use "Via Kondado," click the icon to the right of the displayed plans:
Now, review your plan details and payment method, then click on “CONFIRM”:
If you choose to use "Via Kondado," click the icon to the right of the displayed plans:
If you are using Kondado's free trial services and choose to subscribe to a paid plan, we will adjust your pipelines and frequencies according to the selected plan.
- After confirming the credit card payment method, the card will undergo validation, and the transaction will be confirmed. If there is any issue, you will be notified. Your plan will be activated as soon as the transaction is successfully completed.
- If your payment method is bank payment slip, you will be able to download it on the next screen and pay it. The bank payment slip will also be sent by email to the billing contacts provided in the company information step. Your plan will be activated as soon as the bank payment slip payment is identified by Kondado.
- The invoice will be issued after the bank payment slip payment is identified and, in the case of credit card payments, within up to one (1) week after the transaction. It will be sent to the billing emails provided in the company information step. To change the billing recipients, go to Settings > Financial after completing your subscription.
Get started with Kondado
Follow these foundational steps to set up your first pipeline, choose a replication mode and start sending data to your destination.
Create your account and sign in
Sign up on the Kondado platform and log in to access the source and destination catalog.
Add a destination
Configure where the data should land — a dashboard, spreadsheet, data warehouse or data lake — using the credentials your destination requires.
Add a source
Authenticate the source system you want to extract from (ERP, e-commerce, ad platform, CRM, database). Each source has its own credential flow described in its wiki page.
Create a pipeline
Combine one source object + one destination into a pipeline. Choose the replication type the source's API supports (full, incremental, or incremental with update window) and pick the execution frequency that fits your needs.
Optionally enable history table and models
Turn on the history table option to keep an audit trail of every change, and create SQL models to join or transform tables once they land at the destination.
Manage and edit your pipelines
Use basic editing for name, status and schedule changes, or advanced editing when you need to alter the source object, fields or savepoint — note that advanced edits reset the savepoint.
Frequently asked questions
insert_ts field, so you can audit how each row evolved instead of seeing only the latest state.