Creating the data source
Adding the data source
Based on ClickUp API documentation
Requirements
Make sure to use an user with admin access to the Workspaces to be replicated
Instructions
Currently ClickUp has two versions: ClickUp 2.0 and ClickUp 3.0. Following you can find the instructions to obtain the API Key in both versions.
Instructions to ClickUp 2.0
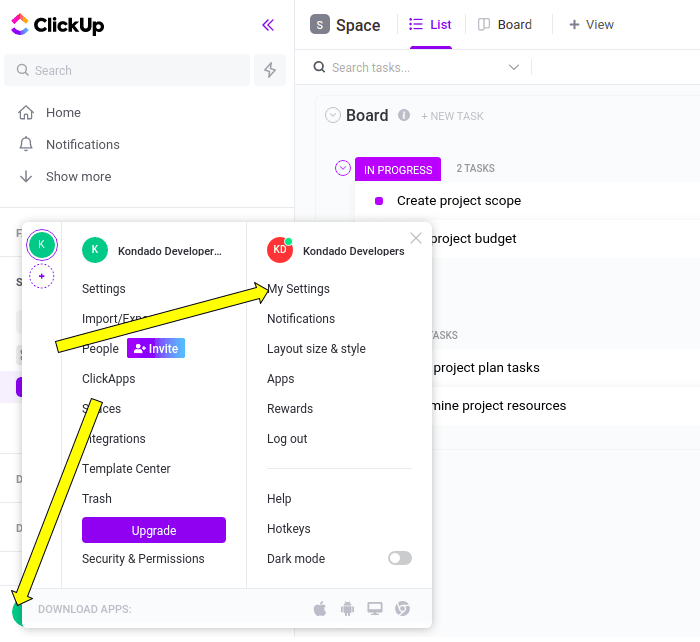
1) Log in to your ClickUp account, click on your profile icon on the bottom left and then on "My Settings";
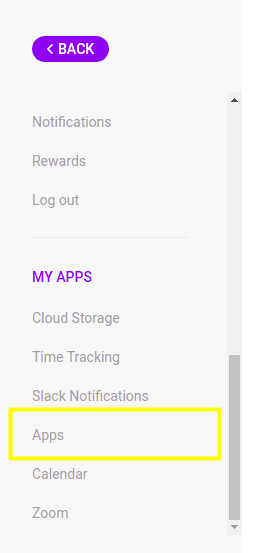
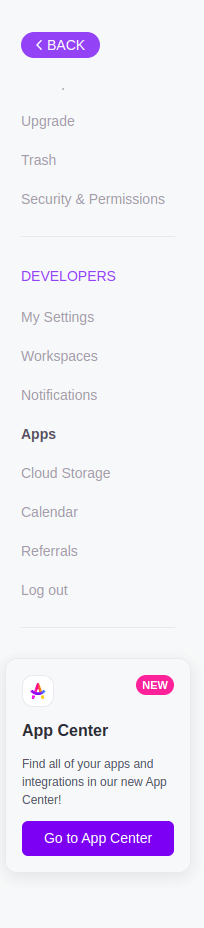
2) On the settings page, on the left bar, look for “Apps”;
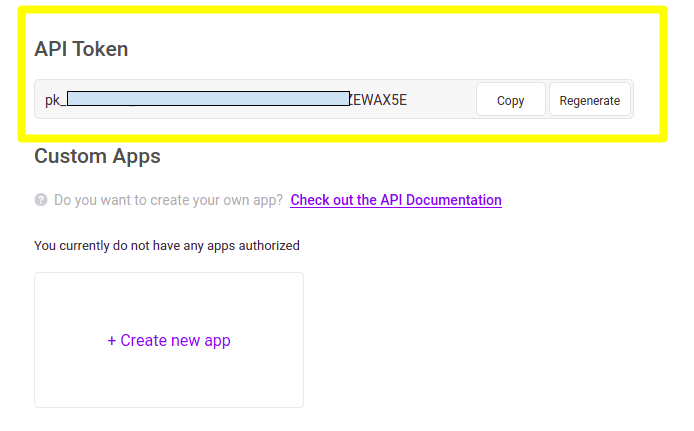
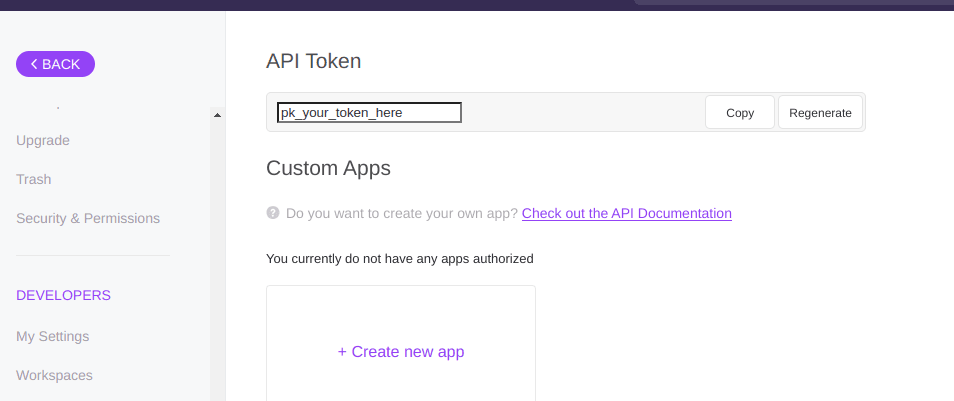
3) Search for the “API Token” section and copy the value found – this is the time to generate a first API Token if you don’t have one yet;
5) Name your data source and, in API Token, paste the value obtained in step 3 and click "SAVE".

Instructions to ClickUp 3.0
1) Log in to your ClickUp account, click on your profile icon on the upper-right corner and then on "Settings";
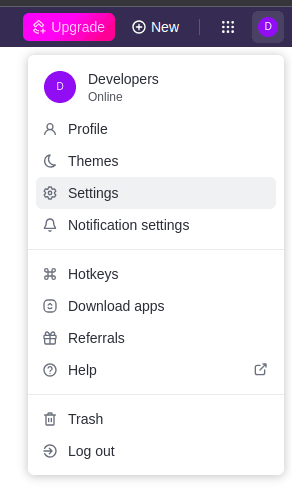
2) Scroll down and click on the “Apps” section in the sidebar;
3) Search for the “API Token” section and click on “Generate” if you don't have an API token yet, or on “Regenerate” if you already have one. Copy the value displayed in the “API Token” section;
5) Name your data source and, in API Token, paste the value obtained in step 3 and click "SAVE".
Pipelines
Summary
Relationship chart
Click to expand

Folders
Main object
Folders used to group lists within each space.
| Campo | Tipo | |
|---|---|---|
|
text |
[en] Unique folder identifier. |
|
|
text |
[en] Space that owns the folder. |
|
|
boolean |
[en] Indicates whether the folder is archived. |
|
|
boolean |
[en] Indicates whether the folder is hidden from users. |
|
|
text |
[en] Display name of the folder. |
|
|
float |
[en] Folder position within ordering. |
|
|
boolean |
[en] Allows the folder to define its own statuses for lists. |
|
|
text |
[en] Permission level granted to access the folder. |
|
|
float |
[en] Total number of tasks recorded in the folder. |
clickup_folders__statuses
Statuses configured specifically for lists within the folder.
| Campo | Tipo | |
|---|---|---|
|
text |
[en] Reference to the owning folder. |
|
|
text |
[en] Color defined for the status. |
|
|
text |
[en] Identifier of the associated status. |
|
|
float |
[en] Status position within the folder. |
|
|
text |
[en] Name of the status available in the folder. |
|
|
text |
[en] Category of the status (e.g., open, closed). |
List members
Members associated with each ClickUp list.
| Campo | Tipo | |
|---|---|---|
|
text |
[en] Identifier of the related list. |
|
|
text |
[en] Identifier of the member user. |
|
|
text |
[en] Username displayed in ClickUp. |
|
|
text |
[en] Member email address. |
|
|
text |
[en] Color used to represent the member. |
|
|
text |
[en] Initials displayed for the member. |
|
|
text |
[en] Profile picture URL for the member. |
Lists
Lists that organize tasks within folders or spaces.
| Campo | Tipo | |
|---|---|---|
|
text |
[en] Unique list identifier. |
|
|
text |
[en] Folder where the list is located. |
|
|
boolean |
[en] Indicates whether the list is archived. |
|
|
timestamp |
[en] Due date defined for the list. |
|
|
text |
[en] Display name of the list. |
|
|
float |
[en] List position in ordering. |
|
|
boolean |
[en] Indicates whether the list uses its own statuses. |
|
|
text |
||
|
text |
[en] Color associated with the list standard priority. |
|
|
text |
[en] Textual label of the default priority. |
|
|
timestamp |
[en] Planned start date for the list. |
|
|
text |
[en] Color applied to the list main status. |
|
|
boolean |
[en] Indicates whether the main status label should be hidden. |
|
|
text |
[en] Name of the main status assigned to the list. |
|
|
float |
[en] Current number of tasks in the list. |
Spaces
Main object
Organizational spaces configured in ClickUp.
| Campo | Tipo | |
|---|---|---|
|
text |
[en] Unique space identifier. |
|
|
text |
[en] Workspace that owns the space. |
|
|
boolean |
[en] Indicates whether the space is archived. |
|
|
boolean |
[en] Shows whether multiple assignees are allowed for tasks. |
|
|
text |
[en] Display name of the space. |
|
|
boolean |
[en] Indicates whether the space is private. |
clickup_spaces__priorities
Priority settings available within each space.
| Campo | Tipo | |
|---|---|---|
|
text |
[en] Reference to the owning space. |
|
|
text |
[en] Color displayed for the priority. |
|
|
float |
[en] Numeric identifier of the priority. |
|
|
float |
[en] Priority position within ordering. |
|
|
text |
[en] Name or label of the priority. |
clickup_spaces__statuses
Default status list defined for each space.
| Campo | Tipo | |
|---|---|---|
|
text |
[en] Reference to the owning space. |
|
|
text |
[en] Identifier of the configured status. |
|
|
text |
[en] Color used to represent the status. |
|
|
float |
[en] Ordering position of the status. |
|
|
text |
[en] Name of the available status. |
|
|
text |
[en] Category of the status (e.g., open, closed). |
clickup_spaces___features
Enabled features and keys for each space.
Tasks
Replication type: Incremental
Relationships:
- workspace_id → Workspaces > id
- creator_id → List members > user_id
- folder_id → Folders > folder_id
- list_id → Lists > list_id
- space_id → Spaces > space_id
- tag_creator > tags → List members > user_id
- dependency_userid > dependencies → List members > user_id
- assignee_id > assignees → List members > user_id
- userid > linked_tasks → List members > user_id
Main object
Tasks managed in ClickUp with core metadata.
| Campo | Tipo | |
|---|---|---|
|
text |
[en] Unique task identifier. |
|
|
text |
[en] Workspace that owns the task. |
|
|
text |
[en] User who created the task. |
|
|
text |
[en] Folder that groups the task. |
|
|
text |
[en] List where the task is registered. |
|
|
text |
[en] Space related to the task. |
|
|
text |
[en] Custom identifier configured for the task. |
|
|
timestamp |
[en] Date when the task was closed. |
|
|
timestamp |
[en] Date when the task was marked as done. |
|
|
timestamp |
[en] Date when the task was created. |
|
|
timestamp |
[en] Date of the task most recent update. |
|
|
timestamp |
[en] Planned start date of the task. |
|
|
text |
[en] Text description of the task. |
|
|
timestamp |
[en] Due date assigned to the task. |
|
|
text |
[en] Display title of the task. |
|
|
float |
[en] Task position within the list ordering. |
|
|
text |
[en] Parent task when the item is a subtask. |
|
|
text |
[en] Permission level applied to the task. |
|
|
float |
[en] Point value assigned to the task. |
|
|
boolean |
[en] Indicates whether the task has been archived. |
|
|
text |
[en] Color configured for the task priority. |
|
|
text |
[en] Identifier of the applied priority. |
|
|
float |
[en] Position of the priority within team settings. |
|
|
text |
[en] Name of the priority used by the task. |
|
|
text |
[en] Color displayed for the task current status. |
|
|
float |
[en] Position of the current status within the workflow. |
|
|
text |
[en] Name of the task current status. |
|
|
text |
[en] Category of the current status (e.g., open, closed). |
|
|
text |
[en] Consolidated textual content of the task. |
|
|
float |
[en] Estimated time to complete the task (milliseconds). |
|
|
text |
[en] Direct link to access the task. |
clickup_tasks__tags
Tags applied to tasks.
| Campo | Tipo | |
|---|---|---|
|
text |
[en] Reference to the tagged task. |
|
|
text |
[en] User who created the tag. |
|
|
text |
[en] Name of the tag applied. |
|
|
text |
[en] Background color configured for the tag. |
|
|
text |
[en] Text color displayed on the tag. |
clickup_tasks__dependencies
Dependencies recorded for tasks.
| Campo | Tipo | |
|---|---|---|
|
text |
[en] Task that holds the dependency. |
|
|
timestamp |
[en] Date when the dependency was created. |
|
|
text |
[en] Task or element this task depends on. |
|
|
float |
[en] Dependency type (e.g., waiting, blocking). |
|
|
text |
[en] User who registered the dependency. |
clickup_tasks__assignees
Relationship of task assignees.
| Campo | Tipo | |
|---|---|---|
|
text |
[en] Task to which the assignee is linked. |
|
|
text |
[en] User assigned to the task. |
clickup_tasks__linked_tasks
Link relationships between tasks.
| Campo | Tipo | |
|---|---|---|
|
text |
[en] Primary task that has the linkage. |
|
|
timestamp |
[en] Date when the link was created. |
|
|
text |
[en] Identifier of the relationship between tasks. |
|
|
text |
[en] User who created the linkage. |
Tasks: custom fields
Tasks: time in status
Main object
Time spent in the current status for each task.
| Campo | Tipo | |
|---|---|---|
|
text |
[en] Task analyzed for time in status. |
|
|
text |
[en] Name of the current status. |
|
|
text |
[en] Color configured for the current status. |
|
|
float |
[en] Total time spent in the current status, minutes. |
|
|
timestamp |
[en] Start moment of the current status period. |
clickup_tasks_time_in_status_history
Historical timings per status for each task.
| Campo | Tipo | |
|---|---|---|
|
text |
[en] Task referenced by the history record. |
|
|
text |
[en] Historic status being analyzed. |
|
|
text |
[en] Color used for that historic status. |
|
|
text |
[en] Category of the historic status. |
|
|
float |
[en] Time accumulated in that status, minutes. |
|
|
timestamp |
[en] Start moment of the historic period. |
|
|
float |
[en] Record order within the historical trail. |
Workspaces
Replication type: Full
Notes
- Part of this documentation was automatically generated by AI and may contain errors. We recommend verifying critical information
Add ClickUp as a data source on Kondado
Connect your ClickUp workspace data to Kondado by generating an API token and configuring the source for your pipelines.
Verify admin access requirements
Ensure you are using a ClickUp user with admin access to the Workspaces you want to replicate, as this is required for successful data extraction.
Generate API token for your ClickUp version
For ClickUp 2.0, go to My Settings → Apps → API Token. For ClickUp 3.0, go to Settings → Apps → Generate/Regenerate API Token. Copy the token value shown.
Add ClickUp source on Kondado platform
On the Kondado platform, navigate to the add new sources page, select the ClickUp data source, name your connection, paste the API Token, and click SAVE to complete the setup.
Review available ClickUp entities and relationships
Familiarize yourself with the data integration schema including Workspaces, Spaces, Folders, Lists, Tasks, and their related sub-entities to plan your pipeline configuration effectively.
Enable required ClickApps before extraction
For Tasks time-in-status data, confirm the Workspace owner or admin has enabled the Total time in Status ClickApp in ClickUp, otherwise this data will not be returned.
Connect ClickUp data to your preferred destination
Once configured, send your ClickUp data to destinations such as BI tools, data warehouses, or spreadsheets for analysis and reporting.