Creating the data source
Adding the data source
To automate Salesforce Sales Cloud and Service Cloud ETL with Kondado, follow the steps below:
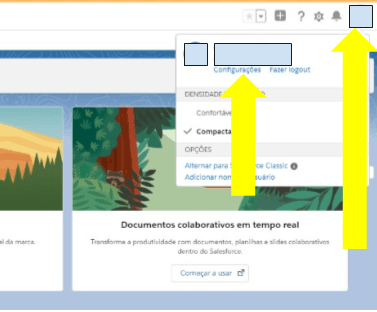
1) Log in to your Salesforce account and, in the upper right panel, click on your company logo and then on "Settings"
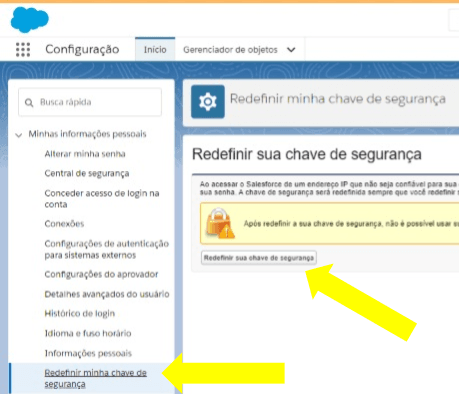
2) On the settings page, look for "Reset my security token" and, on the reset page, click on "Reset my security token"
3) You will receive your new token by email. Copy it, as it will be used later to add the data source on the Kondado platform
4) On the Kondado platform, go to the add new sources page and select the Salesforce data source
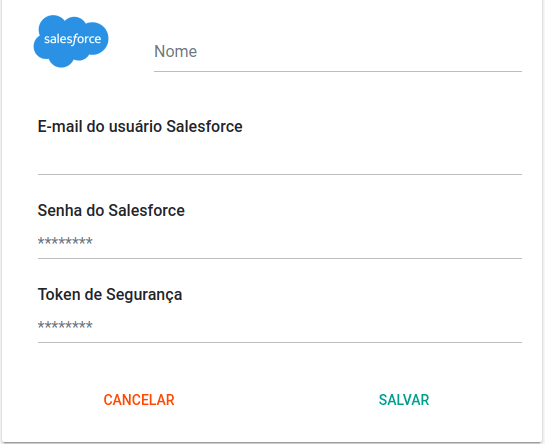
5) Name your data source, fill in the e-mail and password of the user used to generate the token and, in "Security Token", use the token generated in step (3)
Now you can save the data source and start replicating your Salesforce Service Cloud or Sales Cloud objects into your Data Warehouse or Data Lake!
Pipelines
Summary
Relationship chart
Click to expand

Object
- Only objects that the user who created the data source has access to — and that exist in the organization — will be available
- Returned records can be filtered according to the access of the user who created the data source
- When creating an incremental pipeline (using, for example, the LastModifiedDate column), deleted records will not be synchronized. To reflect removals, use the integral (full) replication mode
Replication type: Incremental or Full (user configurable)
Parameters:
- Object: Select the Salesforce object (table) you want to read
Notes
- Part of this documentation was automatically generated by AI and may contain errors. We recommend verifying critical information
Add Salesforce as a Data Source on Kondado
Follow these steps to connect your Salesforce Sales Cloud or Service Cloud data to your Data Warehouse or Data Lake through Kondado.
Generate your Salesforce security token
Log in to Salesforce, click your company logo in the upper right, go to "Settings", find "Reset my security key", and click to reset it. You'll receive the new token by email—copy it for later use.
Start adding the source on Kondado
On the Kondado platform, navigate to the add new sources page and select the Salesforce data source to begin the connection setup.
Configure credentials and token
Name your data source, enter the email and password of the Salesforce user who generated the token, and paste the security token from step 1 into the "Security Token" field.
Save and start replicating data
Save the data source to begin replicating your Salesforce objects. You can then use data integration features to sync standard and custom objects to your Data Warehouse or Data Lake, with optional incremental sync using columns like LastModifiedDate.