How to Create Calculated Fields in Looker Studio

How to Create Calculated Fields in Looker Studio


Looker Studio , previously known as Google Data Studio, is a powerful data visualization tool that enables the transformation of raw data into interactive and detailed reports. With an intuitive interface and advanced features, Looker Studio is perfect for data analysts, marketing professionals, and anyone needing to turn data into actionable insights.

One of the most powerful features of Looker Studio is the ability to create calculated fields. These fields are derived from formulas that combine one or more existing fields in your data source. They allow you to apply mathematical operations, text transformations, conditional logic, and various other functions directly within Looker Studio.

For example, you can use calculated fields to create custom metrics such as profit margin, conversion rate, or any specific measure not present in your original data source.

Tutorial for Creating Calculated Fields in Looker Studio

In this step-by-step guide, a copy of the Google Ads & Facebook Ads report was used as an example.

  • Access the Report where you want to create a calculated field.
1.png
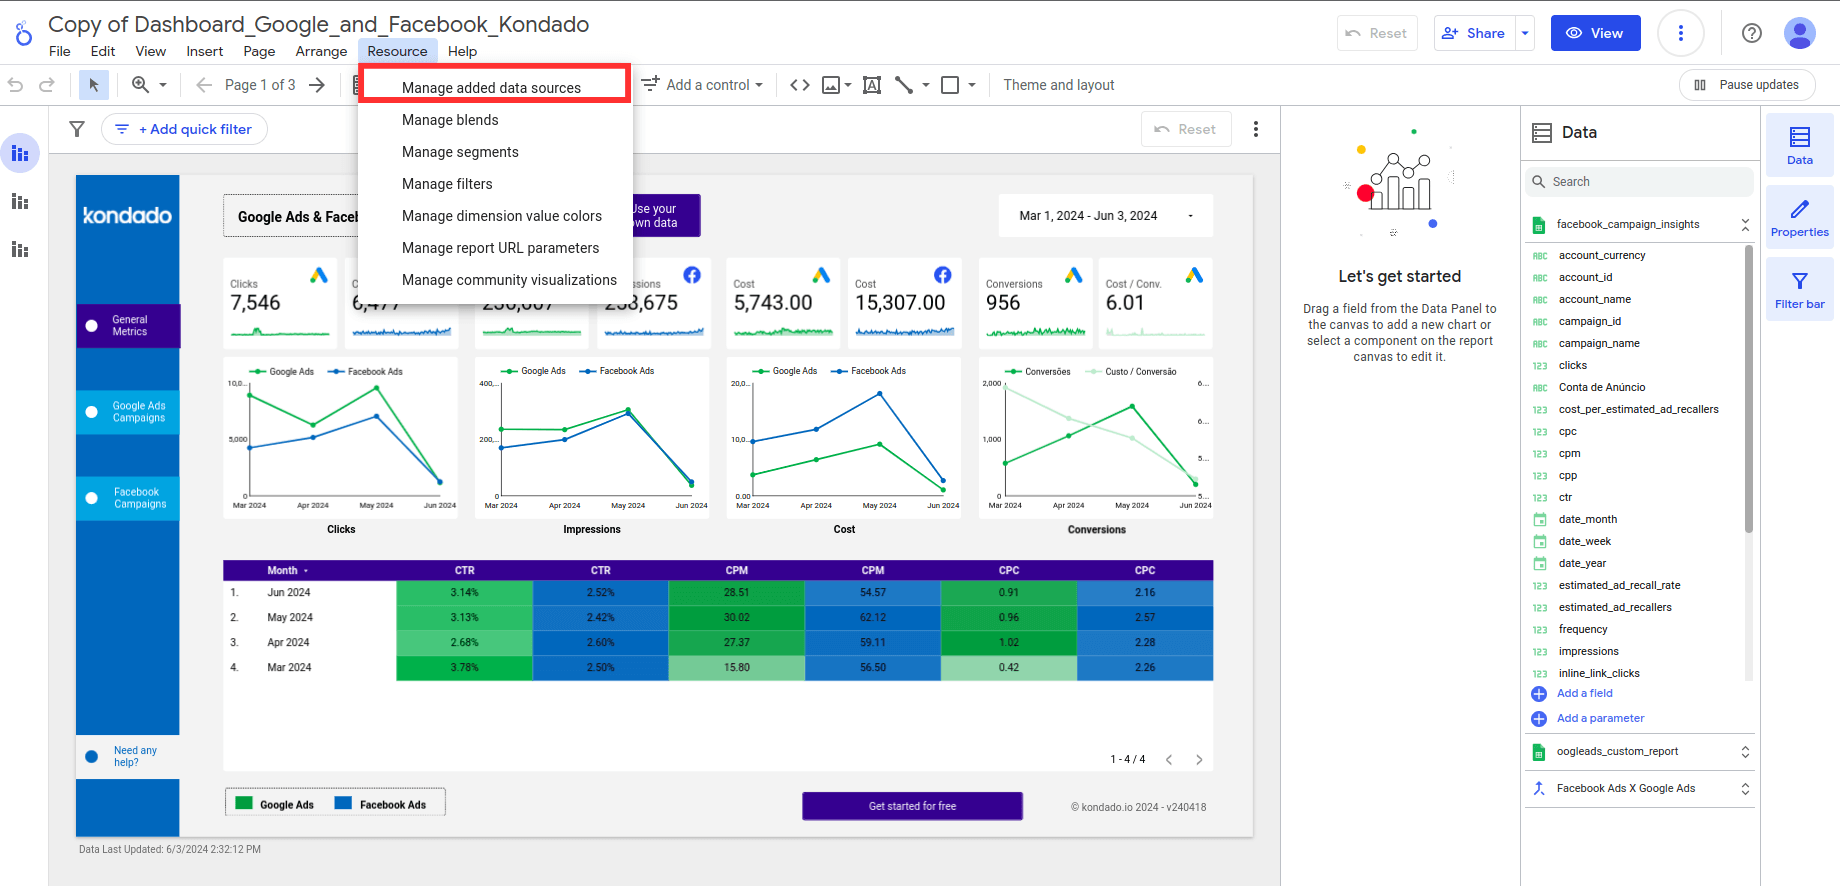
  • Click on “Resources” in the top menu and then select “Manage added data sources”.
2 .png
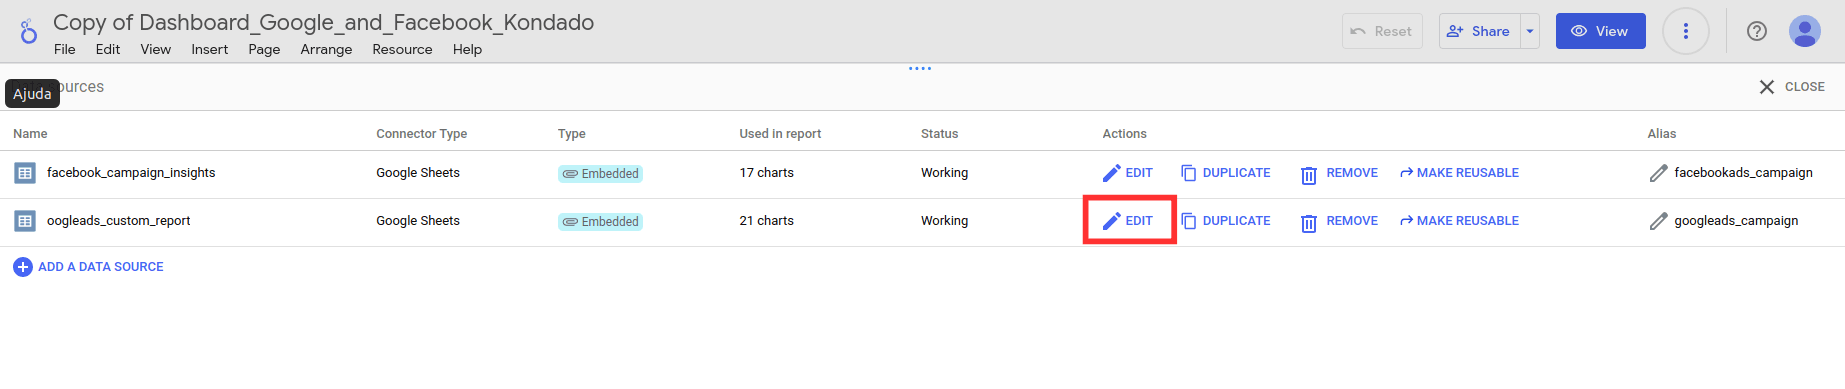
  • Click on “Edit” next to your data source.
     
3.png

If you don’t have a data source added yet, click “Add data” and select the data source containing the necessary information for your calculated field.

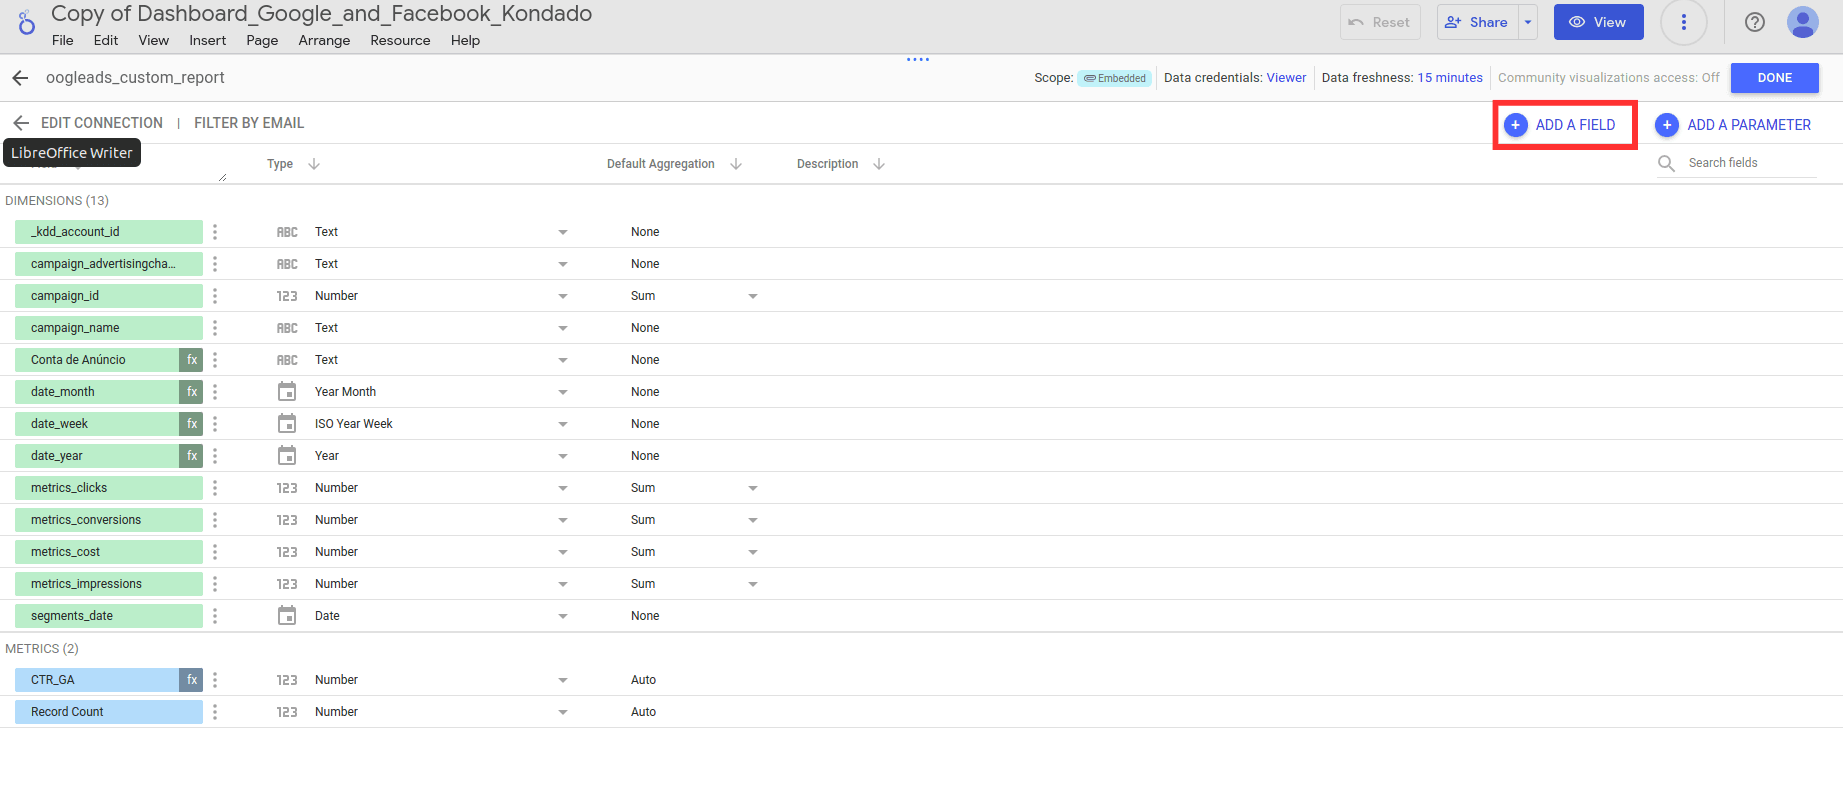
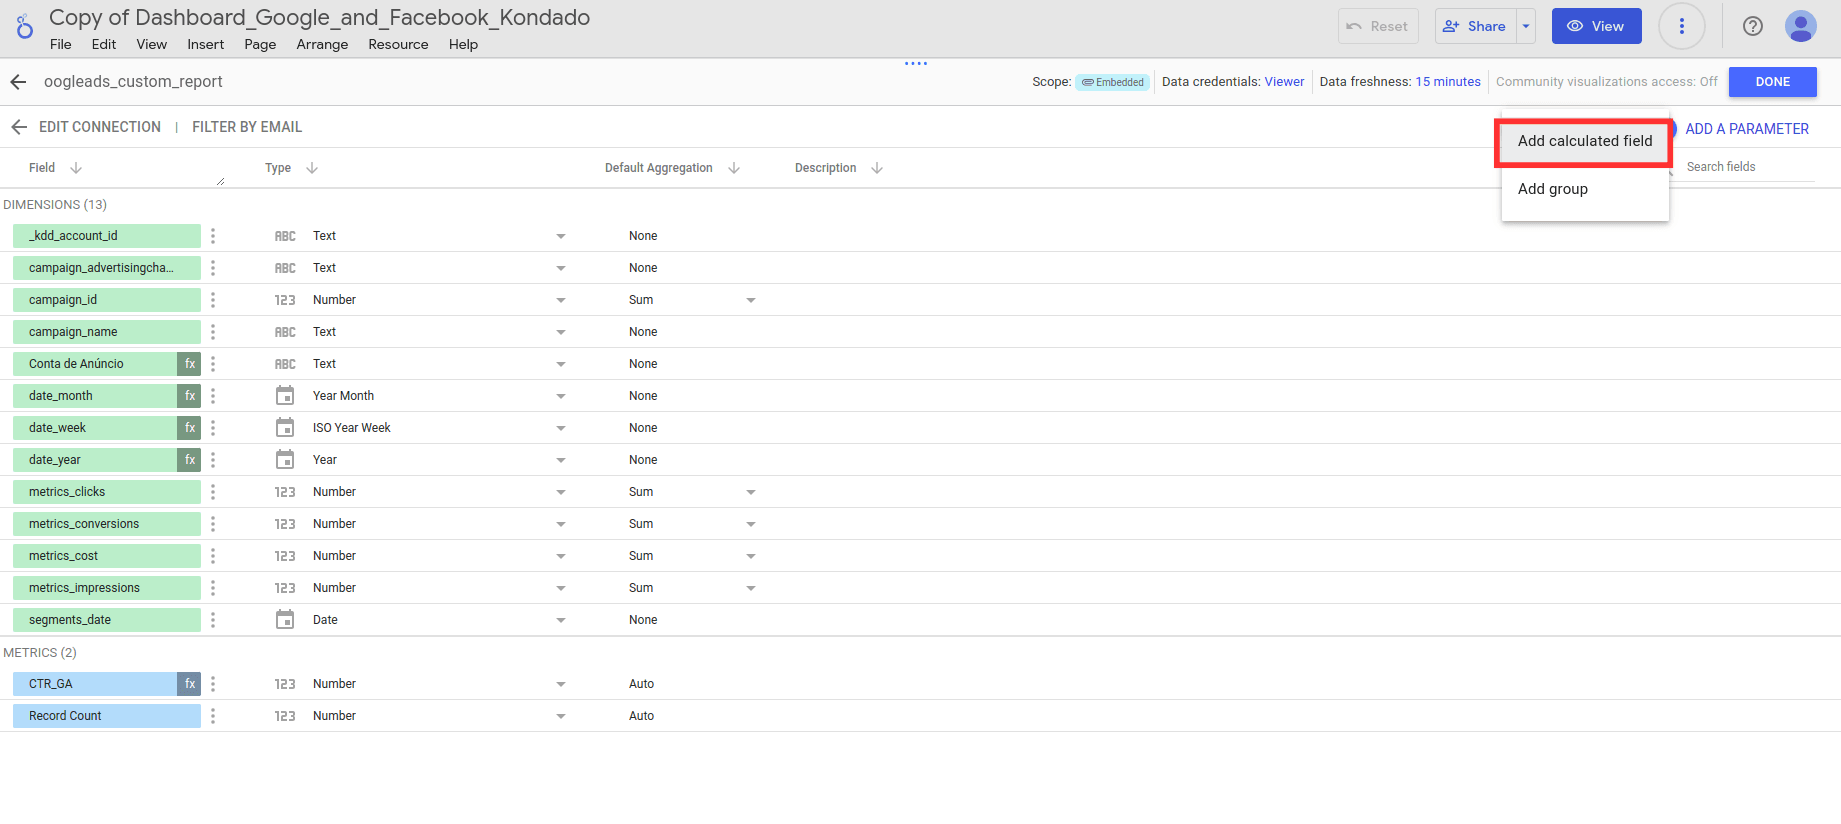
  • Then, click on “Add a Field” and select “Add calculated field”.
4.png
C Field.png

Enter the name (which will appear in your reports) and the function for this field.  To choose a metric or function, start typing its name.

5.png

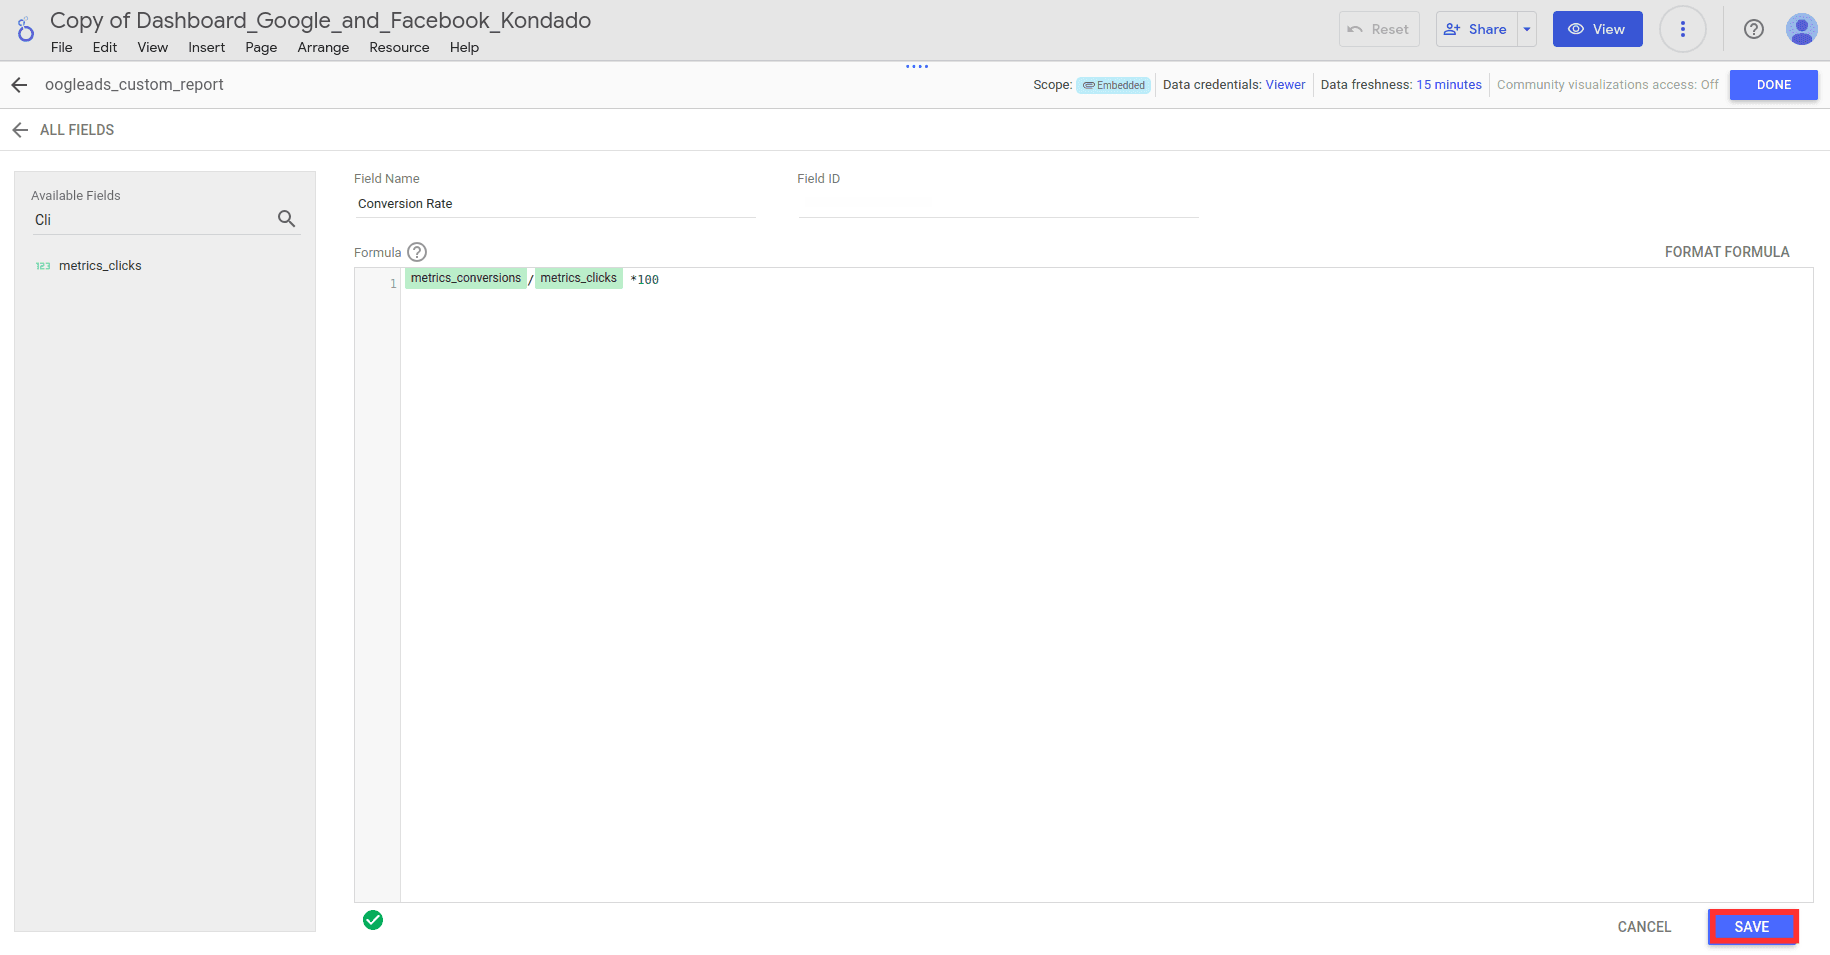
After entering the function , click “Save” to create the calculated field. It will now be available for use in your charts, tables, and other visualizations within Looker Studio.

  • To use your new calculated field, select a visualization (such as a chart or table), click the pencil icon, and add the calculated field as a metric or dimension as appropriate.
7.png
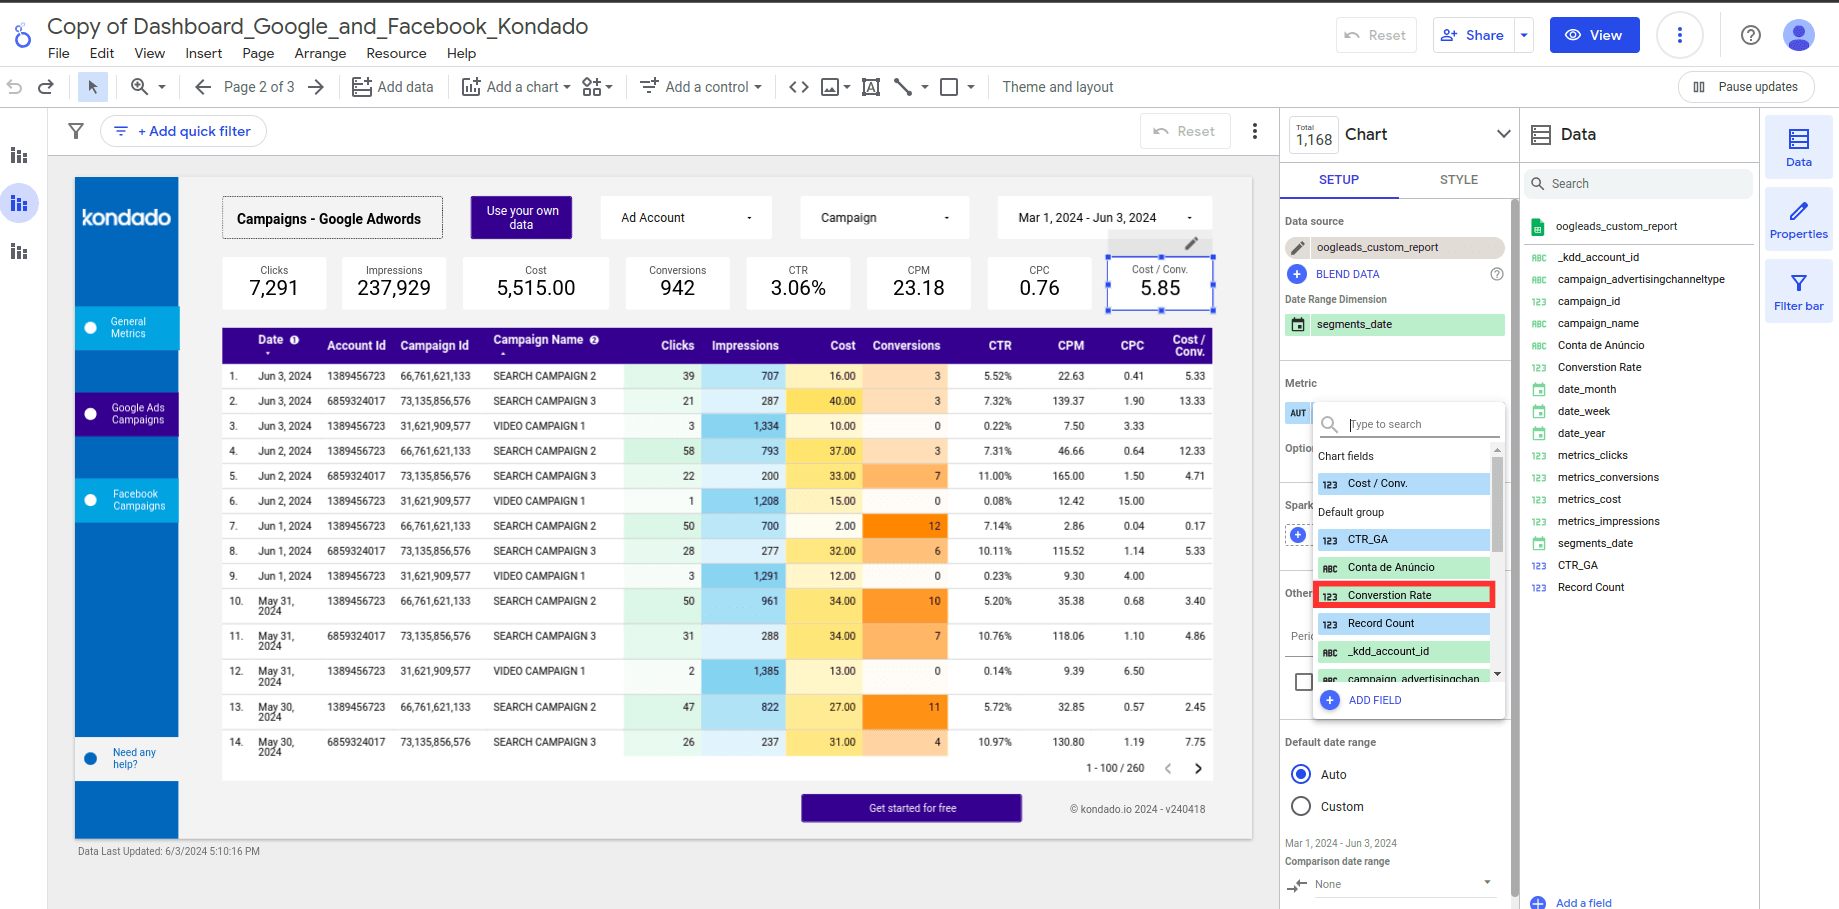
  • Adjust the visualization settings as needed to display your data clearly and informatively.
8.png

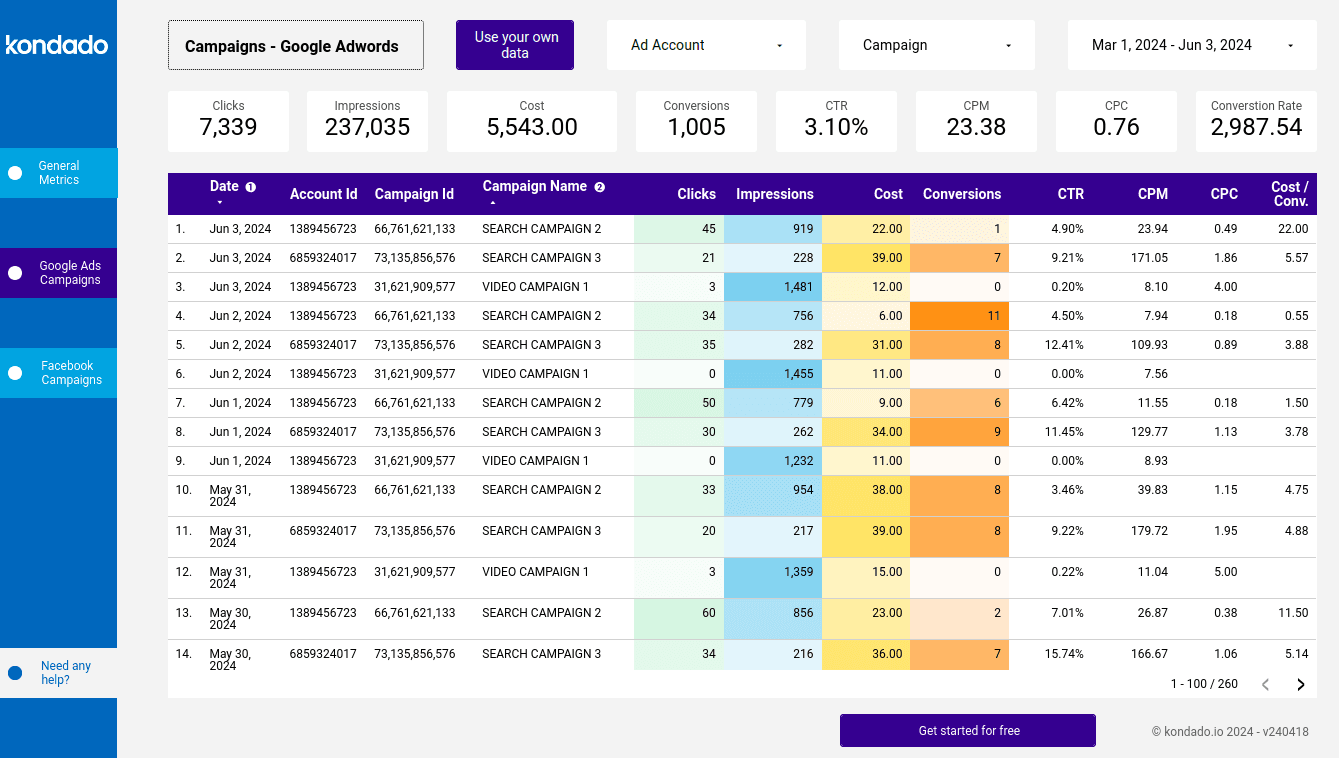
At Kondado, we make data analysis easier with agile tools and integrations designed for seamless connectivity without requiring coding. Our templates for Looker Studio include:

We invite you to discover how our platform can revolutionize how your company utilizes Looker Studio. Try Kondado for free today and see how we can help elevate your data management to the next level.

Conclusion

Calculated fields are an essential tool in Looker Studio, enabling the creation of custom metrics that help answer specific questions and generate valuable insights. With this functionality, you can elevate your data analyses, tailoring visualizations precisely to your needs.

Create a Calculated Field in Looker Studio

Add a custom metric or dimension to a Looker Studio report by defining a calculated field on the data source.

1
Open the report and access data sources

Open your Looker Studio report, click Resource > Manage added data sources, and choose the data source that should host the calculated field.

2
Edit the data source

Click Edit next to the data source. If no source is connected yet, use Add data and pick the connector containing the fields you need.

3
Add the calculated field

Click Add a Field > Add calculated field. Enter a clear field name (it will appear in your report) and write the formula using existing fields and Looker Studio functions.

4
Save and use the calculated field in visuals

Click Save, return to the report, select a chart, click the pencil icon, and add the new field as a metric or dimension.

5
Feed Looker Studio with consolidated data

Connect more sources via Kondado and route them to BigQuery, Google Sheets, or another destination so your calculated fields work on a complete dataset.

Frequently asked questions

What are calculated fields in Looker Studio?
Calculated fields in Looker Studio are derived from formulas that combine one or more existing fields in your data source. They allow you to apply mathematical operations, text transformations, conditional logic, and various other functions directly within the tool to create custom metrics like profit margin or conversion rate.
How do I create a calculated field in Looker Studio?
To create a calculated field, access your report, click on "Resources" then "Manage added data sources", click "Edit" next to your data source, then select "Add a Field" and "Add calculated field". Enter a name and your formula, then click "Save". The field will then be available for use in your visualizations.
Can I use calculated fields in any visualization type?
Yes, once created, calculated fields can be used across various visualizations in Looker Studio including charts, tables, and other visual elements. Simply select your visualization, click the pencil icon, and add the calculated field as a metric or dimension as appropriate.
What data sources work with Looker Studio calculated fields?
Calculated fields work with any data source you've added to your Looker Studio report. If you don't have a data source yet, you can click "Add data" and select from available sources. For seamless data integration from multiple platforms, consider using Kondado's data integration solutions.
Does Kondado offer templates for Looker Studio?
Yes, Kondado provides templates for Looker Studio including integrations for Bling, Tiny, RD Station CRM, and Facebook and Google Ads. You can explore Kondado's data visualization capabilities to enhance your reporting workflow.
Do I need coding skills to use calculated fields in Looker Studio?
No, Looker Studio's calculated fields use an intuitive formula interface where you can start typing metric or function names to build your formulas. Additionally, platforms like Kondado offer data transformation tools that simplify preparing your data without requiring coding expertise.

Written by·Published 2024-06-04·Updated 2026-04-26