Important: Before creating a pipeline, you must have a data destination and at least one source registered on the platform, both functioning correctly.
Click here to return to the documentation homepage. In the search bar, enter the name of your source or destination to find the respective tutorial on how to register them.
If you prefer, watch the tutorial video by clicking here.
The entire Kondado pipeline process is designed so you don't need to write a single line of code and, within minutes, can send information to your previously selected data destination at your desired frequency. In this tutorial, we explain the step-by-step process of creating a pipeline for those starting to use the platform.
Ensure that your destination and source are registered and test their connection. To test the connection, simply access the source/destination to be used in the pipeline and click on “Test Connection.”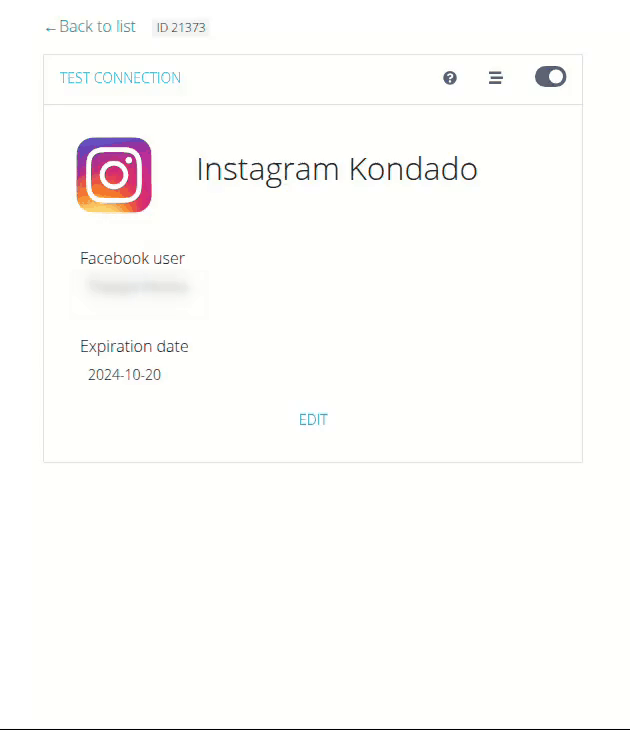
Click on "CREATE +" and then select "PIPELINE":
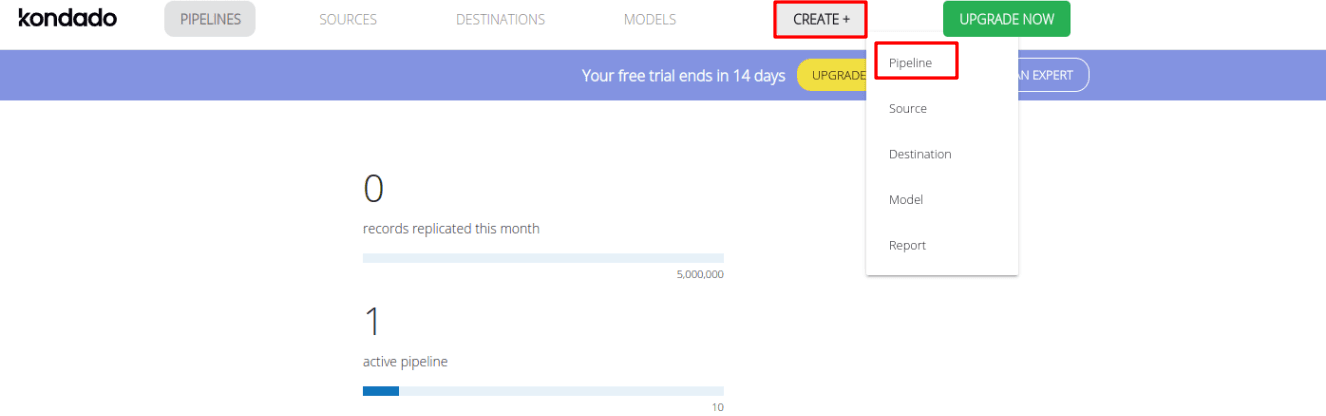
The platform will automatically fill in the source and destination if only one of each is configured. Example: if you have only one active Toggl source and one active Via Kondado destination, the platform will select these tools for creating the new pipeline.
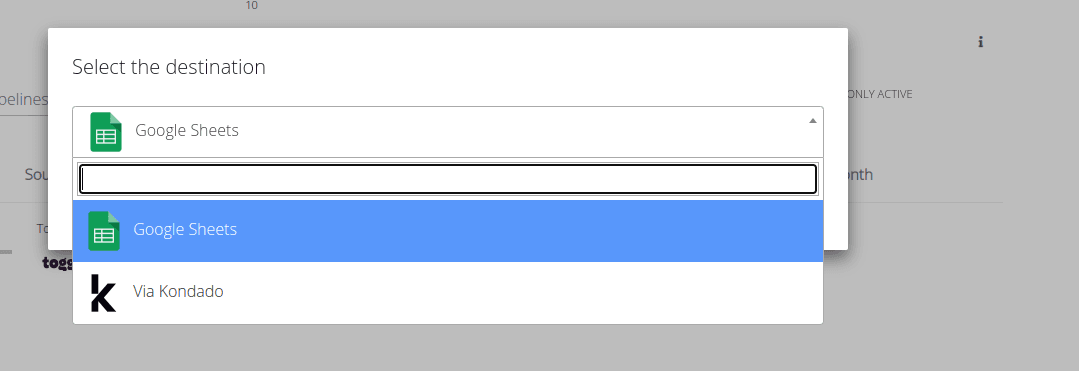
Select your desired destination (if you have more than one):
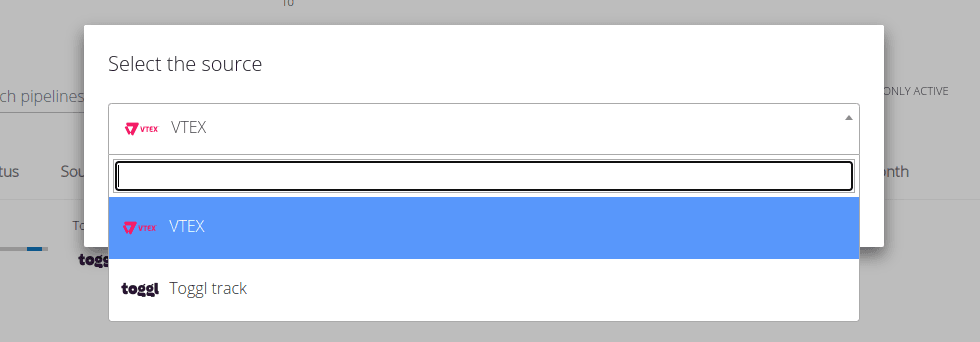
Select your desired source (if you have more than one):
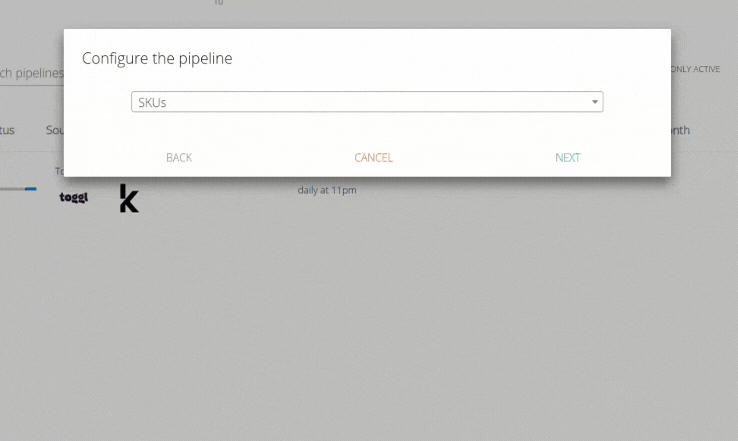
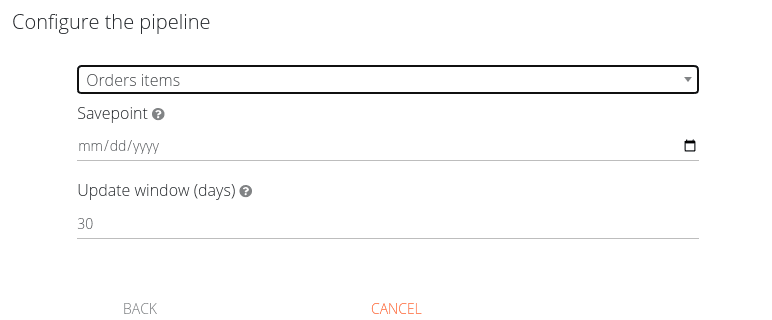
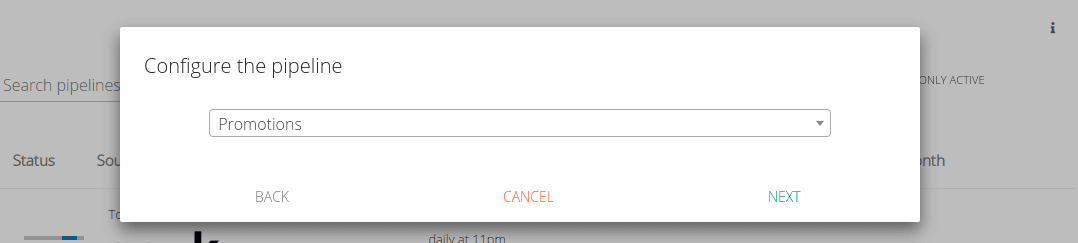
Choose the table/object from the data source to be integrated. The pipeline configurations are variable and depend on the selected object:
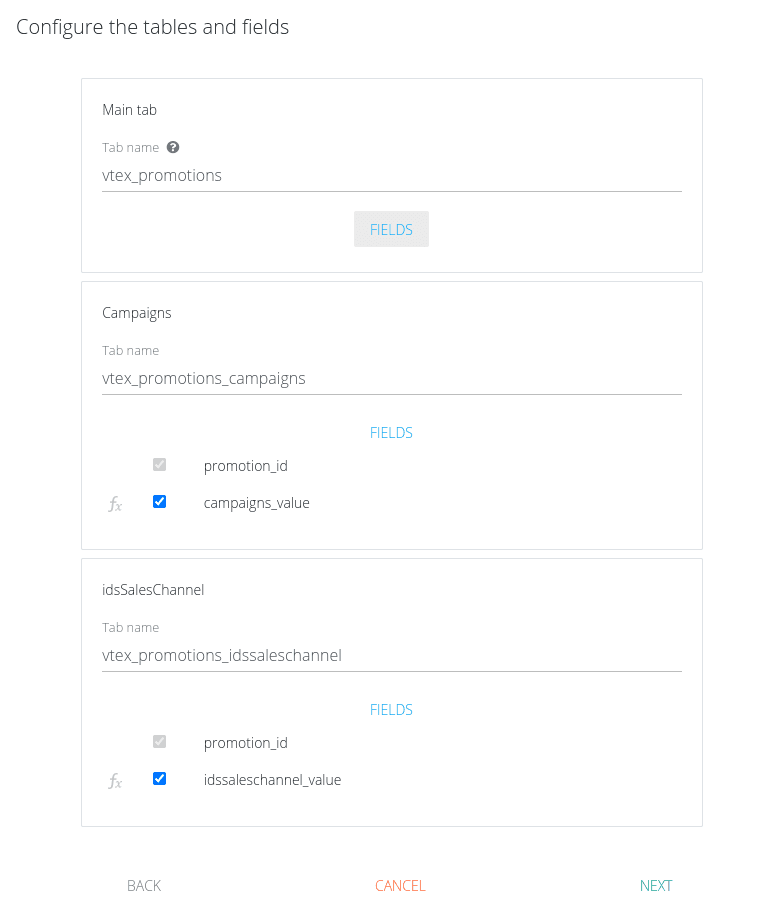
Define the name the table will have in your data destination, and, if enabled, choose whether to insert delta tables or not. The variables for including these historical tables are specified solely by the selected destination. By clicking on "FIELDS," you can view all the fields that will be created in the table and choose not to send specific ones by unchecking them (by default, all fields are sent):
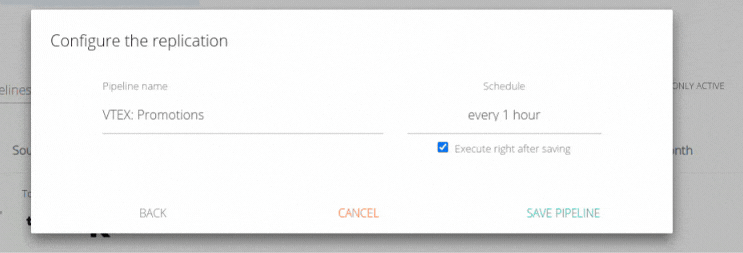
Define the name your pipeline will have within the Kondado platform and the frequency at which the data will be updated, then click on “Save Pipeline”:
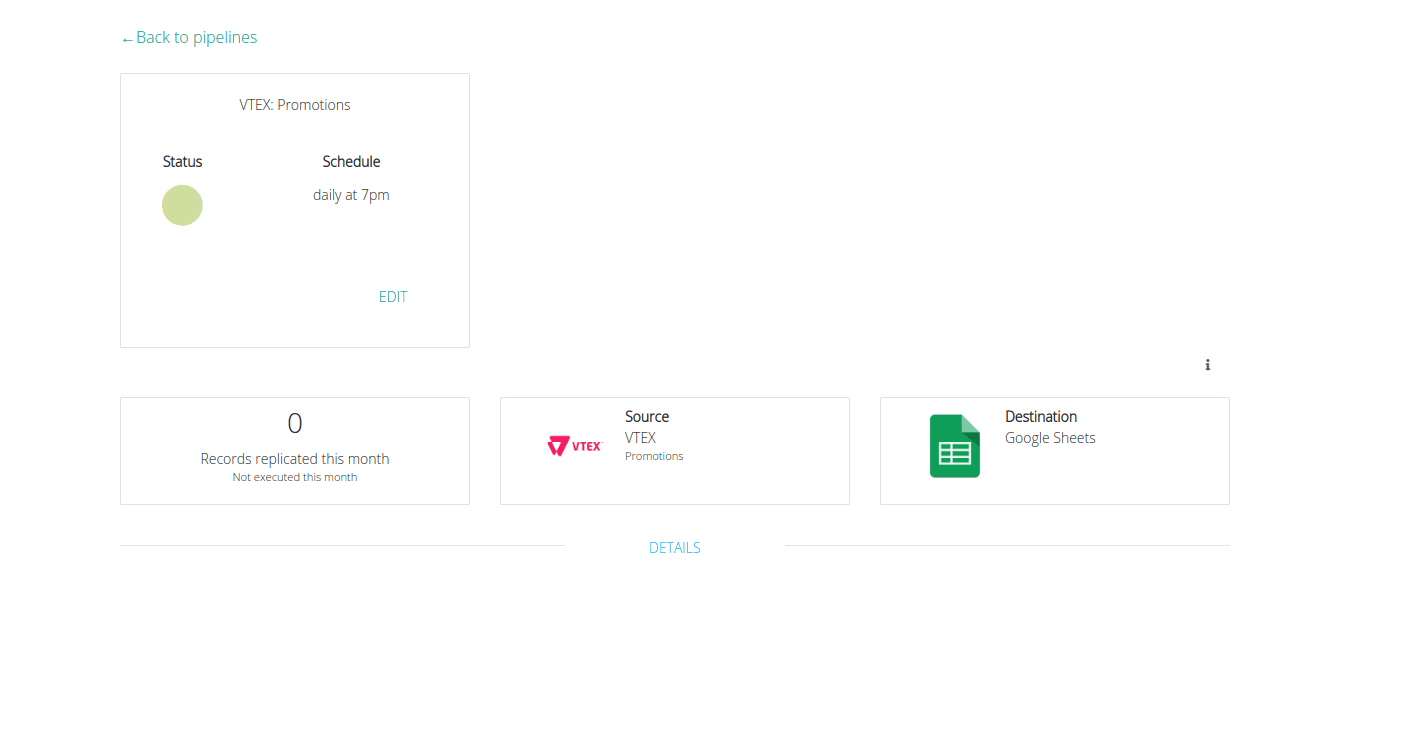
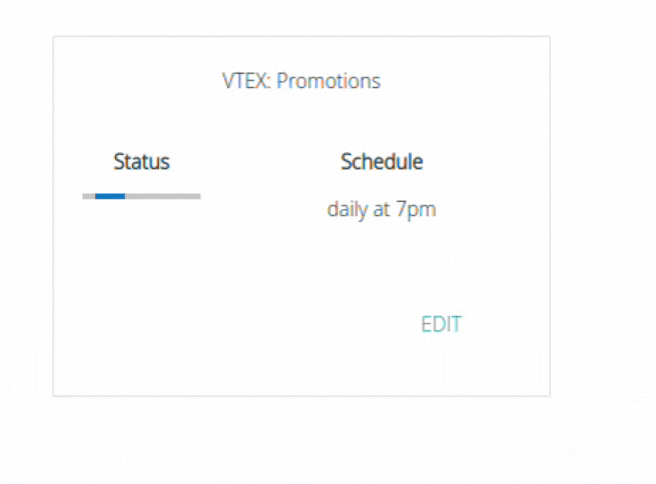
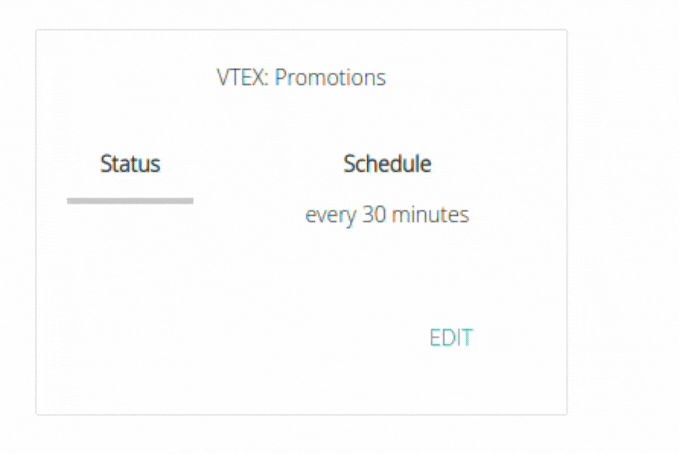
Once the pipeline is saved, you will be directed to its details page. On this page, you can monitor its executions, edit its settings, run it manually, and check the names of the tables and fields being sent. The first execution of the pipeline will be performed automatically at the frequency you set. However, if you want to run it immediately, click on “Run” (it will appear next to “edit”):
To change the frequency or deactivate the pipeline, click on "Edit" and configure it as desired:
To edit all the initial settings (steps 1 to 10) of the pipeline, click on "Edit" and then on “Advanced”:
To view the names of the tables and fields being sent, click on “Details”:

Create a data pipeline on Kondado
Learn how to build a no-code pipeline that connects your data sources to destinations and automates data transfers at your chosen frequency.
Register and test your source and destination
Before creating a pipeline, ensure you have at least one data source and one destination registered and functioning. Test each connection by clicking "Test Connection" in their respective settings.
Start the pipeline creation process
Click on "CREATE +" and select "PIPELINE". If you only have one source and one destination configured, Kondado will auto-fill these fields for you.
Select your destination and source
Manually choose your desired destination and source if you have multiple options registered. The platform supports various sources like Toggl and destinations like Via Kondado.
Choose the table or object to integrate
Select the specific table or object from your data source. Pipeline configuration options will vary depending on the selected object and its structure.
Configure table settings and field selection
Define the table name for your destination, enable delta/historical tables if your destination supports it, and click "FIELDS" to review or uncheck specific fields you don't want to send.
Name your pipeline and set update frequency
Give your pipeline a clear name and choose how often data should update. Click "Save Pipeline" to finalize the initial configuration.
Monitor, run, or edit your pipeline
On the pipeline details page, you can monitor executions, run the pipeline manually with "Run", or click "Edit" to change frequency, deactivate, or access "Advanced" settings to modify all initial configurations.