Data democratization is fundamental for implementing and strengthening a data-driven culture.
For this reason, Kondado aims not only to open the black box behind dashboard charts but also to simplify data integration and modeling for users.
Our platform allows you to add unlimited users (with predefined permissions) to your company's account. These users can include your team members and external consultants. In the latter case, consultants can be linked to multiple accounts simultaneously, enabling unified management of your clients.
Let’s see how easy it is to add and manage users and access permissions in Kondado.
Adding New Users
Before creating a user, ensure you have the necessary permissions to do so.
In your account, access the "Settings" menu by clicking on your email at the top-right corner of the screen: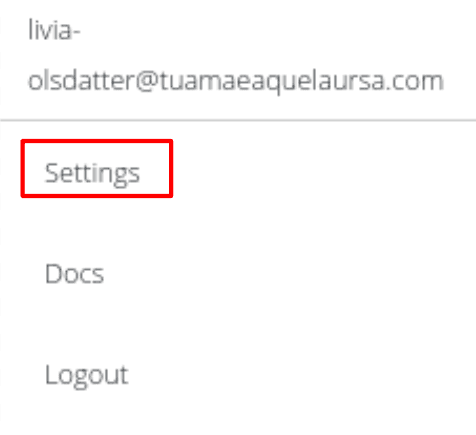
In the settings section, go to the "USERS" menu: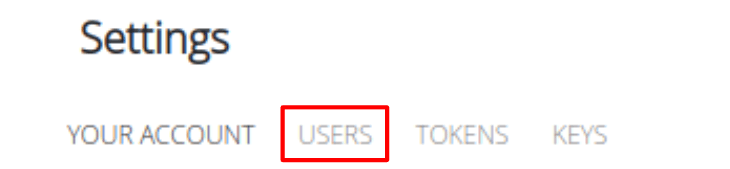
In the users section, you will see a list of users associated with your account and a button on the left: "CREATE +". Click it to add a new user:
The menu to add a user will open. The fields are described below:
- Email and Confirmation: These two fields must contain the same value: a valid email address of the user you want to add.
- Time Zone: As you can schedule the integration execution time, it is essential that the selected time zone matches the user's time zone. For example, when it is 3 PM in São Paulo, it is not 3 PM in Acre.
- Permissions: Leaving the permission fields blank will not limit the new user’s access to most features of Kondado. However, by activating them, you grant the following privileges:
- Manage Users: Allows the user to create, edit, activate, and deactivate other users. This permission also grants access to the user management screen, as shown in this tutorial.
- Manage Financials: With this permission, the user can:
- Change the company’s plan;
- Purchase or modify other products;
- Edit financial information, such as payment method, tax ID, and invoice due dates.
If you are satisfied with the fields you filled out, click "SAVE". The new user will fall into one of two scenarios:
- If the user does not yet exist within Kondado, they will receive a welcome email at the registered address. The email will request the creation of a new password and completion of registration.
- If the user already exists within Kondado, they will receive an email notifying them that the addition is complete. To view the new team, they will need to accept the invitation in the account section.
Done! You’ve just created a team in Kondado!
Editing Existing Users
When a user is created in Kondado, they become responsible for their account and accesses. Editing users only allows you to change how they interact with your account:
To unlink a user from your account, locate them in the user list and click the toggle on the right. This will immediately revoke their access to your Kondado data.
Note: Tokens generated by this user will also stop working!
To relink a previously unlinked user, follow the same procedure: click the toggle:
To manage the permissions a user has in your account, click the pencil icon to the left of their email. You can apply the permissions available at the time of their creation. You can only change permissions for users actively linked to your account:
Login Settings
In the user management page, you can also configure how users can log in and access your company’s account: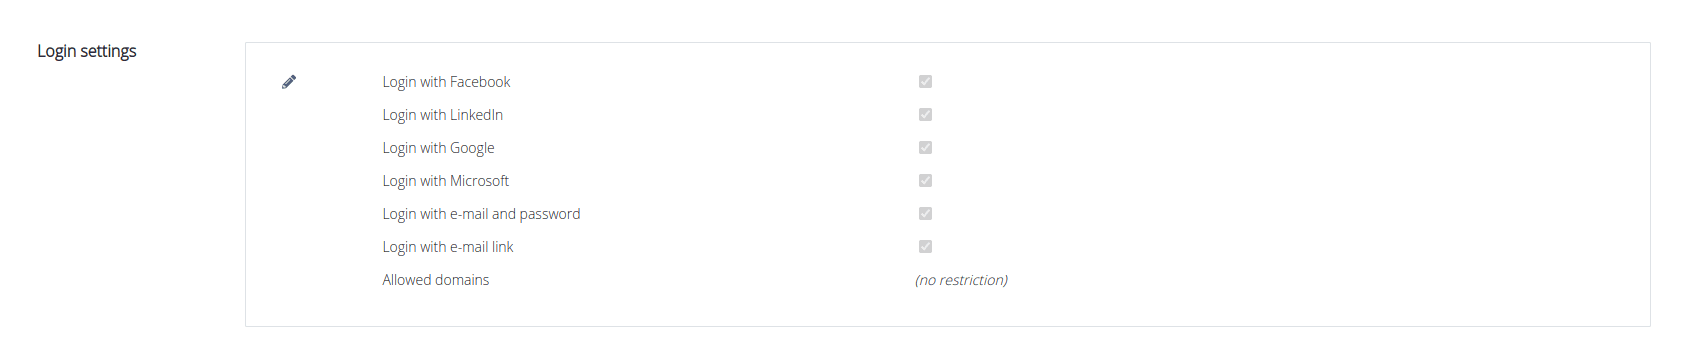
Available login methods are as follows:
- Email and password: The user provides their email (login) and password.
- Login via email link: The user receives a link in their registered email, which can be used to log in without a password.
- Login with Microsoft account: User access is confirmed via OAuth2 authorization with their Microsoft/Azure account upon receiving a response from the registered email.
- Login with Google account: User access is confirmed via OAuth2 authorization with their Google account upon receiving a response from the registered email.
- Login with LinkedIn account: User access is confirmed via OAuth2 authorization with their LinkedIn account upon receiving a response from the registered email.
- Login with Facebook account: User access is confirmed via OAuth2 authorization with their Facebook account upon receiving a response from the registered email.
Additionally, it is possible to restrict the email domains that can access the company account. In "Allowed Domains", specify one or more domains separated by commas. If no domain is specified, there will be no domain restrictions, and all users registered in the company will be able to log in with any email domain. An email domain is defined as the characters after the "@" in an email address. For example, in info@kondado.com.br, the domain is kondado.com.br.
Centralized Management of Corporate Accounts
For corporate accounts from providers like Google (Workspace) or Microsoft (Azure AD), you can centralize the management of your users by allowing login only through this provider and restricting the email domain to your company’s account.
For instance, if your company emails use the domain "empresa.com.br" and you configure login only with Microsoft and restricted to this domain, removing a user from your Microsoft account (Azure AD) will automatically revoke their access to Kondado.
This way, you can centralize the management of your users’ accounts within your provider.
Two-Factor Authentication (MFA/2FA)
By enabling two-factor authentication (MFA) for accounts used to log in to Kondado and allowing only this login method, you add an extra layer of protection to your Kondado account.
To enable two-factor authentication in Kondado:
Visit the appropriate link (below) for the chosen login method and enable two-factor authentication in your account:
In Kondado's login settings (Settings > Users), leave only the chosen login method enabled and disable the others (if more are enabled).
In the "Allowed Domains" field, enter only the domain(s) used by your company: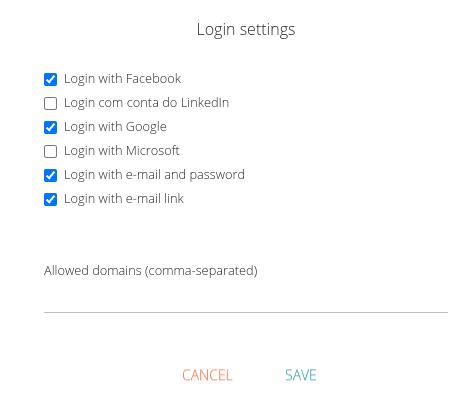
Click "Save" to apply the changes. On your next login to the platform, two-factor authentication will be active!
Access Blocking
The login settings available in this menu only take effect during the user’s login attempt. Therefore, if a user is already logged in and the permitted login methods are changed for this account, the user will remain logged in until their session expires and will be blocked only on their next login attempt.
The login settings defined by the company are absolute for all users associated with the company account.
If a user has access to multiple companies, a company’s configuration may prevent global login for the user’s account. In this case, a message will indicate that the login method is not allowed for one of the associated companies, and the user must contact the company to resolve the issue.
Additionally, users with access to multiple companies can unlink themselves from a certain account to, for example, avoid improper login restrictions. In Settings > Your Account, simply click "REMOVE" for a specific team in the "Associated Teams" section. This operation cannot be reversed by the user and will require new access authorization by the company. This section is available only for users with access to multiple teams.
Once invited to a new team, the user must accept the new link to access the new company (and comply with its login settings).
Manage Users and Access Permissions in Kondado
Configure user accounts, permissions, login methods and corporate authentication to keep your Kondado workspace secure.
Open user management
Click your email at the top-right of the platform, open Settings and go to the USERS section to view and manage users on your account.
Add a new user
Click CREATE +, enter a valid email twice, choose the correct time zone for scheduled pipelines, and assign the Manage Users and Manage Financials permissions as needed before saving.
Edit existing users and permissions
Use the toggle to link or unlink users and click the pencil icon next to an active user to update their Manage Users and Manage Financials privileges.
Choose login methods and allowed domains
In the login settings, enable only the authentication methods you want (email/password, email link, Google, Microsoft, LinkedIn or Facebook) and list your company domain(s) in Allowed Domains.
Centralize access with your identity provider and MFA
For Google Workspace or Microsoft Azure AD, allow only that login method, restrict to your domain and enable MFA in the provider so removing a user there automatically revokes their Kondado access.