
Before we dive into the detailed tutorial, let's take a quick foray into the world of Redshift and Power BI, two tools that have transformed the way we interact with and extract value from data.
By uniting Redshift and Power BI, you are not only optimizing your data analysis pipeline but also creating a framework where information can be easily accessed, analyzed, and shared, promoting an informed data culture and data-driven decisions in your organization.
Now, with a clear understanding of the potential that the integration between Redshift and Power BI holds, let's move on to the detailed tutorial that will guide you through the process of connecting these two powerful tools.
Centralizing Data in Redshift with Kondado
3. Creating your first integration: Now that your data destination and data sources are registered, you can create your first integration by following the platform onboarding steps
Note
To establish the connection between Redshift and Power BI, the IP of the machine where the connection will be made (which has Power BI installed) must be allowed in the server's firewall of your database. If your database is hosted on AWS, in this tutorial (from step 2 to 7) we show you how to release your IPs in the security group.
Connecting Amazon Redshift to Microsoft Power BI:
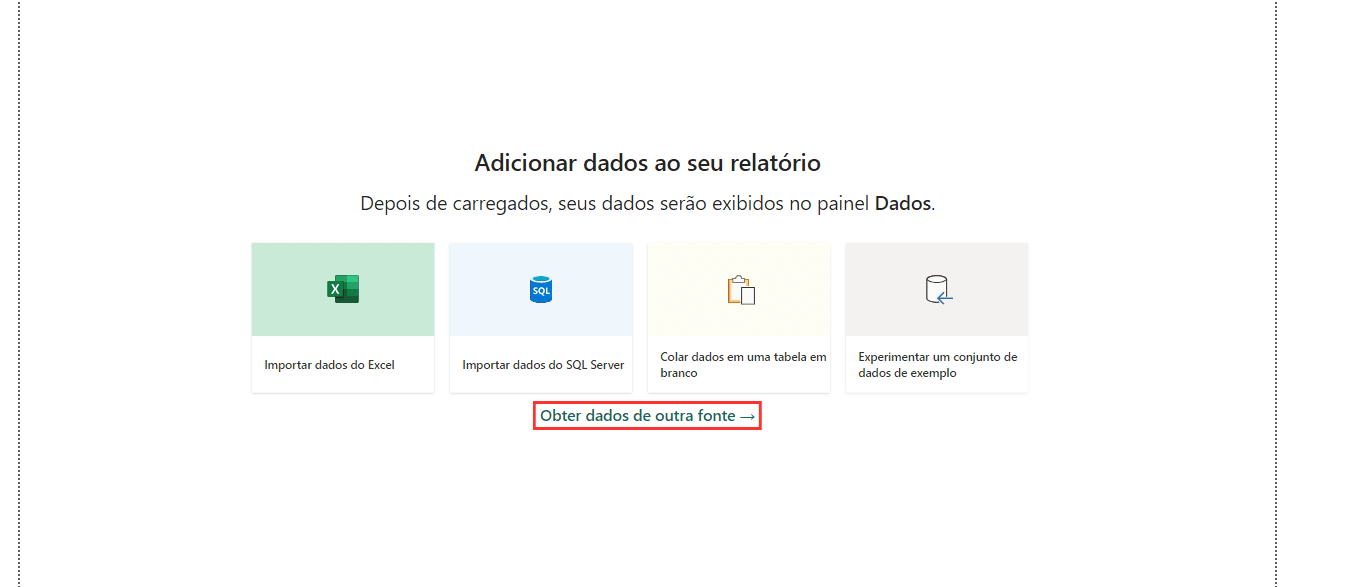
Open Power BI Desktop on your computer and on the Power BI start screen, click on "Get data from another source".
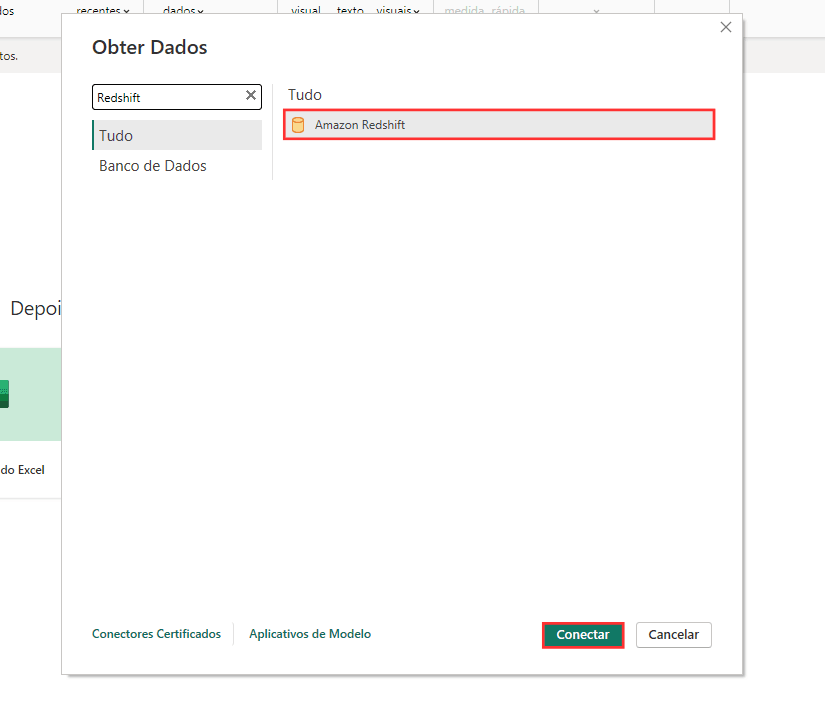
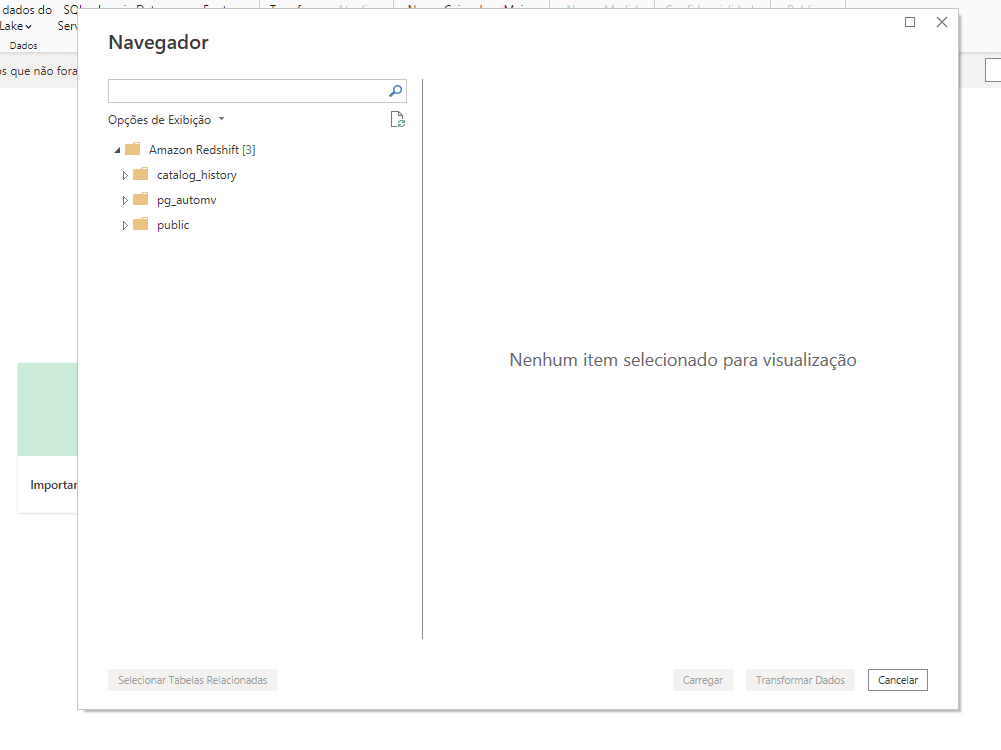
A window will open. Look for and select "Amazon Redshift" from the list of available data sources and click on "Connect".
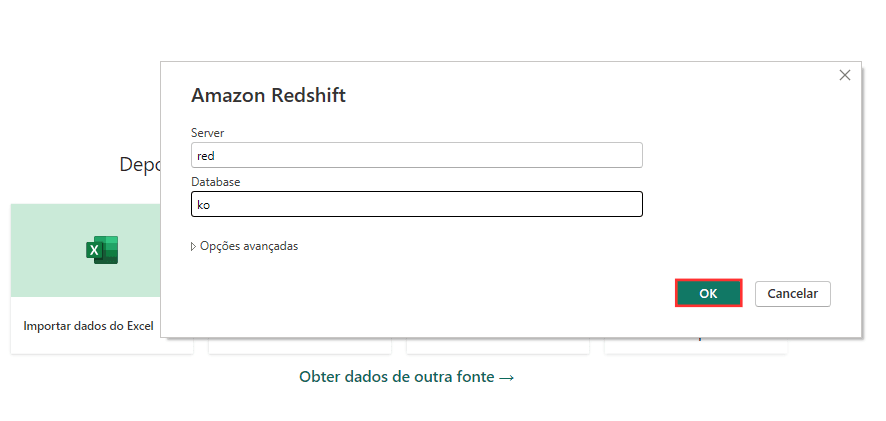
Enter the necessary information to connect to your Redshift database. This includes the server name and database name. After that, click on “OK”.
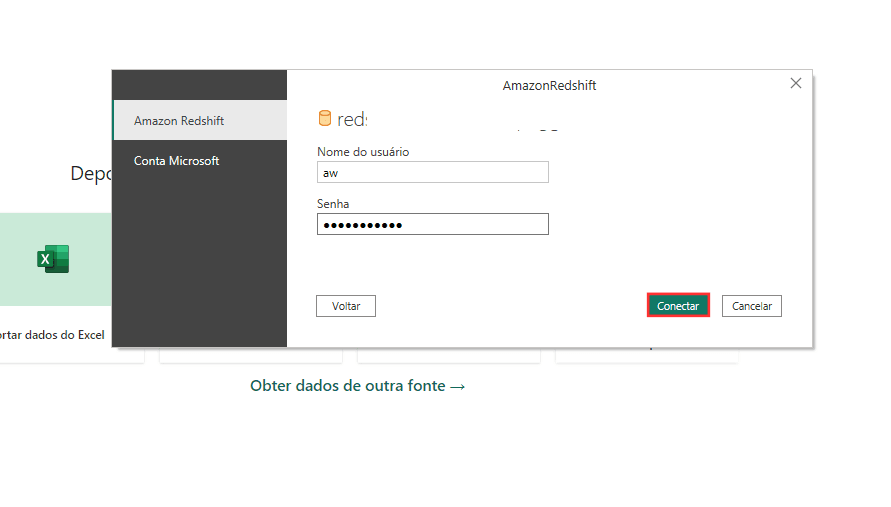
Provide your user credentials and password for the database.
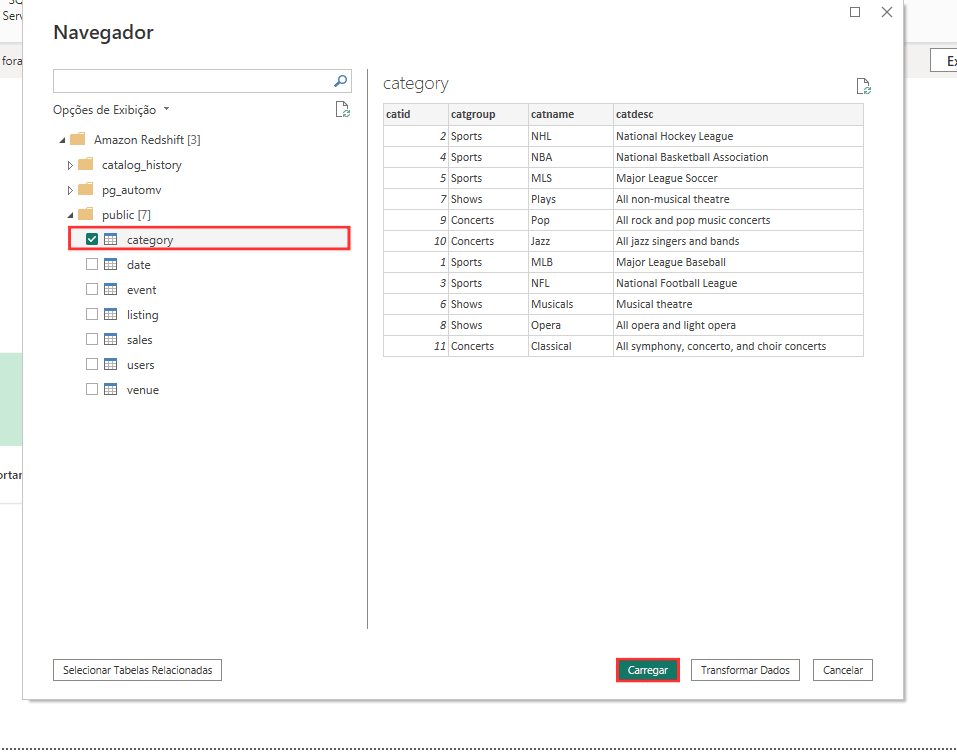
Once connected, you will be presented with a list of available tables in your Redshift database.
Select the tables you want to import and click on "Load".
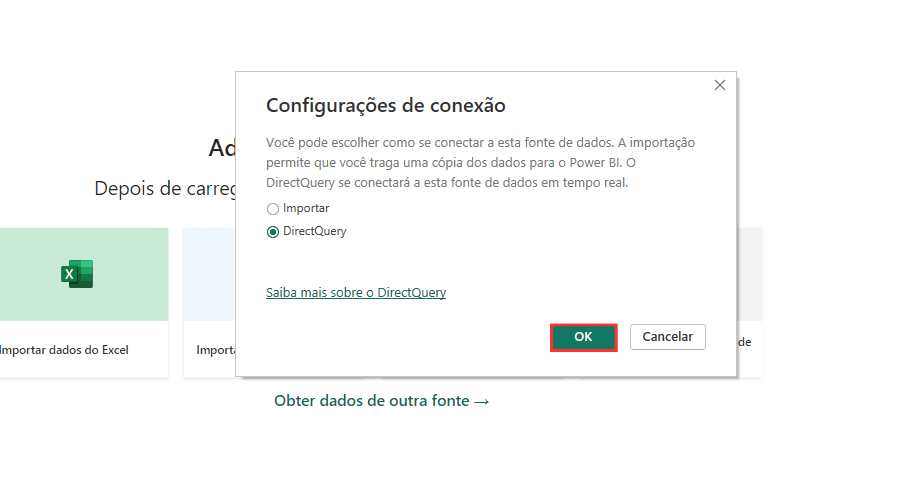
After this step, you will be presented with the connection settings. Select the “DirectQuery” option so that the data is updated in Power BI as it is updated in your Redshift database.
Done! Your Redshift database is now linked to Power BI, enabling you to explore, analyze, and visualize your data more effectively and intuitively.
Connect Amazon Redshift to Power BI
Centralize data in Amazon Redshift with Kondado and connect it to Power BI Desktop to build dashboards.
Register Redshift as a destination in Kondado
Log in to Kondado and add your Redshift cluster as a destination using endpoint, port, database, user, and password.
Create data sources and pipelines into Redshift
Configure the sources you want to replicate (ads, CRM, e-commerce, ERPs) and set Kondado to load them into Redshift at the frequency you choose.
Open the Redshift security group to Power BI
On AWS, edit the security group attached to your Redshift cluster and add an inbound rule allowing the Power BI machine's IP on the cluster port (default 5439).
Connect Power BI Desktop to Redshift
In Power BI, click Get Data > Amazon Redshift, enter the server endpoint and database, then pick DirectQuery to query Redshift live or Import for a snapshot.
Authenticate and load the tables you need
Provide the Redshift user and password, choose the schemas and tables Kondado is loading into, then click Load to bring them into Power BI.
Build and publish your report
Model the data, create your visuals, and publish to Power BI Service. Configure scheduled refresh aligned with how often Kondado updates Redshift.
Frequently asked questions
SELECT access on the relevant schemas. Use a dedicated read-only user when possible to follow least-privilege principles.