MCP (Model Context Protocol) on Via Kondado lets you connect ChatGPT — in any of its products — directly to your data integrated in Kondado. Once connected, you can ask ChatGPT to list tables, describe fields, and run queries in natural language without leaving the chat.
This article covers how to set up the connection in ChatGPT (Web and Desktop) and in Codex (OpenAI's CLI). For the general MCP concept on Via Kondado and the alternative token-based path, see the MCP section of the main Via Kondado article. To connect the Claude family (Anthropic), see the Claude article.
https://mcp.kondado.io/mcpSame URL for every customer — authentication resolves which account each call belongs to.
ChatGPT (Web)
The walkthrough below was validated on a Free / Personal account. The same steps work on paid plans.
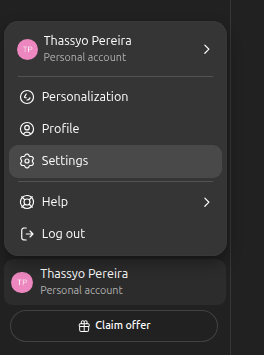
Step 1. Open ChatGPT Web and click your account avatar (top right) → Settings.
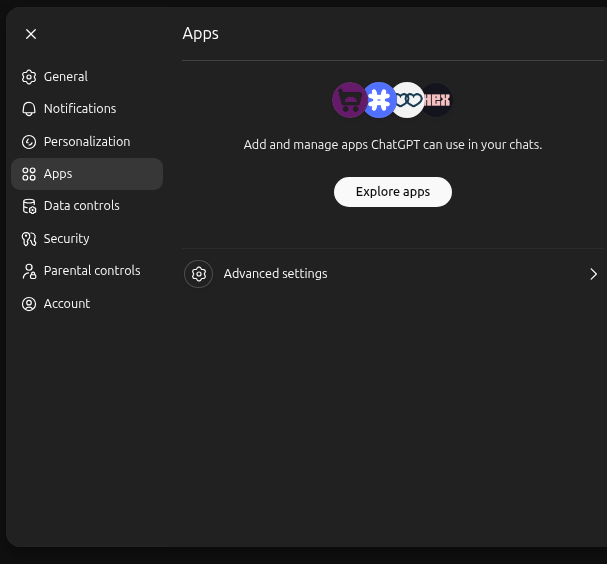
Step 2. In the Settings sidebar, click Apps. Scroll to the bottom of the page and click Advanced settings.
Step 3. Under Advanced settings, turn on the Developer mode toggle and confirm the risk warning. Without this step the "Create app" button will not be enabled.
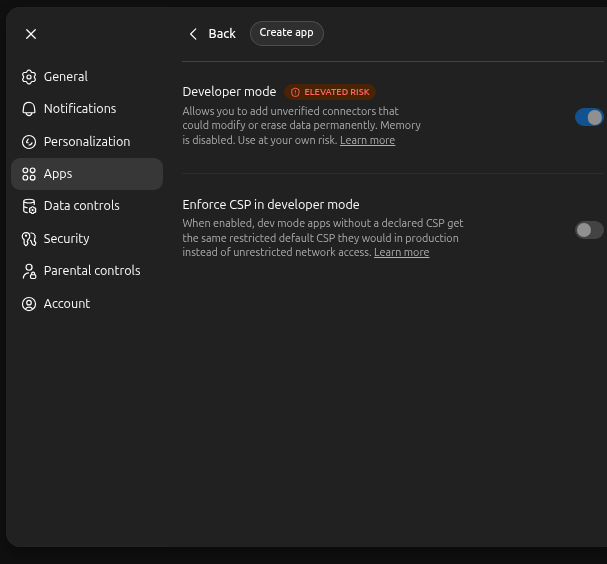
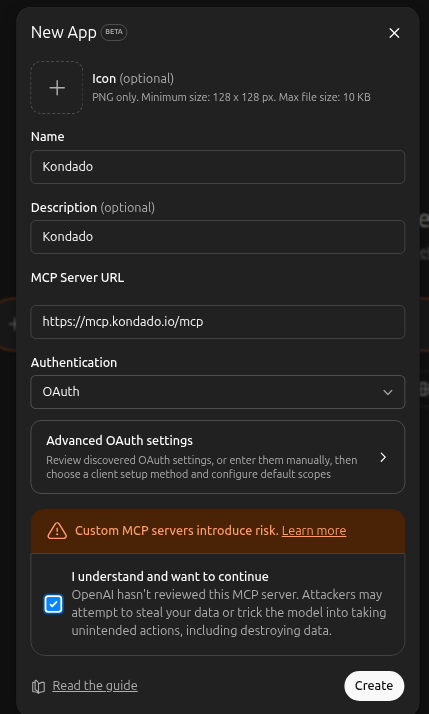
Step 4. Still in Advanced settings, click Create app. In the New App modal, fill in:
- Name: Kondado (or any name of your choice)
- MCP Server URL:
https://mcp.kondado.io/mcp - Authentication: leave it on OAuth — there is no need to expand Advanced OAuth settings; ChatGPT discovers the auth server automatically.
- Tick the "I understand and want to continue" checkbox (risk acknowledgment).
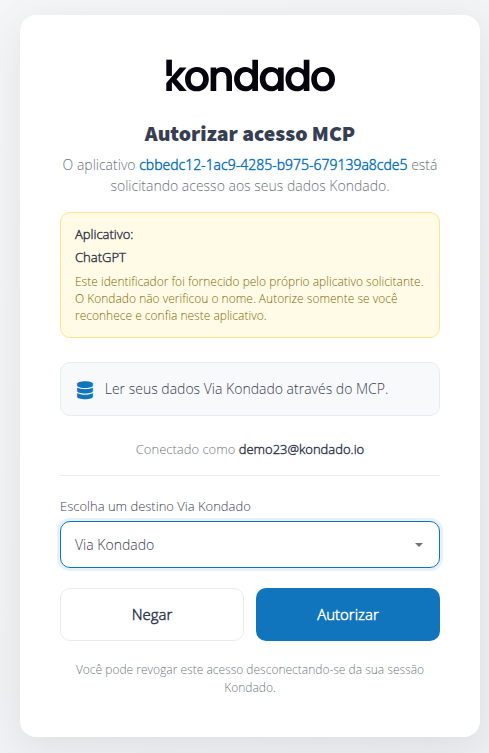
Step 5. When you click Create, ChatGPT opens a new tab at app.kondado.com.br with the "Authorize MCP access" screen. Confirm that the connected email is yours, pick the destination Via Kondado from the dropdown, and click Authorize.
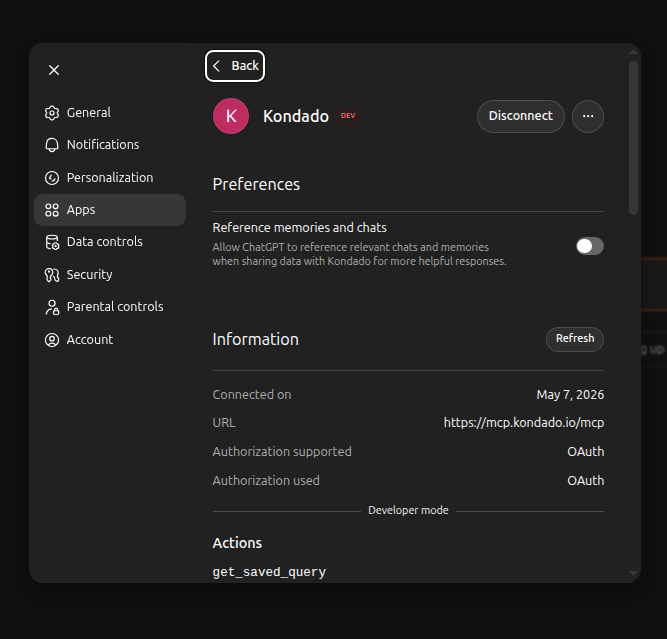
Step 6. The consent tab closes itself and the app appears connected inside ChatGPT, with a DEV badge. The Kondado tools are immediately available for use.
Step 7. To use the connector, open a Developer mode chat. The input box has an orange border indicating dev mode, and Memory is disabled for this kind of chat.
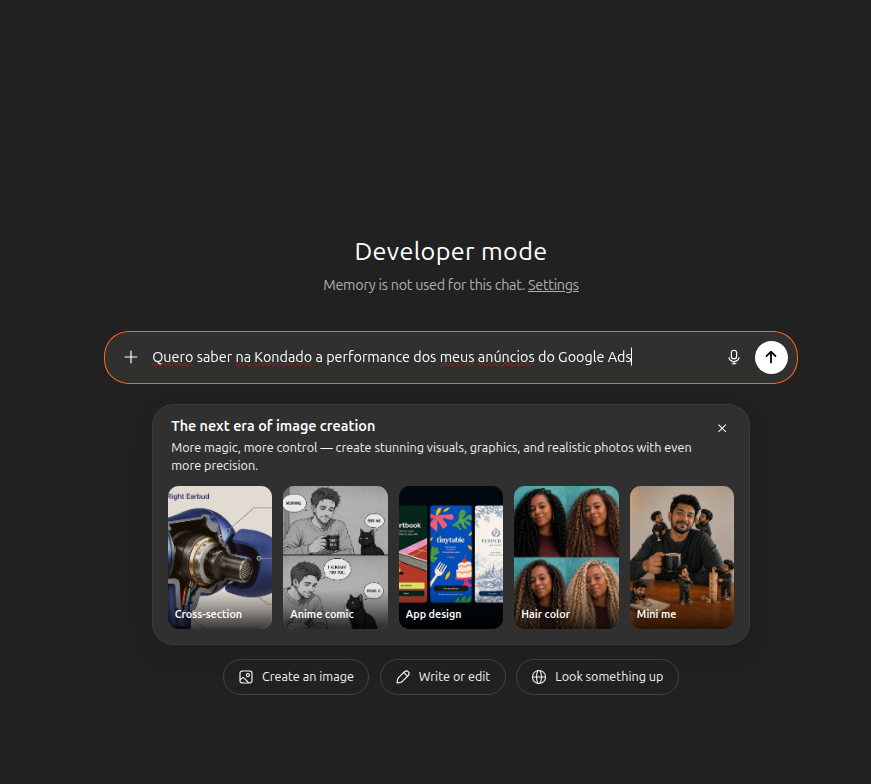
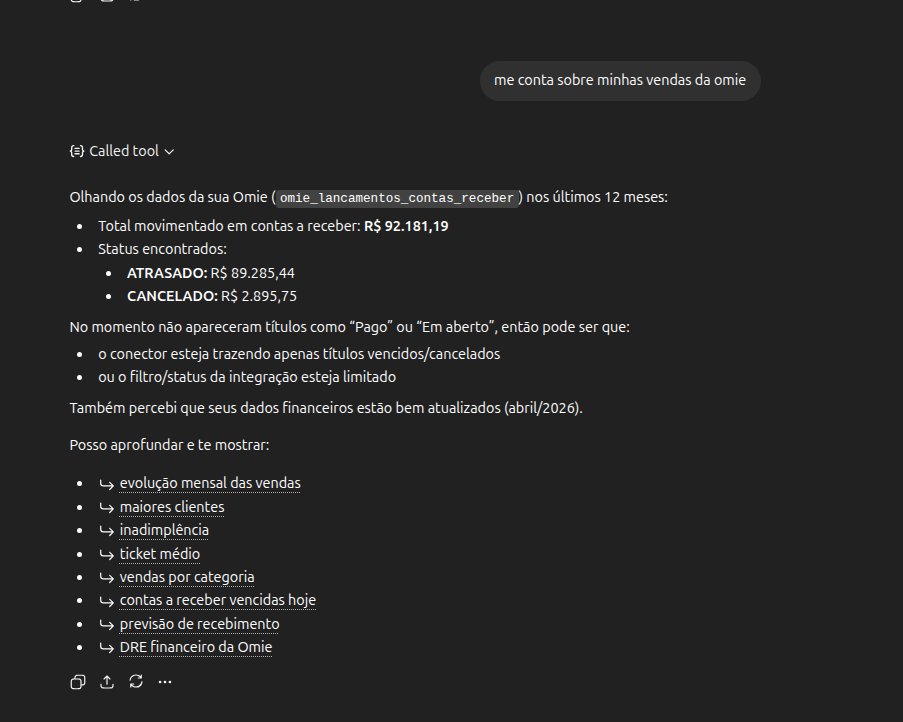
That's it. Ask a question about your data — for example, "tell me about my Omie sales". ChatGPT will call the Kondado tools, run the queries, and return the results in the chat.
ChatGPT (Desktop)
The Desktop version of ChatGPT (Mac and Windows) uses the same account and the same connectors configured on the Web:
- Connectors added on the Web automatically show up on Desktop (and vice versa).
- The OAuth flow (Kondado sign-in + destination pick + Approve) also runs in your system's default browser.
- If your Desktop version exposes its own Connectors menu, the registration is identical to the Web (same Name + same URL
https://mcp.kondado.io/mcp).
If your Desktop app doesn't yet expose the custom-connector UI, configure it on the Web and the connection will propagate to the app.
Codex (OpenAI CLI)
Codex is OpenAI's terminal CLI (the counterpart of Anthropic's Claude Code). It accepts MCP servers via a direct command or via the ~/.codex/config.toml file.
Option A — direct command
In the terminal:
codex mcp add kondado --url https://mcp.kondado.io/mcp
codex mcp login kondado
The codex mcp login kondado command opens the browser at the Kondado sign-in screen and then at the "Authorize MCP access" screen. After picking the Via Kondado destination and clicking Approve, the token is stored locally by Codex and refreshed automatically.
Option B — config file
Add this to your ~/.codex/config.toml:
[mcp_servers.kondado]
url = "https://mcp.kondado.io/mcp"
Then run codex mcp login kondado to do the OAuth consent once. From there on, Codex uses the stored credentials on every subsequent call.
Useful commands
codex mcp list— lists the registered MCP servers.codex mcp logout kondado— removes the stored OAuth credentials (useful for switching to a different Via Kondado destination).codex mcp remove kondado— removes the registered server.
codex mcp add complains about a flag or subcommand, update the CLI to the latest version and try again. The server URL (https://mcp.kondado.io/mcp) and the OAuth flow (sign-in + destination pick + Approve) do not change.
Other OpenAI clients
As OpenAI adds MCP support to new products (SDKs, Apps, etc.), the pattern is always the same:
- Register the MCP server with the URL
https://mcp.kondado.io/mcp. - On the first call, the client opens the Kondado consent screen at
app.kondado.com.br. - You pick the Via Kondado destination and approve.
For third-party MCP clients or server-to-server integrations that do not support OAuth, you can use the legacy Via Kondado token — see the MCP section of the Via Kondado article.
Tips and troubleshooting
- Switch Via Kondado: remove the connector in ChatGPT (or run
codex mcp logout kondado) and add it again. Going through consent again lets you pick a different destination in the dropdown. - Token expired: ChatGPT and Codex refresh the token automatically via the refresh token. If you still see an authentication error, redo the connection (remove + add).
- I don't see all my tables: the connector only sees tables in the destination you picked on the consent screen. Make sure you selected the right destination during consent.
- "Create app" button is disabled: turn on Developer mode under Settings → Apps → Advanced settings. Without it the button stays grayed out on every plan. On Business / Enterprise workspaces, ask your admin to unblock Developer mode if the toggle is locked.
- v1 limitations: MCP is read-only (queries only) and uses KSQL. You cannot write, update, or delete data in Via Kondado through MCP.
FAQ
What is Kondado MCP in ChatGPT?
Do I need a paid ChatGPT plan?
What is Developer mode and why does it need to be ON?
Can I connect more than one Via Kondado destination?
codex mcp logout kondado in the Codex CLI) and add it again, picking a different Via Kondado.Does ChatGPT ask for permission on every query?
How do I remove the connection?
codex mcp logout kondado then codex mcp remove kondado.Does it work in Codex (CLI) too?
https://mcp.kondado.io/mcp — and OAuth authentication follows the same pattern as Web/Desktop.Next steps
- Via Kondado — destination overview
- MCP section in the Via Kondado article — differences between OAuth and the legacy token
- Claude — how to connect the Claude family (Web, Desktop, Code) to Via Kondado
Connect Via Kondado to ChatGPT via MCP
Set up a custom MCP app in ChatGPT (Web, Desktop, or Codex) to access your Via Kondado on any plan.
Enable Developer mode
Under Settings → Apps → Advanced settings, turn on the Developer mode toggle. Without it, the Create app button stays disabled on every plan.
Create an MCP app
In Advanced settings, click Create app. Fill in Name (Kondado) and MCP Server URL with https://mcp.kondado.io/mcp.
Authorize Via Kondado
ChatGPT opens the Kondado consent flow. Sign in and pick which Via Kondado the app can access.
Confirm and enable the app
Approve access and enable the app in chat. No per-query approval needed — consent is server-level.
Use in natural language
Open a new chat, mention the Kondado app and ask for the queries in natural language.
Frequently asked questions
codex mcp logout kondado in the Codex CLI) and add it again, picking a different Via Kondado.codex mcp logout kondado then codex mcp remove kondado.https://mcp.kondado.io/mcp — and OAuth authentication follows the same pattern as Web/Desktop.