MCP (Model Context Protocol) on Via Kondado lets you connect Claude — in any of its products — directly to your data integrated in Kondado. Once connected, you can ask Claude to list tables, describe fields, and run queries in natural language without leaving the chat.
This article covers how to set up the connection in Claude Web, Claude Desktop, and Claude Code. For the general MCP concept on Via Kondado and the alternative token-based path, see the MCP section of the main Via Kondado article.
https://mcp.kondado.io/mcpSame URL for every customer — authentication resolves which account each call belongs to.
Claude Web
Validated on claude.ai. The whole flow takes less than a minute and uses OAuth — you do not need to copy any token by hand.
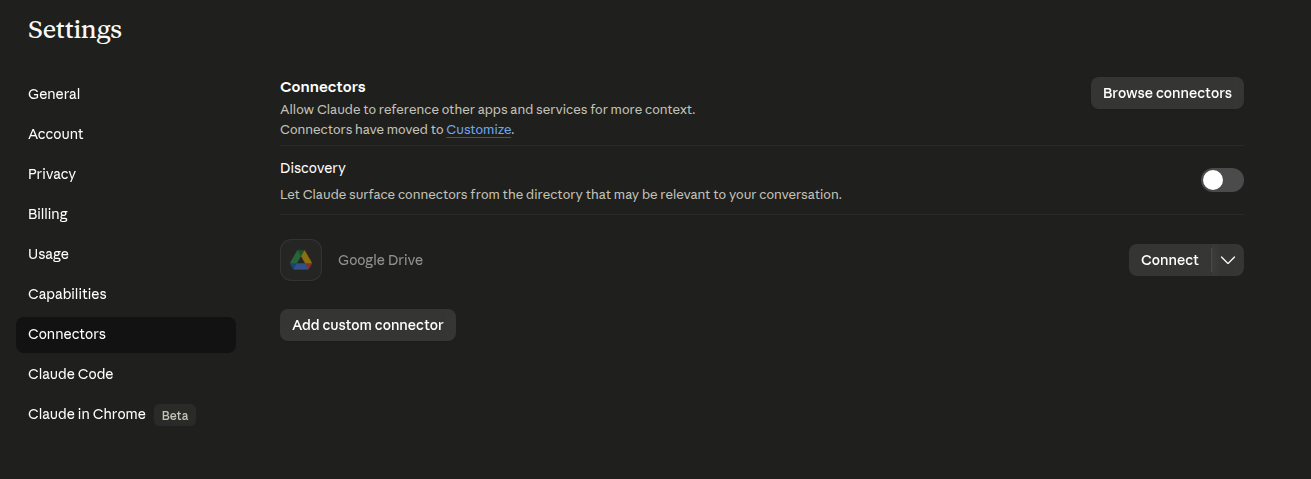
Step 1 — Open Customize → Connectors
In Claude Web, open Customize → Connectors in the left sidebar. Scroll to the bottom of the page and click "Add custom connector".
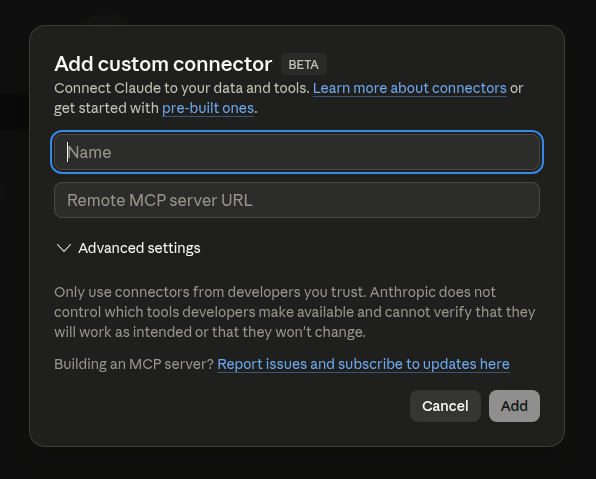
Step 2 — Configure the connector
In the "Add custom connector" modal:
- Name:
KondadoorVia Kondado(any clear label — it is just cosmetic). - Remote MCP server URL:
https://mcp.kondado.io/mcp(full URL, including the trailing/mcp). - Advanced settings: leave the defaults — you do not need to configure headers manually; authentication is discovered automatically.
Click Add. Claude validates that the server responds.
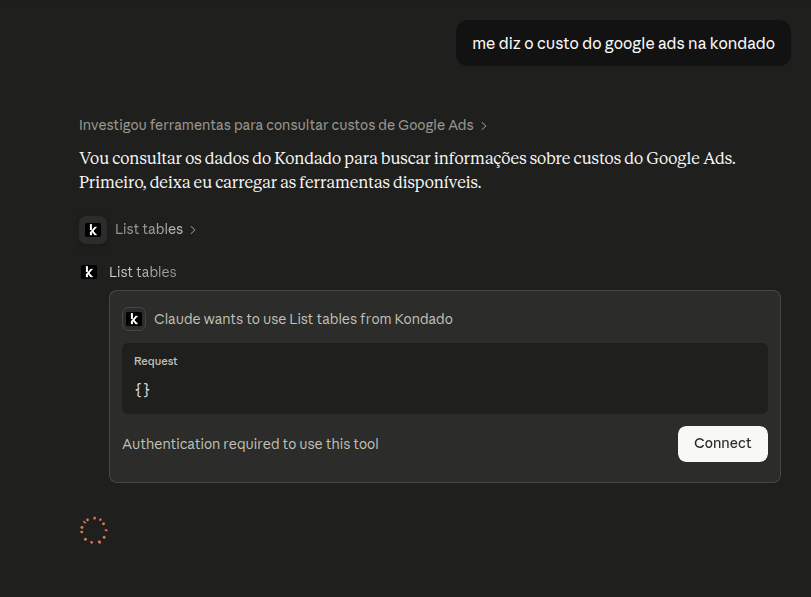
Step 3 — Trigger the first call
Open a new chat and ask something that uses Kondado, for example:
- "What tools do you have available from Via Kondado?"
- "List the Kondado tables."
- "How much did I spend on Google Ads last month?"
On the first call, Claude shows an "Authentication required to use this tool" card with a Connect button. Click Connect.
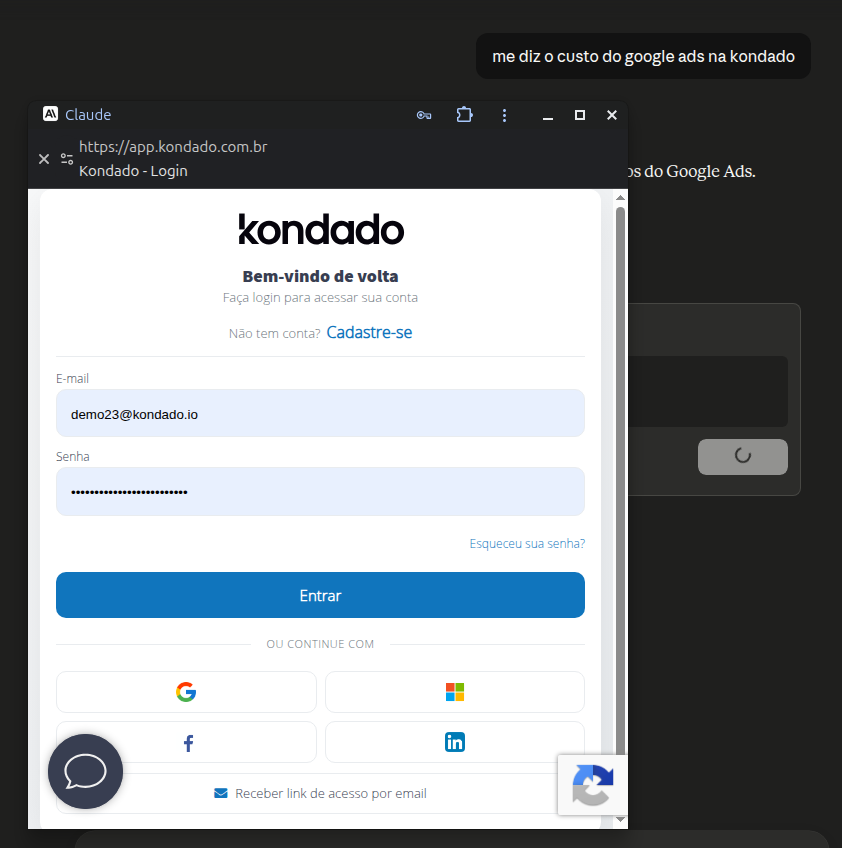
Step 4 — Sign in to Kondado
A browser window opens at the Kondado login screen (app.kondado.com.br). Sign in with your email and password (or social login).
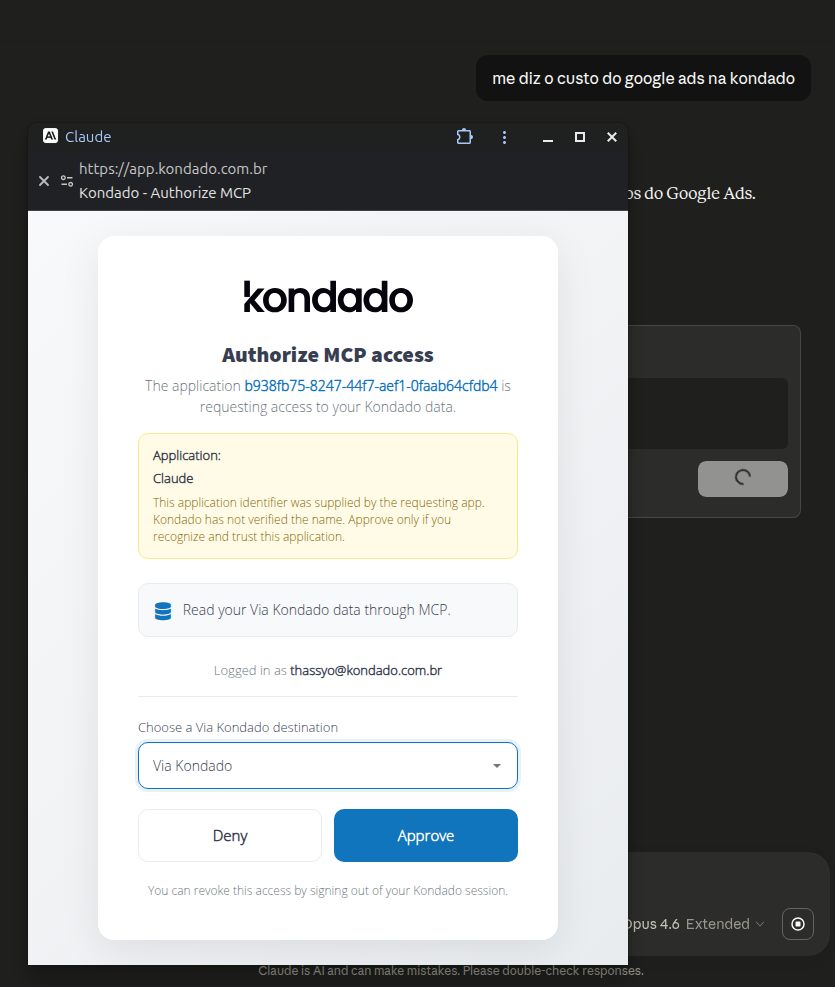
Step 5 — Authorize access and pick a Via Kondado
Next, the "Authorize MCP access" screen appears:
- Confirm you are signed in as the right user (the "Logged in as ..." line).
- In the Choose a Via Kondado destination dropdown, pick which destination Claude should query. If you have more than one Via Kondado configured, pick the one you want Claude to run queries against.
- Click Approve.
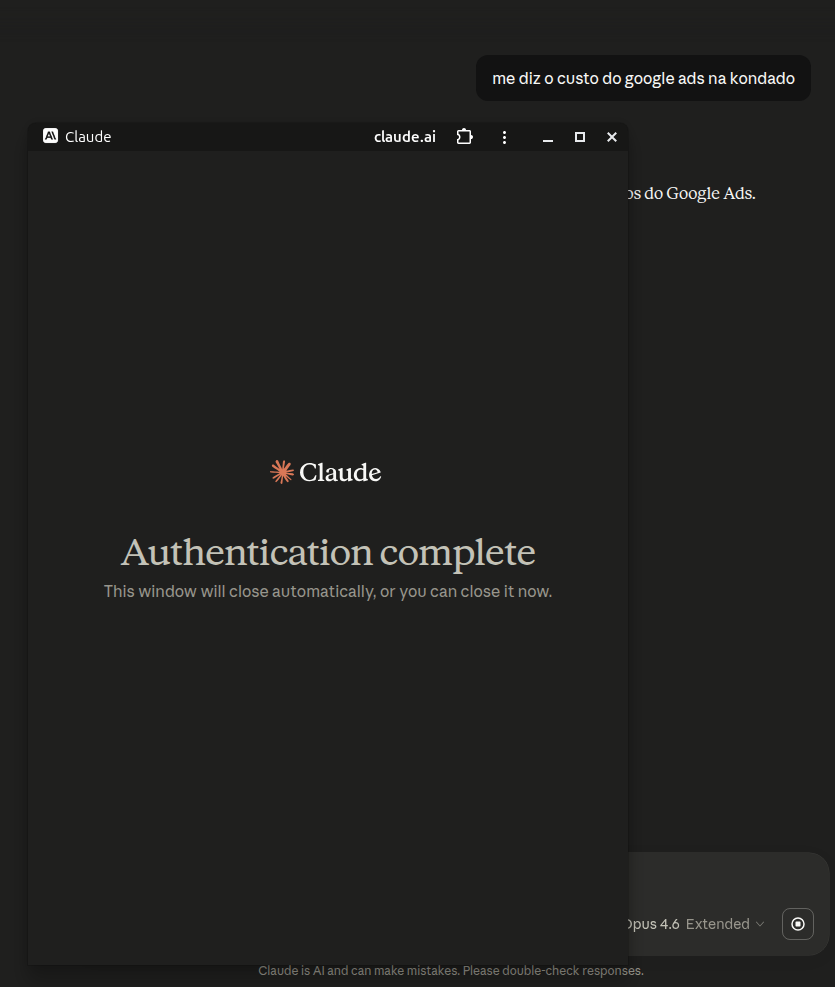
Step 6 — Confirmation
The window shows "Authentication complete" and closes itself after a few seconds.
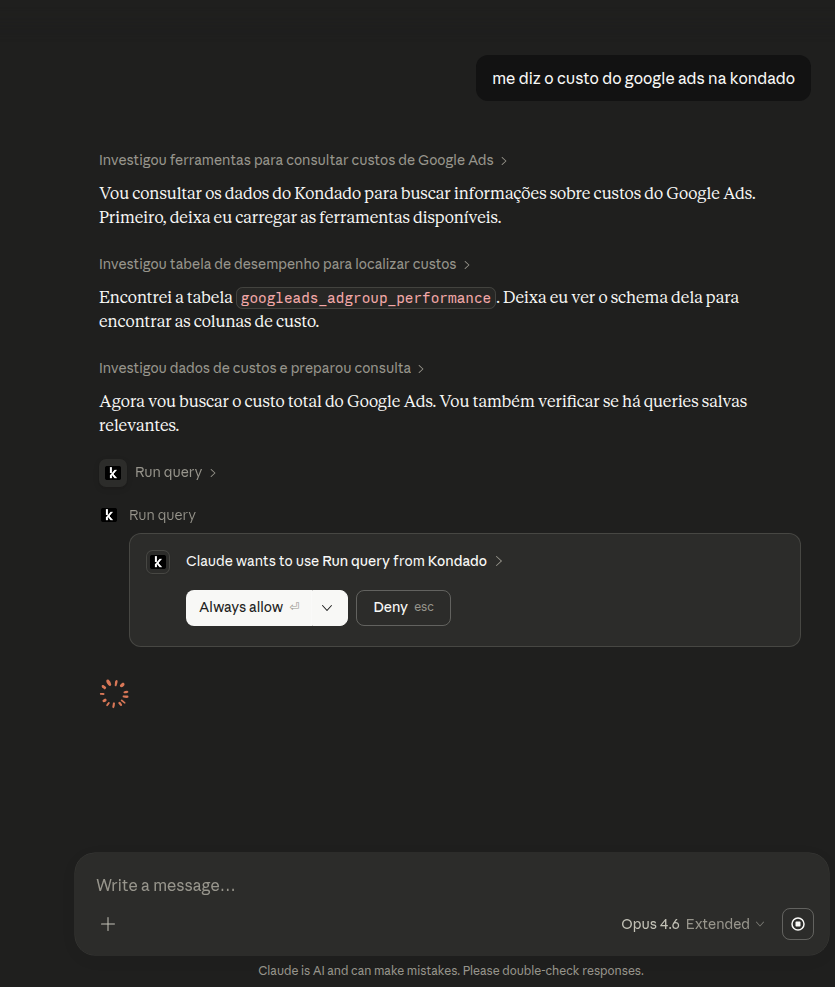
Step 7 — Allow tool calls in Claude
Back in Claude, the tool call that was waiting for authentication runs automatically. From there on, Claude asks for permission per tool call ("Claude wants to use Run query from Kondado") with Always allow / Deny buttons.
Click Always allow if you want to stop seeing this pop-up for that tool.
Claude Desktop
Claude Desktop also supports remote MCP servers. The configuration flow mirrors the Web version — you register the URL and Claude handles the rest through OAuth.
- Open Claude Desktop → Customize → Connectors.
- Click "Add custom connector" and fill in:
- Name:
Kondado - Remote MCP server URL:
https://mcp.kondado.io/mcp
- Name:
- Confirm. On the first call that uses Kondado, Claude Desktop opens the browser at the same consent screen described in steps 4 to 6 above.
- After approving, Claude Desktop stores the token and reuses it on subsequent calls — you do not need to sign in again.
Claude Code (CLI)
Claude Code is Anthropic's terminal CLI. It accepts MCP servers via a direct command or a config file.
Option A — direct command
claude mcp add kondado --transport http --url https://mcp.kondado.io/mcpOption B — config file
Add this to your Claude Code settings.json:
{
  "mcpServers": {
    "kondado": {
      "type": "http",
      "url": "https://mcp.kondado.io/mcp"
    }
  }
}
On the first tool call that uses Kondado, Claude Code opens the browser in the same OAuth flow described in steps 4 to 6 of Claude Web. After approving, the token is stored locally and refreshed automatically.
Other Claude clients
As Anthropic adds MCP support to new products in the Claude family, the pattern is always the same:
- Register the MCP server with the URL
https://mcp.kondado.io/mcp. - On the first call, the client opens the Kondado consent screen at
app.kondado.com.br. - You pick the Via Kondado destination and approve.
See also: to connect OpenAI products (ChatGPT Web/Desktop and the Codex CLI), see the ChatGPT article.
For third-party MCP clients (non-Claude) or server-to-server integrations that do not support OAuth, you can use the legacy Via Kondado token — see the MCP section of the Via Kondado article.
Tips and troubleshooting
- Switch Via Kondado: open Customize → Connectors, remove the connector, and add it again. Going through consent again lets you pick a different destination in the dropdown.
- Token expired: Claude refreshes the token automatically via the refresh token. If you still see an authentication error, redo the connection (remove + add).
- I don't see all my tables: the connector only sees tables in the destination you picked on the consent screen. Make sure you selected the right destination in Step 5.
- Claude asks for permission on every call: click Always allow the first time to stop seeing the pop-up for that specific tool.
- v1 limitations: MCP is read-only (queries only) and uses KSQL. You cannot write, update, or delete data in Via Kondado through MCP.
FAQ
What is Kondado MCP in Claude?
Which Claude plan does it work on?
Can I connect more than one Via Kondado destination?
What if the consent screen doesn't open?
/mcp (https://mcp.kondado.io/mcp); (2) pop-up blockers are off in the Claude tab — consent opens in a secondary window; (3) you're signed in to Kondado in another tab of the same browser. If it persists, remove and re-add the connector.Does Claude see my data? Where does it stay?
How do I remove the connection?
claude mcp remove kondado.Does it work in Claude Desktop and Claude Code too?
https://mcp.kondado.io/mcp — and OAuth authentication is identical across all three.Next steps
- Via Kondado — destination overview
- MCP section in the Via Kondado article — differences between OAuth and the legacy token
- ChatGPT — how to connect ChatGPT (Web/Desktop) and Codex (OpenAI's CLI) to Via Kondado
Connect Via Kondado to Claude via MCP
Set up the MCP connection between Claude (Web, Desktop, or Code) and your Via Kondado in a few steps, no manual token copy.
Open Settings → Connectors
In Claude Web, open Settings from the sidebar and select Connectors. Click Add custom connector at the bottom.
Configure the connector
Set a name (e.g. Kondado) and the URL https://mcp.kondado.io/mcp in Remote MCP server URL. Click Add.
Trigger the first call
Open a new chat and ask something that uses Kondado, e.g. "List my Kondado tables".
Authorize in Kondado
Sign in to Kondado in the OAuth window and choose which Via Kondado Claude can access.
Approve access and use
Click Approve to finish. From here Claude can query your data in natural language.
Frequently asked questions
/mcp (https://mcp.kondado.io/mcp); (2) pop-up blockers are off in the Claude tab — consent opens in a secondary window; (3) you're signed in to Kondado in another tab of the same browser. If it persists, remove and re-add the connector.claude mcp remove kondado.https://mcp.kondado.io/mcp — and OAuth authentication is identical across all three.