Looker Studio Via Kondado connection uses the connector we created for Looker Studio. After your first connection, you can easily add more tables.
First Connection
If you have never added the Looker Studio Via Kondado connector to your current Looker Studio account, follow these steps for your first connection. If you have previously connected, just add more tables.
- Click here to install the Via Kondado connector on Looker Studio or click on the share icon
 in your pipeline or model > Looker Studio > Then on a link to a table
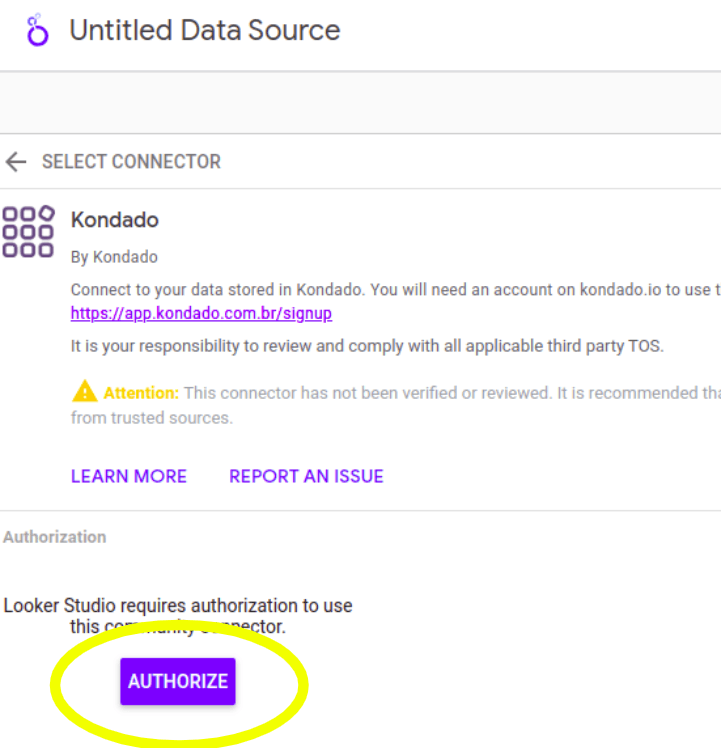
 - On the new page, click AUTHORIZE
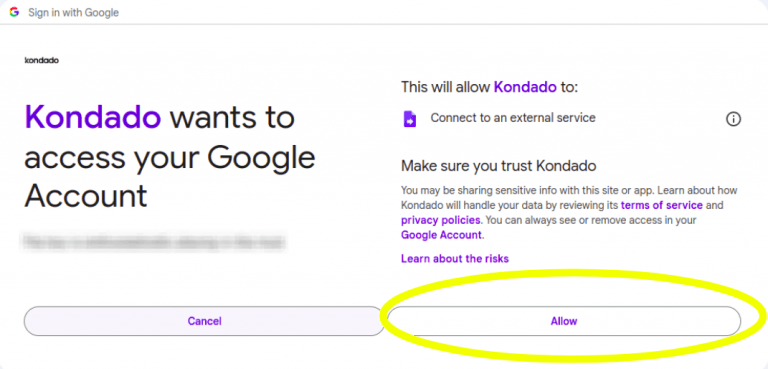
- Click Allow
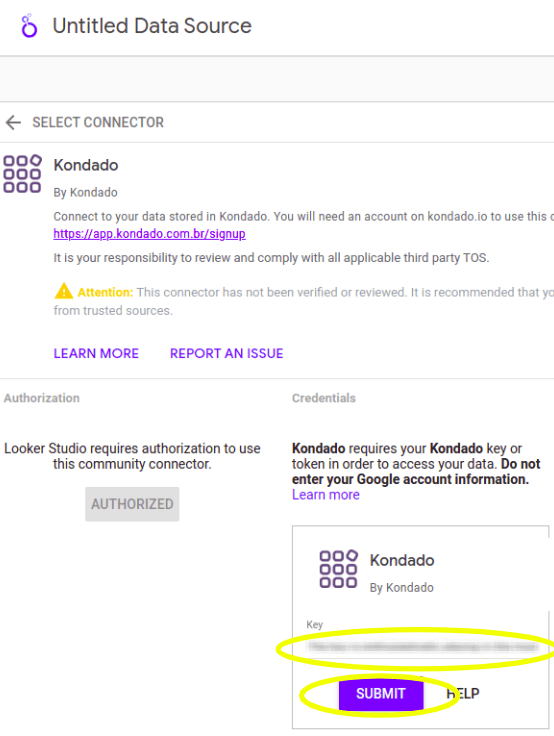
- Enter your Token in the Key field and click SUBMIT
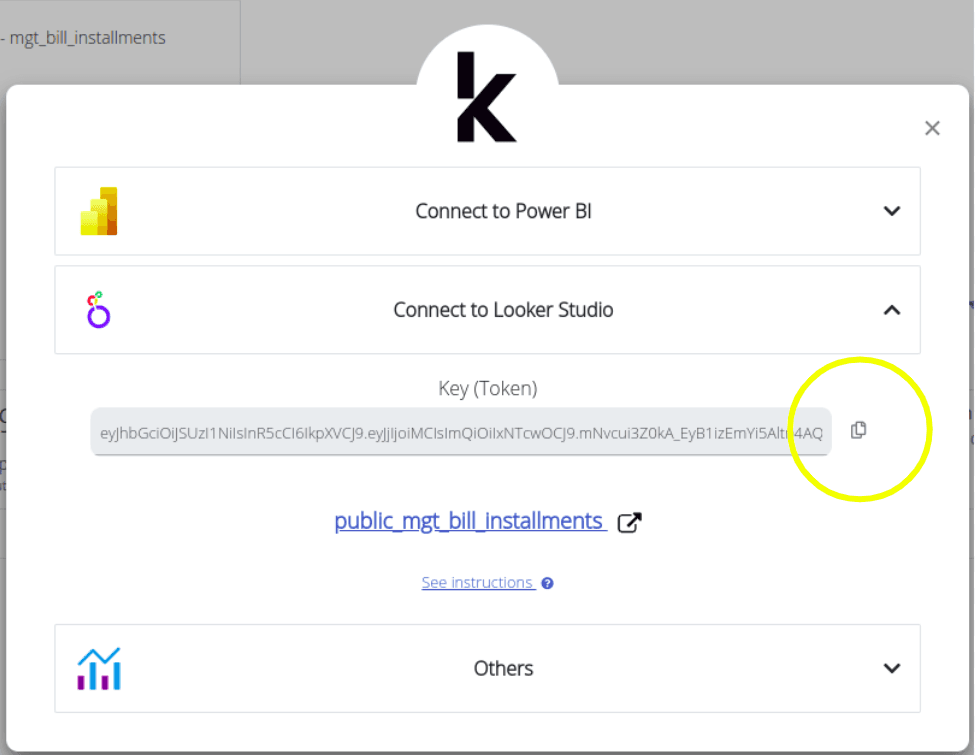
- To obtain your token, click on the share icon
 in your pipeline or model > Looker Studio > Copy the Token value
 - Then copy it to Looker Studio and click SUBMIT
- To obtain your token, click on the share icon
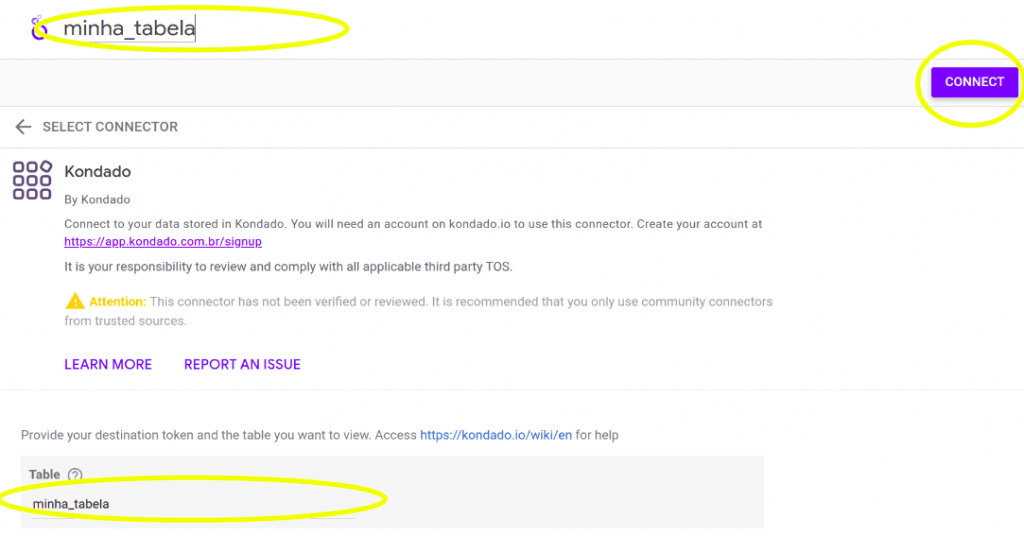
- If the Table parameter is not already pre-filled, enter your table name below and click CONNECT – we advise you to also name your connector in the upper section
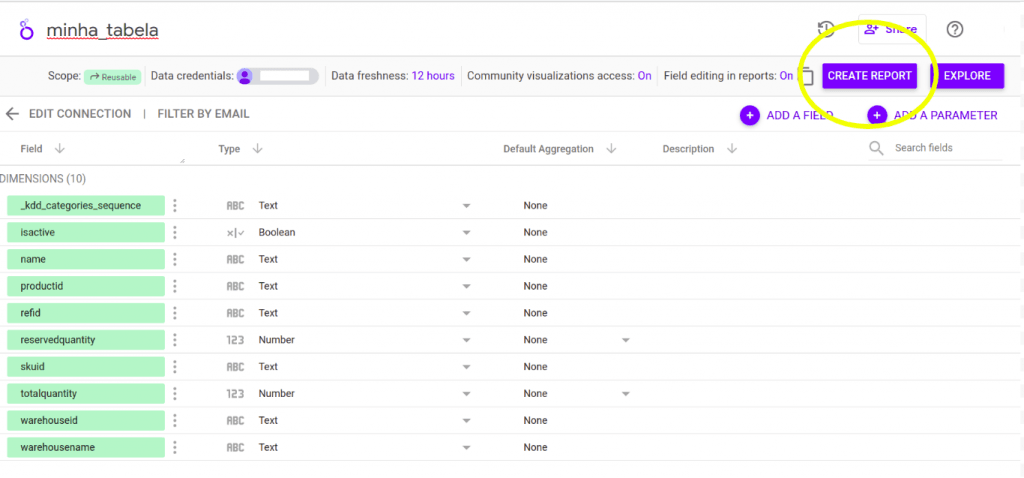
- The connection will be made, and you just need to click CREATE REPORT, and your table will be ready to use
- This first connection will authorize the connector and create your first table. See how to connect other tables below

Connecting More Tables
If you have previously authorized the Kondado connector in your Looker Studio account, just add more tables to your report. If you have never done this, see how to authorize our connector or how to add a Kondado table using the URL on Looker Studio.
- Access your pipeline or model, click on the share icon
 > Looker Studio > the link on your table name
 - Give a name to your table and click CONNECT
- If you want to include this new table in an existing report, simply go to your existing report > Add Data > My Data Sources > Search for "tabela_x" (or the name given in step 2) > Add
If the Looker Studio page is asking for a Key or Token you need to create your first connection
Access other destinations of Via Kondado
If you have more than one Via Kondado and want to access it in your Looker Studio, you can replace the specified table—located within the "Table" parameter—with the link to your table. Follow this tutorial to learn how to access other Via Kondado connectors
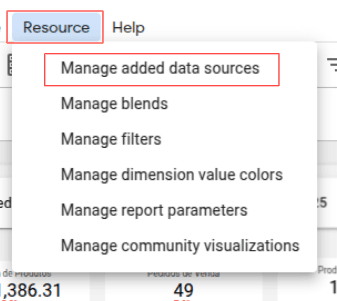
- On your report, click on “Resource” and then “Manage added data sources”
- Access your data source settings by clicking the pencil icon
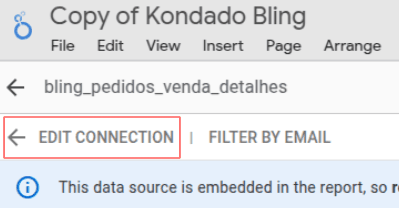
- Click on “EDIT CONNECTION”
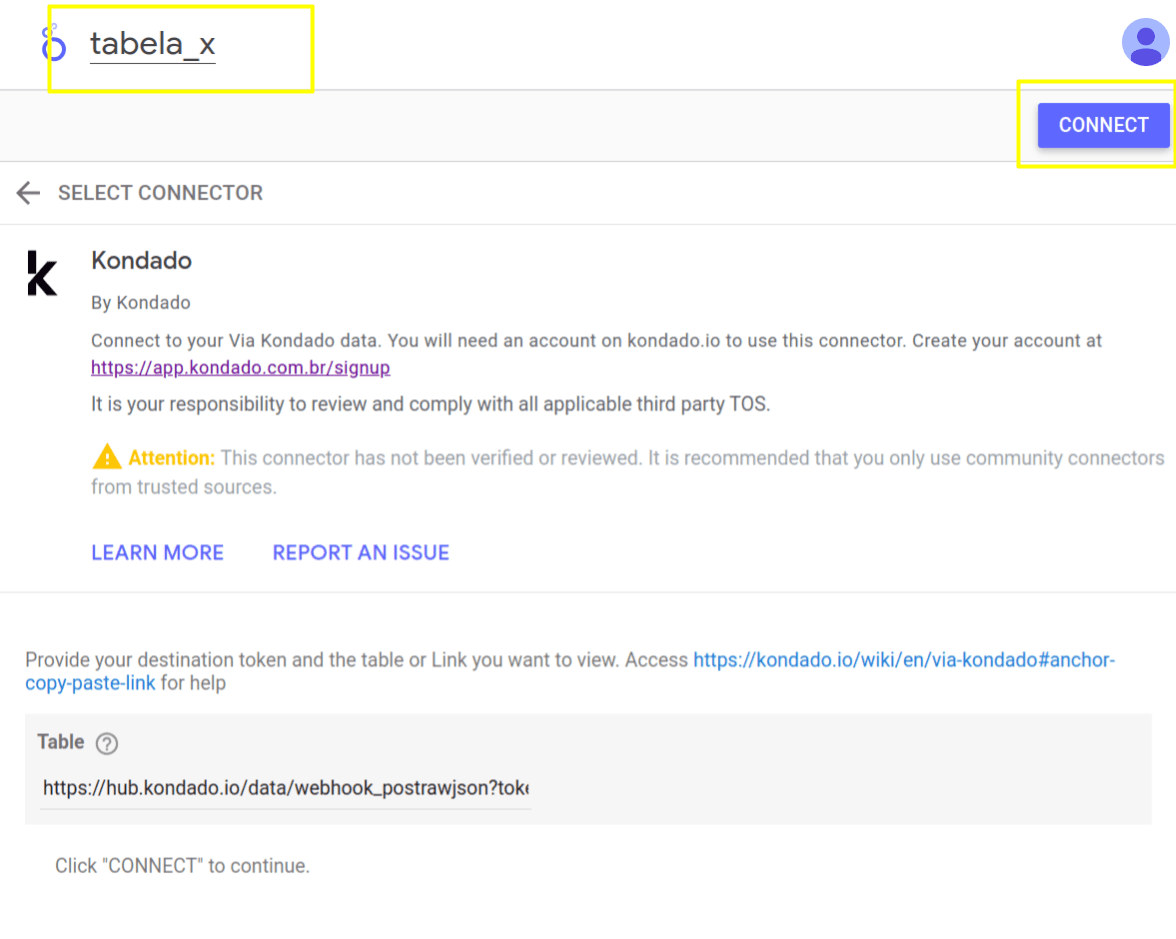
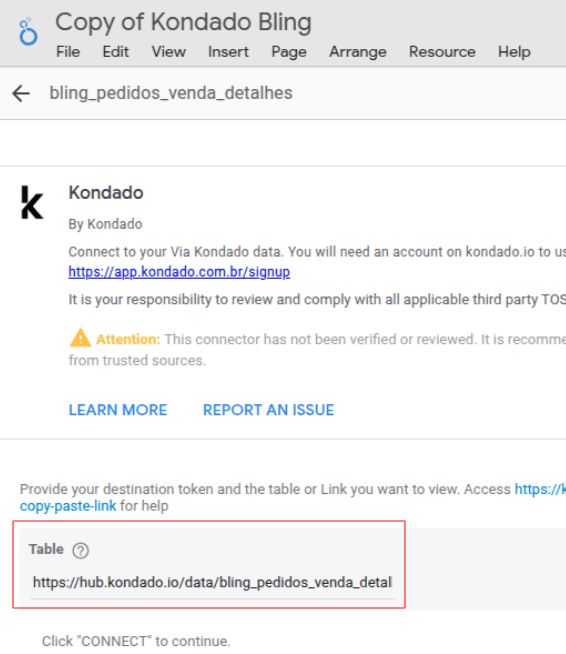
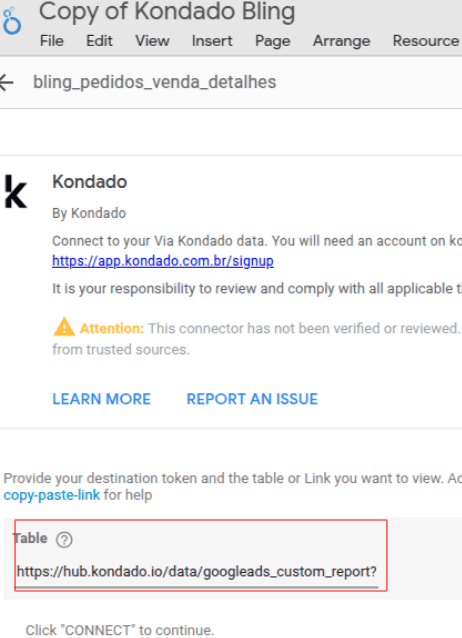
- You will see the “Table” field
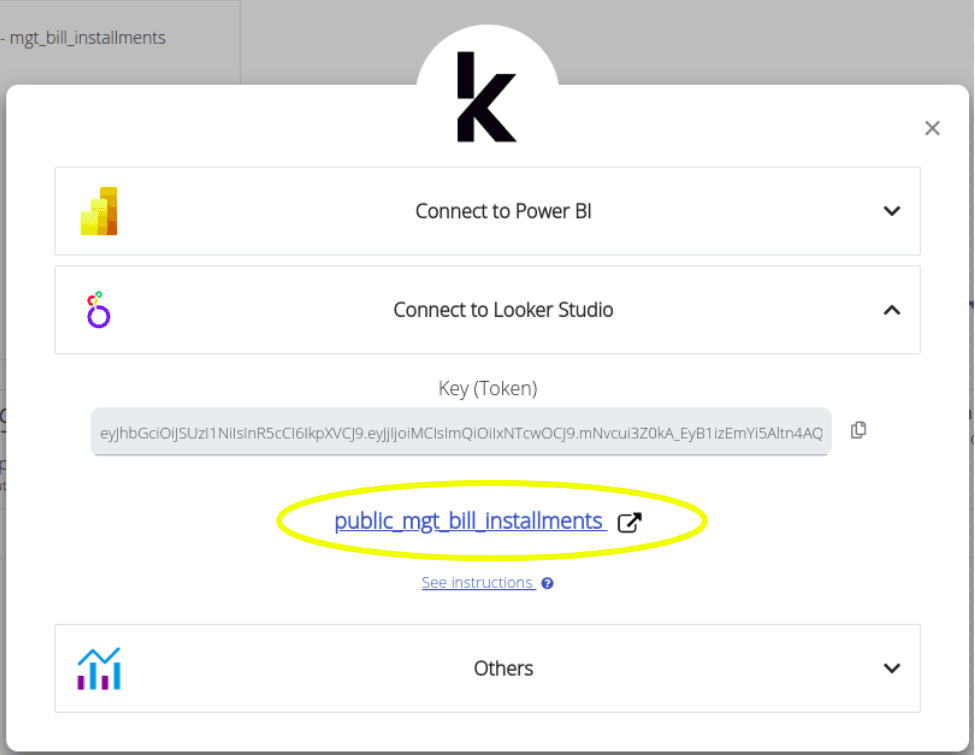
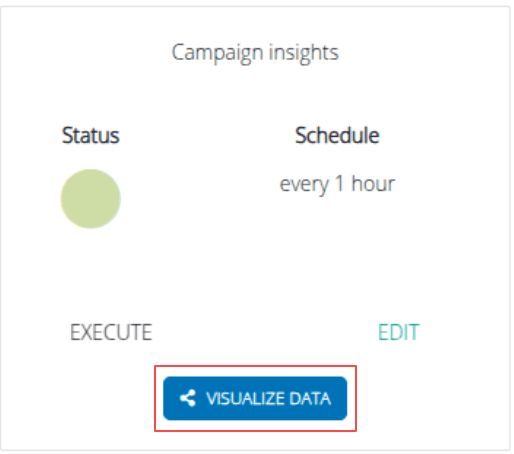
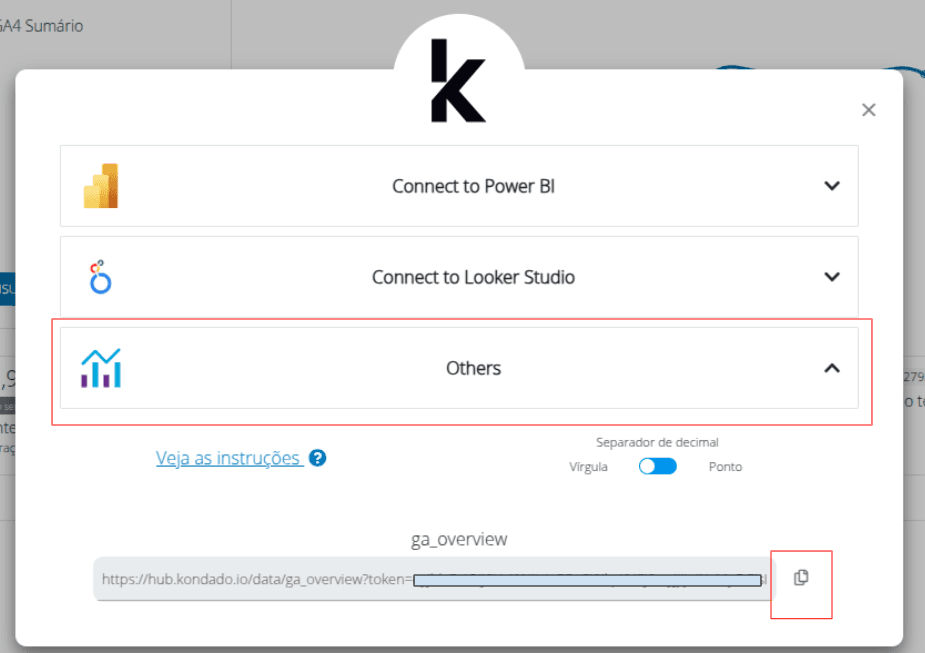
- Return to the Kondado platform, access your pipeline, and click on “VISUALIZE DATA”
- Click on “Others” and copy the link to your table
- Return to Looker Studio and paste the link into the “Table” field
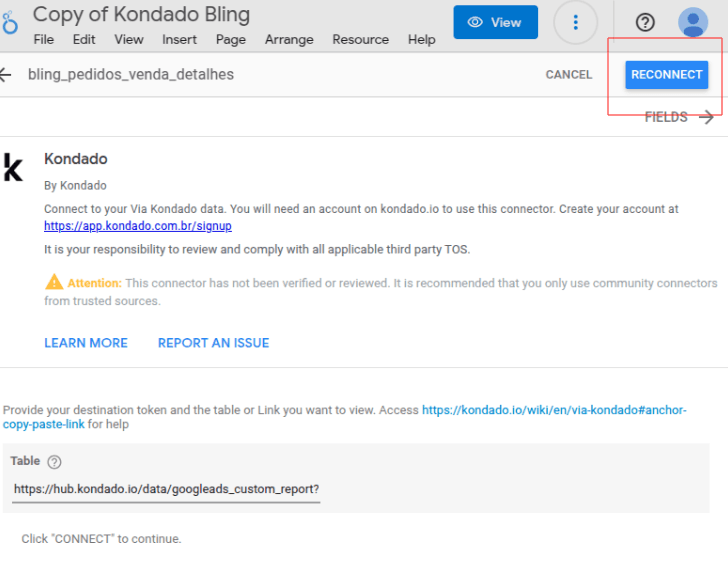
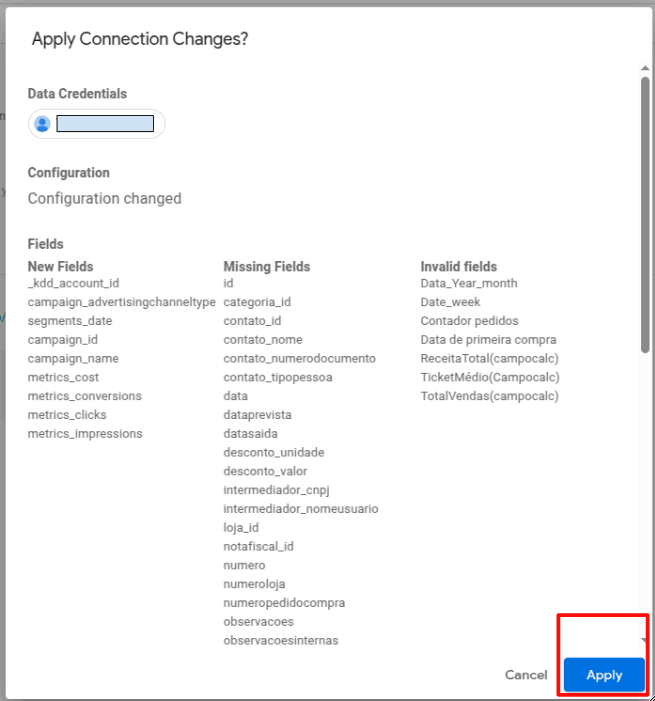
- Finally, click on “RECONNECT” and then “Apply”
- You must repeat this same process for each data source in your Looker Studio report

Common Questions
- Why am I seeing a warning that the connector is not verified? Looker Studio has a lengthy approval process for new connectors, which we have already started. The Kondado connector remains secure as it continues to use the Via Kondado API and your token to securely access your data.
- Why don’t I see the Kondado connector in Looker Studio's connector list? Our connector is not publicly available in Looker Studio and needs to be added following these steps.
- How is the access count of the Looker Studio connector? The Looker Studio connector was developed by us to access our Via Kondado API. It requires some additional calls to the metadata endpoint, which may result in higher consumption of your access limit.
- Count distinct is not working properly: There's a known issue on Looker Studio that returns wrong results for count distinct when there's a date filter. See here how to fix it
- I'm not seeing all my data: There is currently a limitation on reading very large tables. Tables larger than 50MB will not be fully read. This corresponds to approximately 150,000 records, but it can vary depending on the number of fields and the content of those fields. One way to work around this limitation is by using models to summarize the information or by selecting fewer fields in the pipeline or model
Create the Looker Studio Via Kondado Connection
Set up and manage the Looker Studio Via Kondado connector to visualize your pipeline or model data in Looker Studio reports.
Install the Via Kondado connector
Click the installation link to add the Looker Studio Via Kondado connector to your account, or use the share icon in your pipeline or model > Looker Studio > table link.
Authorize the connector
On the new page, click AUTHORIZE, then Allow to grant the necessary permissions for the connector to access your data.
Enter your Kondado token
Copy your Token from the Kondado platform by clicking the share icon in your pipeline or model > Looker Studio > Copy Token value, then paste it into the Key field and click SUBMIT.
Configure your table and connect
If the Table parameter is not pre-filled, enter your table name, name your connector in the upper section, and click CONNECT to establish the link.
Create your first report
Click CREATE REPORT to finalize the connection. Your table will be ready to use in Looker Studio, and the connector will remain authorized for future tables.
Add more tables to existing reports
For additional tables, access your pipeline or model, click the share icon > Looker Studio > your table link, name it, and click CONNECT. To add to an existing report, go to Add Data > My Data Sources > search for your table name > Add.
Switch between Via Kondado destinations
To access a different Via Kondado, go to Resource > Manage added data sources > edit your data source > EDIT CONNECTION. Replace the Table parameter with the link copied from VISUALIZE DATA > Others in your Kondado platform, then click RECONNECT and Apply.